2017 Acura RDX 'A16' Service

DIY car service can save you some serious money, especially when some of the maintenance can be done in your own garage. The A16 service for the RDX is:
- Oil change (no filter, that is only with B service)
- Rear differential fluid change
- Tire rotation
Cost
Because I had already done a similar service on another car, I already had a lot of stuff on hand. My cost for this service (directly) was $35.71 for oil (+ spare filter) and $30.99 for the rear differential fluid.
Total Cost: $66.70
Crown Acura posts their service costs which appear to be $89.95 for the A1 service plus $99.95 for the rear differential service.
Total Dealer Cost: $189.90
So I saved about $123.20 which would easily cover any of the tools I did not have on hand.
Time
This took me about 1 hour to complete in total. I did the work in the evening and went back and forth prepping dinner while I waiting for the fluids to drain. If you have an afternoon, this can be a fun way to spend it while perhaps drinking some beer along the way.
Equipment
Required
- Oil pan (this is the one I have and it works great). Unless you have a jack or something to get your vehicle up on, you will want a low profile one like this.
- Ratchet set with a 1/4" drive and a 17mm socket (the oil can be changed with just a wrench, but you actually need a ratchet for the rear differential).
- Fluid pump - the fill hole for the rear differential cannot be filled without this. This is the one I have...DO NOT get it, it sucks (well kind of literally) but also the pump gets stuck and is just a pain to use. Find something similar though.
- 5 Qts of oil - Acura recommends 5W-30 with the Honda HTO-06 specification. I have always bought Mobil1 5W-30 because I know it meet the spec. Realistically, I doubt that it matters much. Autozone also runs deals frequently on oil + filter, so I usually go there and get a filter for next time if I do not need one for the current service.
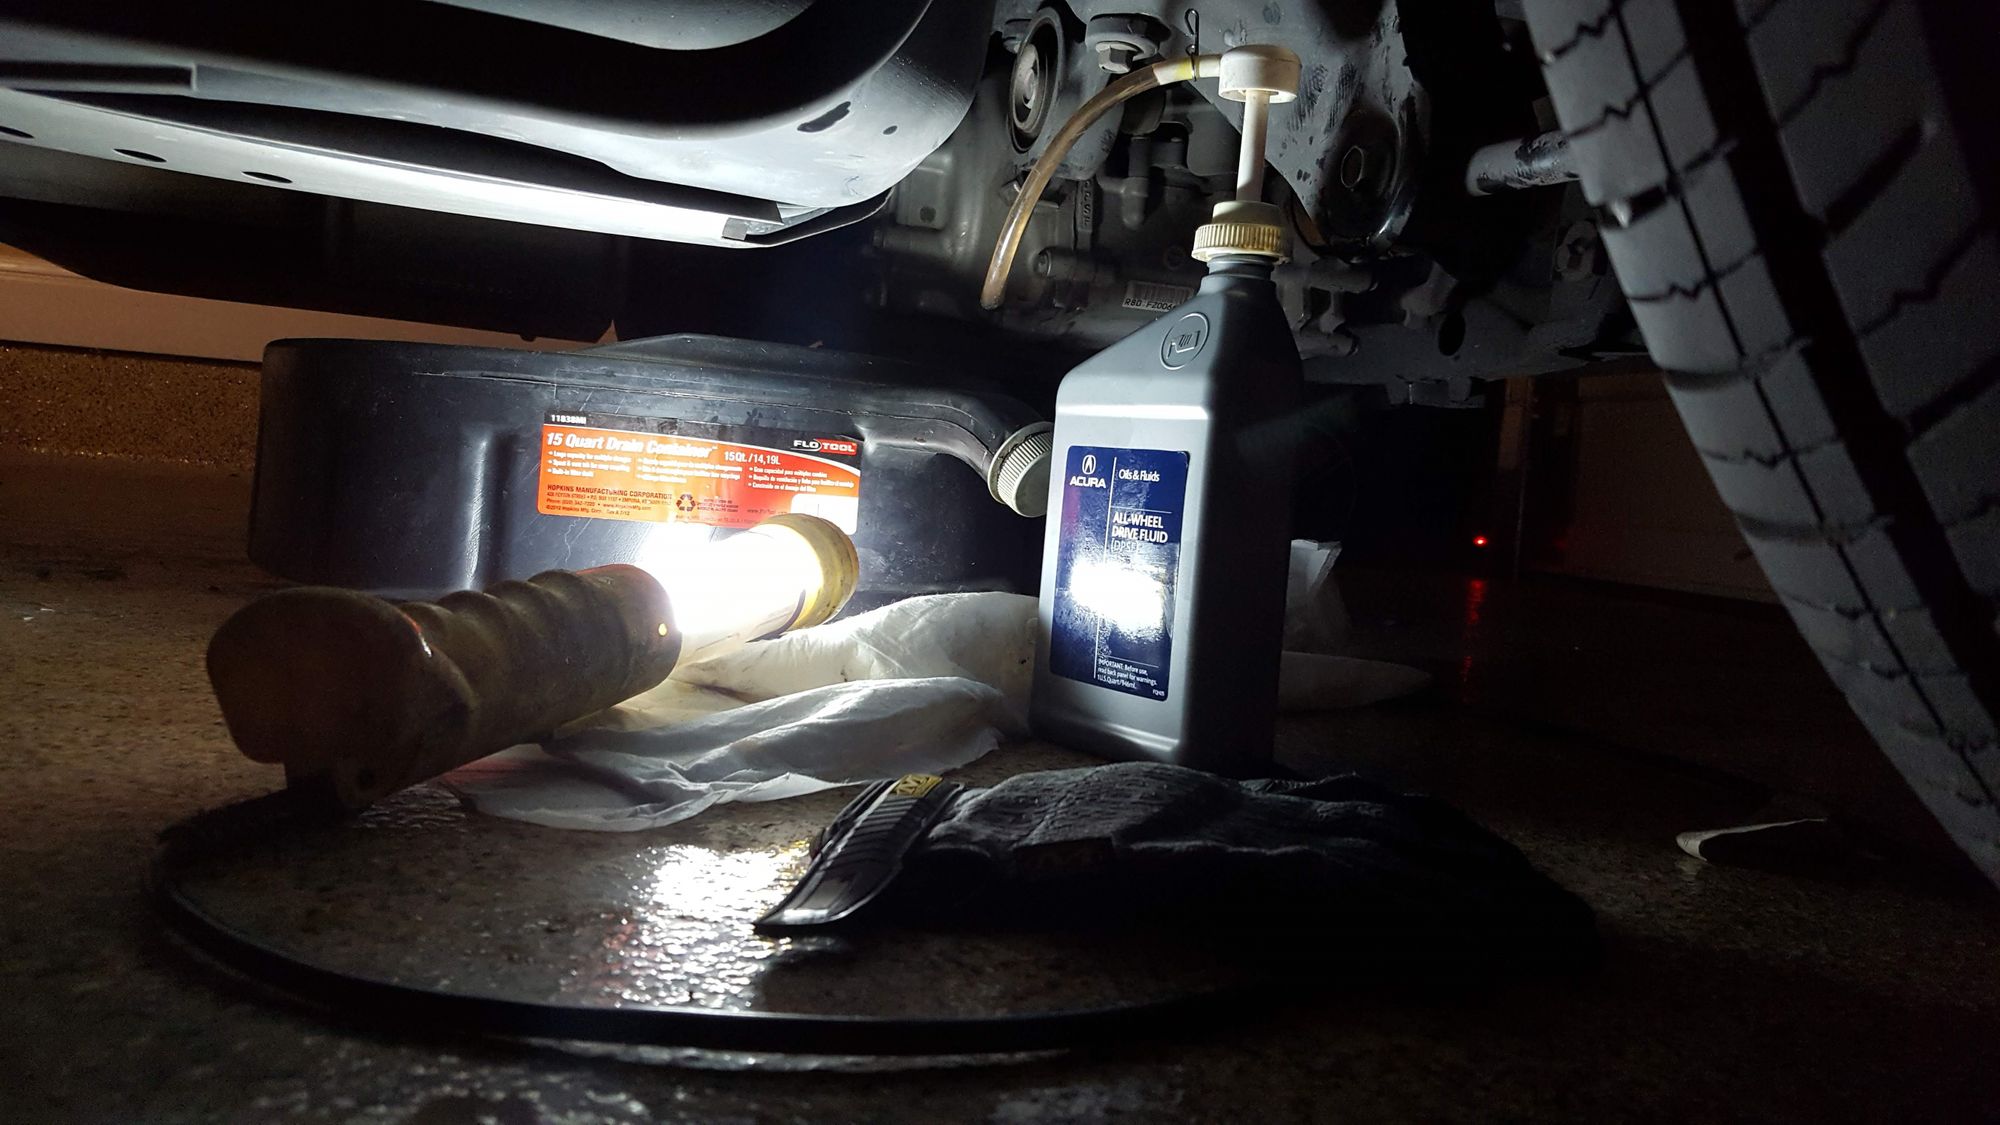
- 2-3 Qts of Honda All-Wheel-Drive fluid, mine took just under 1.5 Qts. Again, you could probably get away with generic fluid, but to play it safe, I stick with the recommended version. I ordered off Ebay but you can also order through your local Acura or Honda dealer. Just
acura rear differential fluidand you will see a handful of options. You may see older versions called "Dual Pump II" fluid. At some point Acura went from recommending this version to the new AWD version. They are likely similar, but again, playing it safe.
Optional (but really nice to have)
- Pig mats or piddle pads, or something that can absorb any oil you spill without making a mess
- Shop rags (always good to have on hand)
- Shop light
- Gloves
Oil Change
This is the easy part.
- If you want, jack the car up or drive it up on some 2x4s to give yourself some space to work. In this case, I was able to get everything done without raising the car, but getting under the car was a tight squeeze.
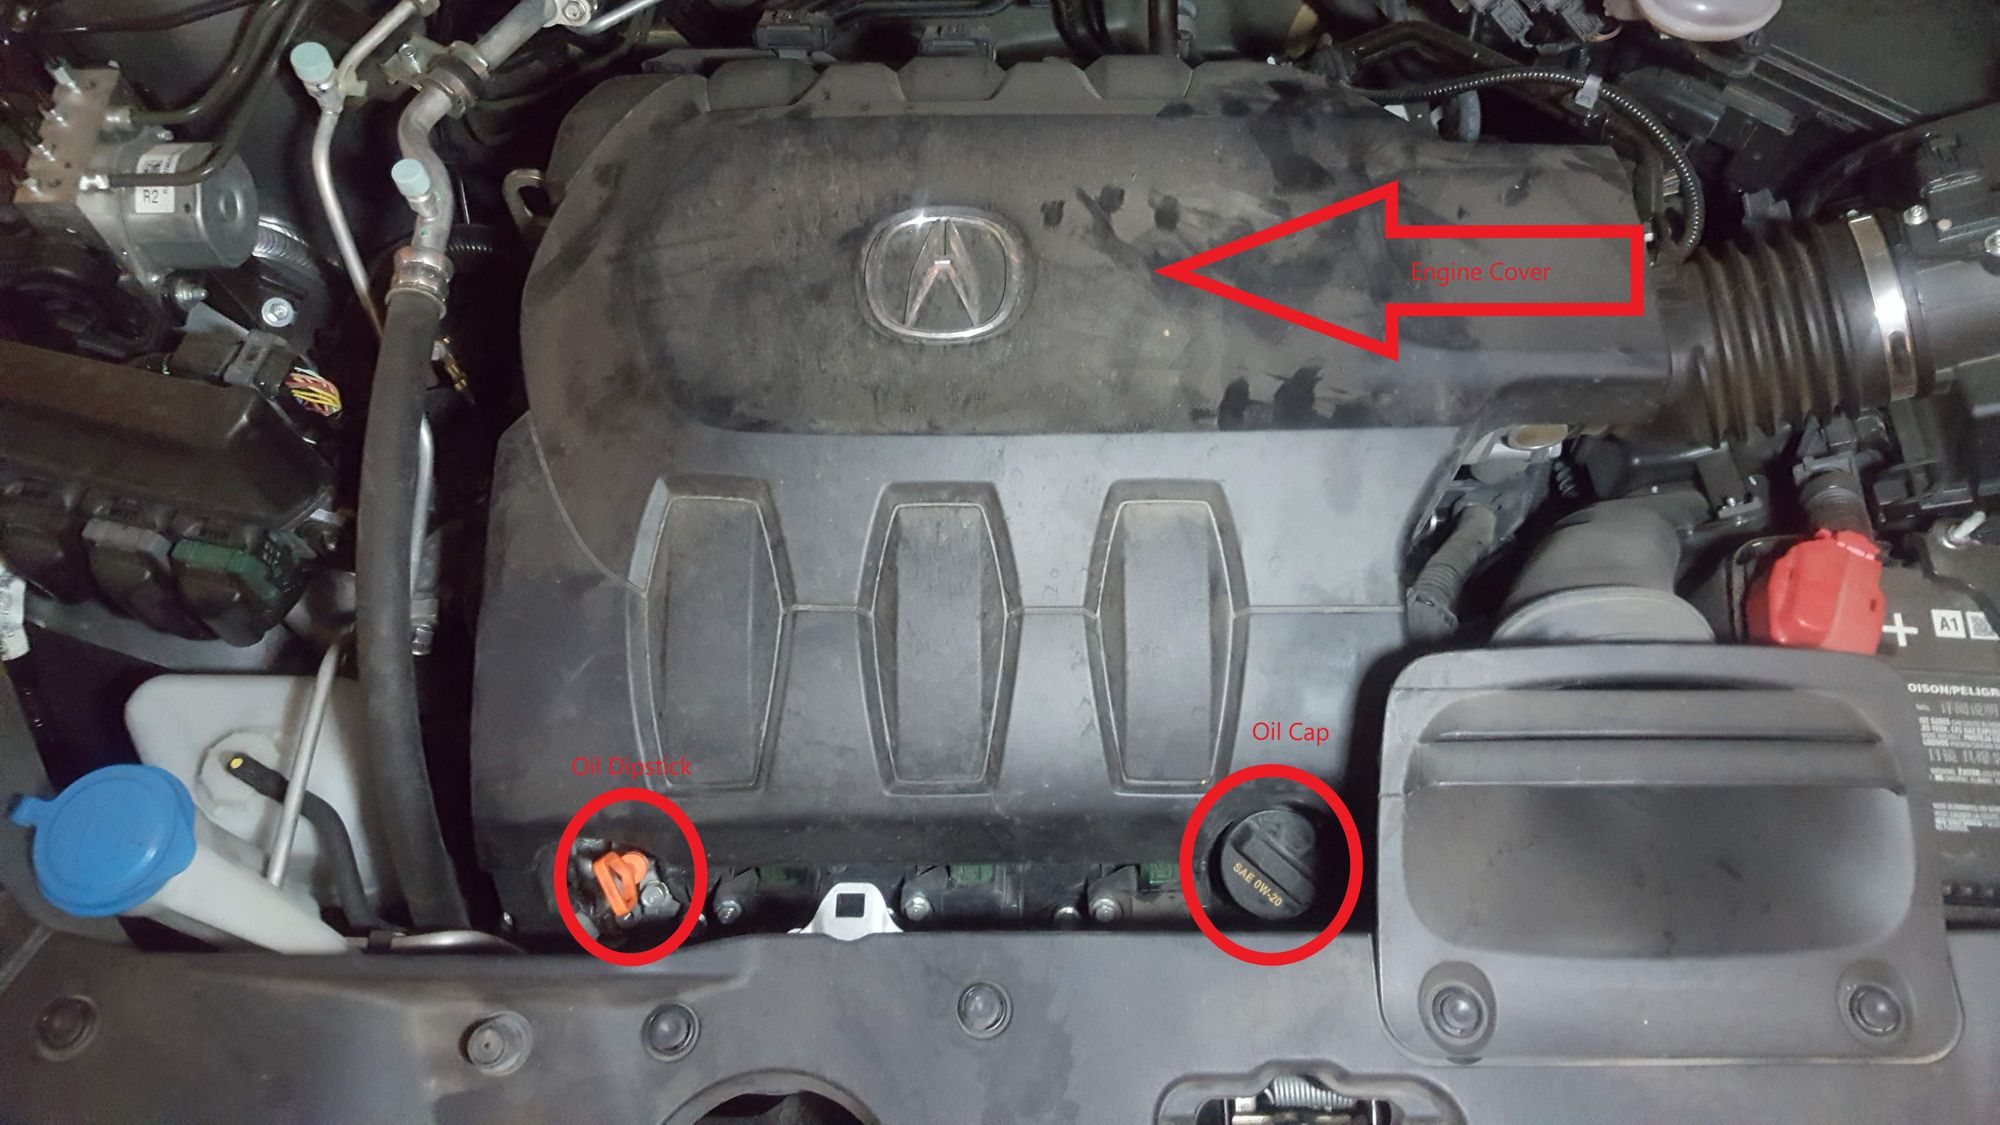
- Pop the hood and remove the oil cap, this is just to let the oil drain easier without the chance of it gulping/splashing
3. Now get under the car and locate the oil drain bolt. This image is from just behind the front passenger tire, but I find it easier to access from the front of the car.
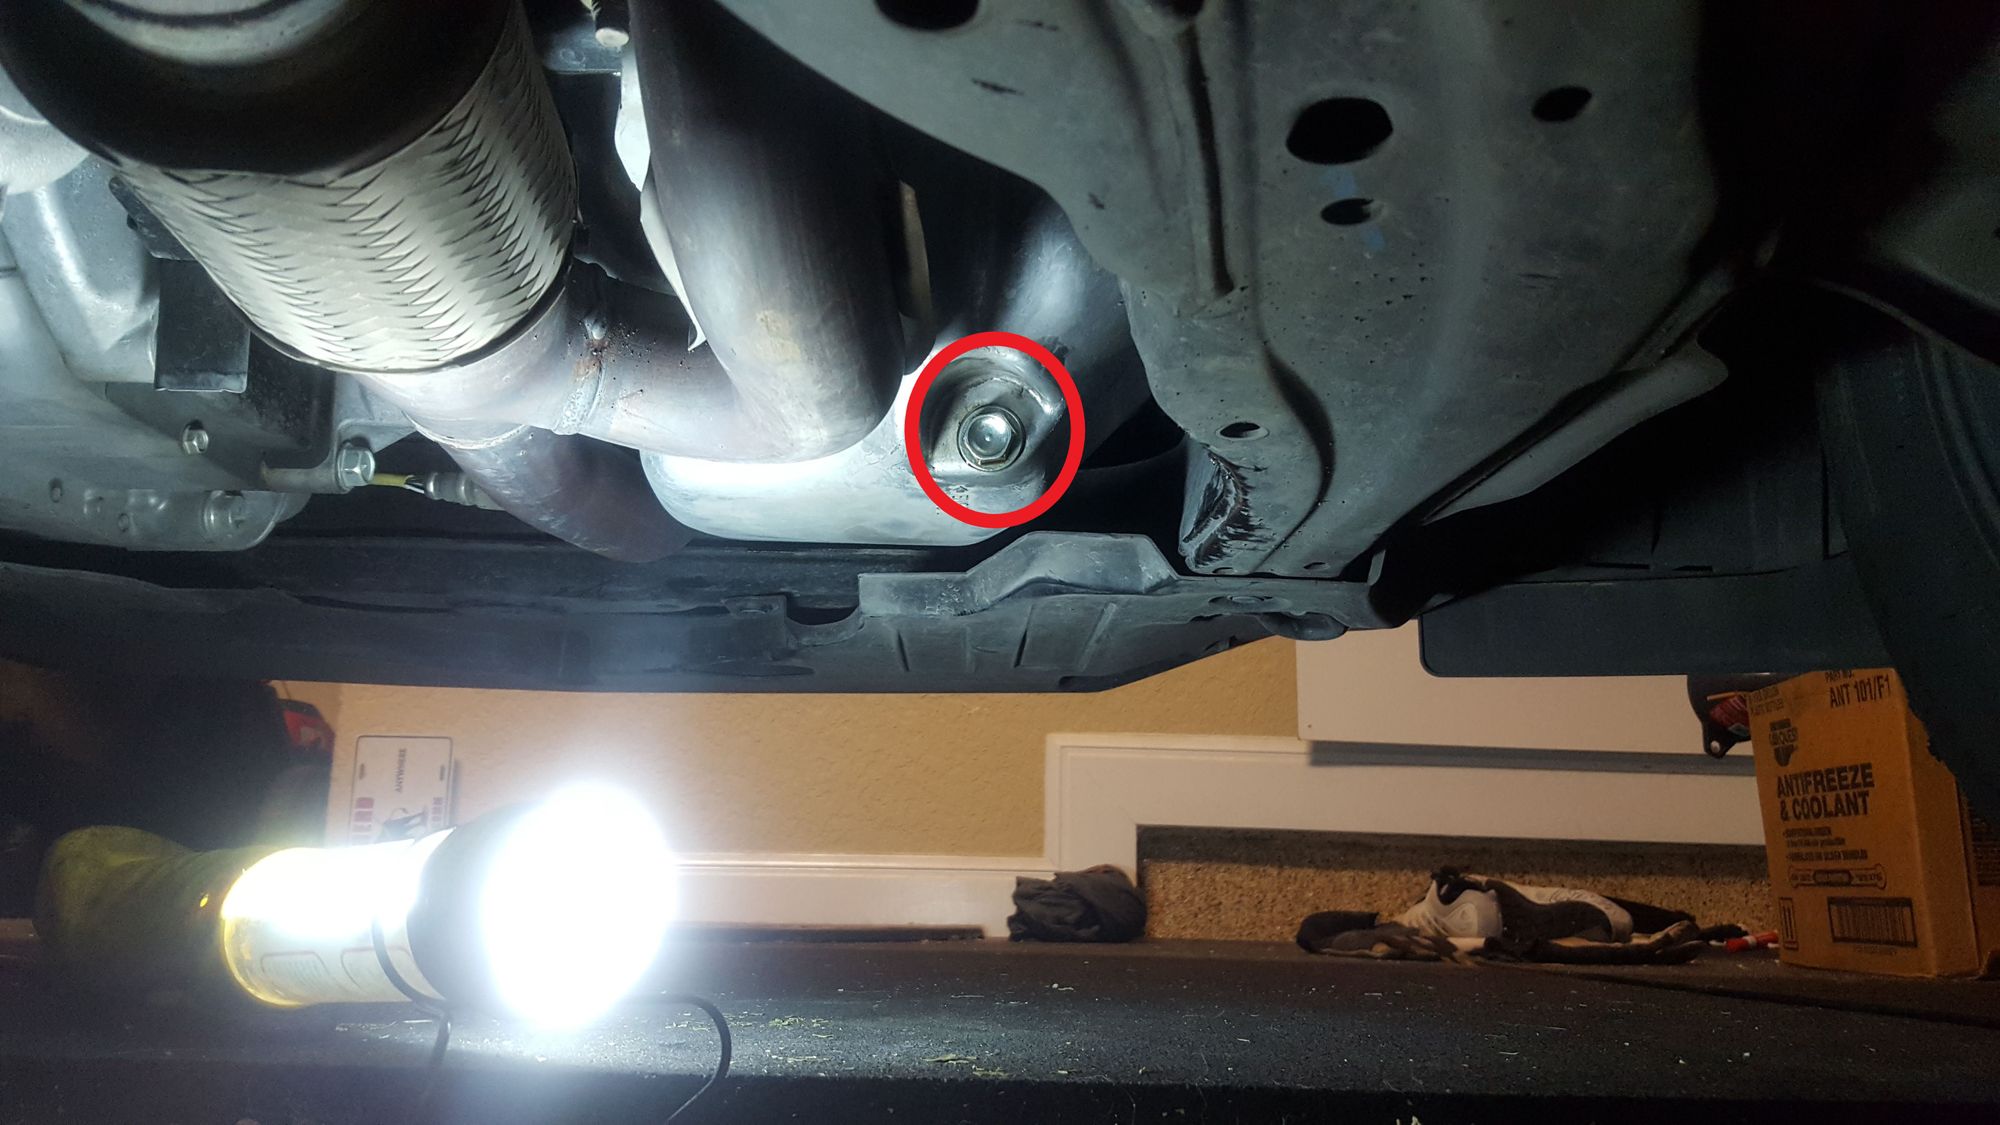
4. Now position your oil pan below the bolt and your absorbent mats beneath that, keeping in mind that the initial flow of oil will push the flow out a bit from the drain hole.
5. Now loosen the bolt with the 17mm socket and then use your fingers to fully remove the bolt, letting it just fall into the pan (assuming you have one like I recommended above).
6. Once the oil has fully drained, replace the bolt and tighten it. You do not need it to be as tight as humanly possible but you should have it fairly tight.
7. Now fill the engine with new oil. I found it easiest to remove the engine cover(it just pops off at the 4 corners) and wedge a funnel in there to make pouring easier. This car takes just under 5 Qts so when you get close, start checking the dip stick to ensure you do not over fill the vehicle.
8. Replace the oil cap and engine cover if removed and your oil change is complete.
Rear Differential Fluid Change
Changing the rear differential fluid is pretty similar to the oil but a little more involved because the drain and fill holes are on the sides of the case.
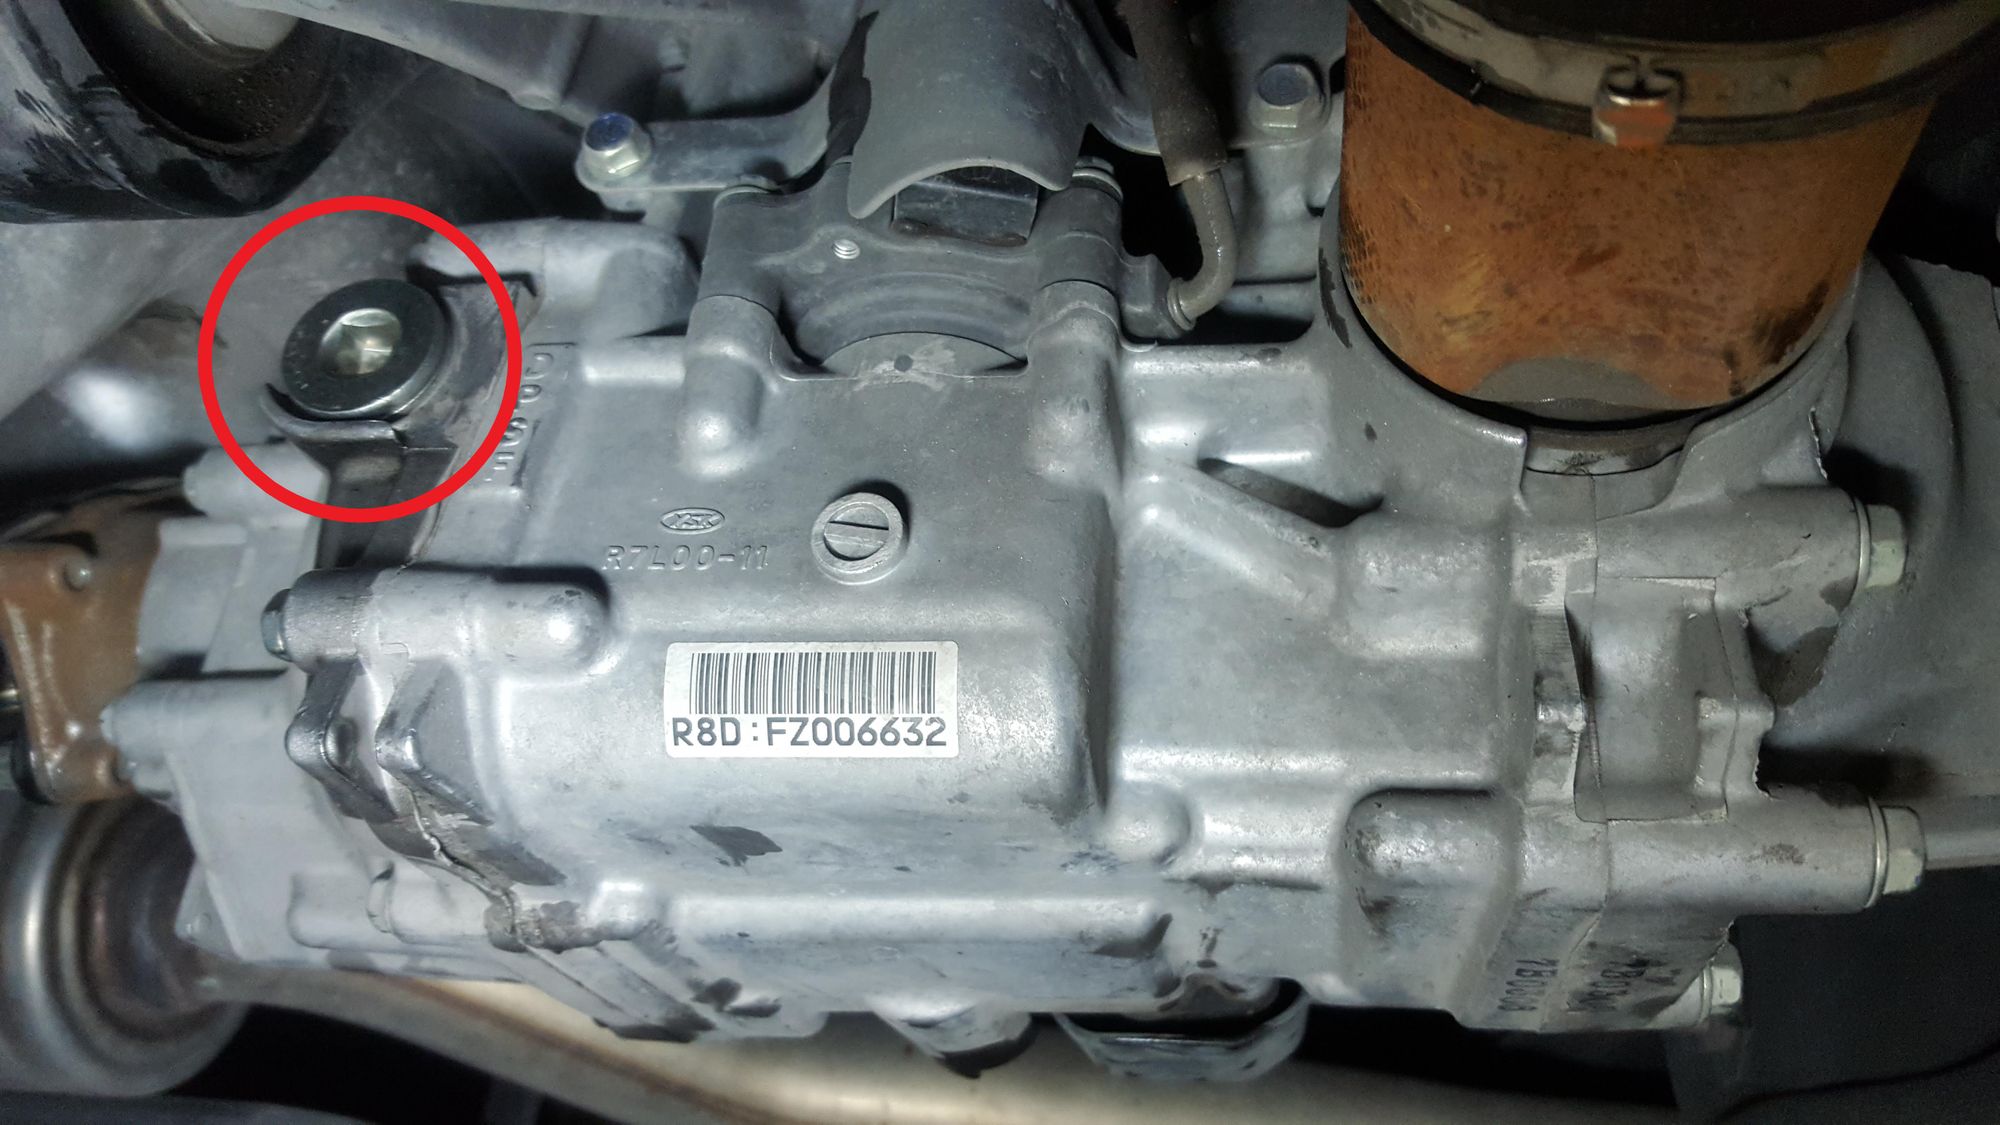
- Locate the rear differential at the rear of the car, smack-dab between the two wheel axles. The drain hole is low on the passenger side of the case and the fill hole is high on the driver side of the case.
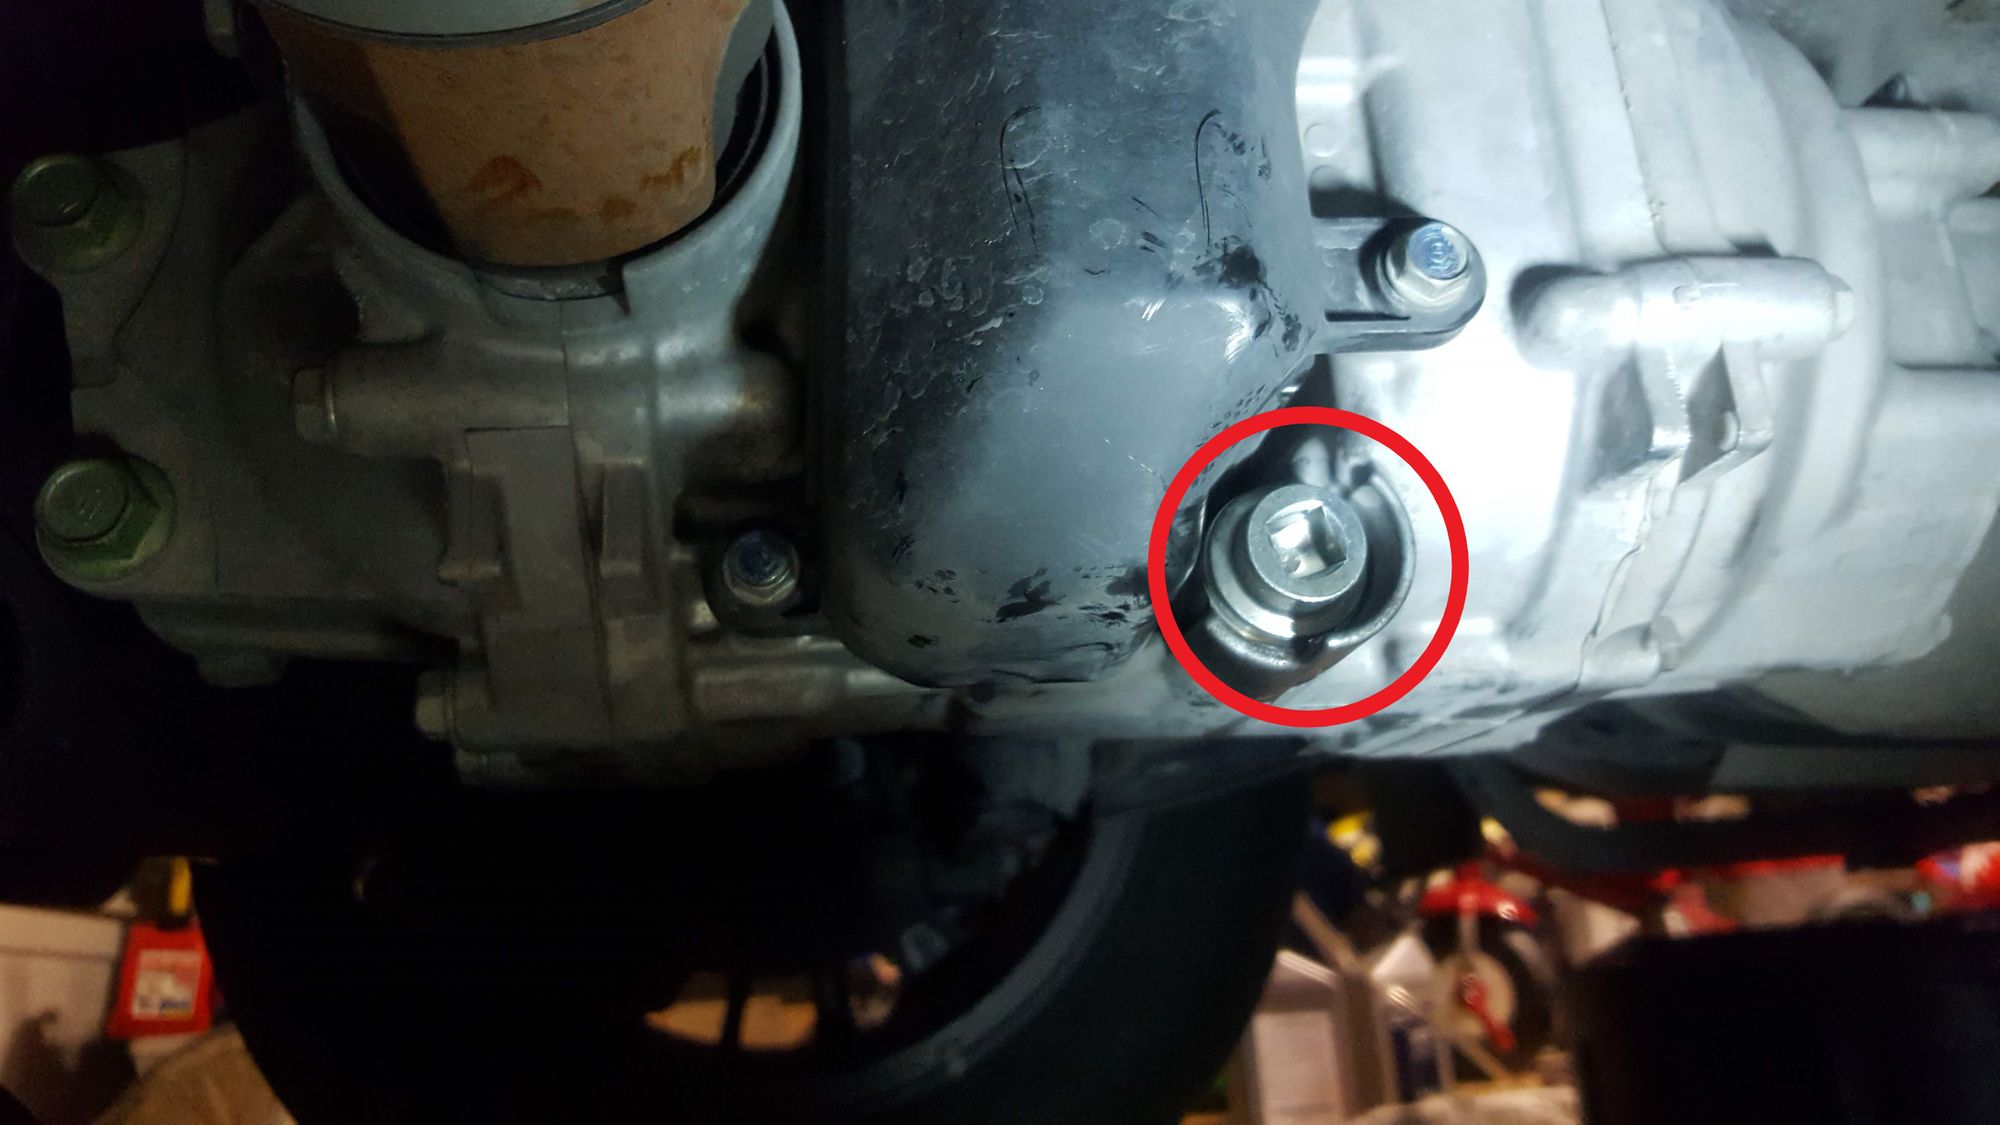
2. Similar to the oil change, we are going to first position the oil pan and mats appropriately and then use the ratchet (without a socket) to loosen the drain plug. Then use fingers to fully remove the plug and drain the fluid.
3. The rear differential plug has a magnet on it to catch loose metal shavings. A little bit is normal, a lot is not. Be sure to wipe the plug off so that it can keep doing its job.
4. Once fully drained, replace the plug, again tightening a fair amount but not as tight a humanly possible.
5. Transition to the fill plug and remove it with the ratchet.
6. Get your pump set up and put it on one of the fluid bottles. Feed the pump hose into the fill hole and start pumping. "Full" is when the fluid is just a hair below the fill hole. You can check by putting a pinky finger in and checking where the level is at. Or you can be really lazy like me and just fill until it starts to flow out (probably not recommended). In my case, it took just under 1.5 Qts. If you do fill until it overflows, be sure to wait until is drains completely before replacing the fill plug.
This is by far the worst part of the job (especially if you have a crappy pump) because you are contorted under the car while having to move your arms to pump the bottle. It can be a little tiring.
7. Replace the fill plug. And you are done.
Cleanup
Just be sure to clean up, no one likes a dirty garage.
Tire Rotation
I used to try to take the car to a DIY garage to get it up on a lift for the tire rotation but the hassle just is not worth it any more. I just take it to a nearby auto repair place and have them do that part.