DIY Barn Door
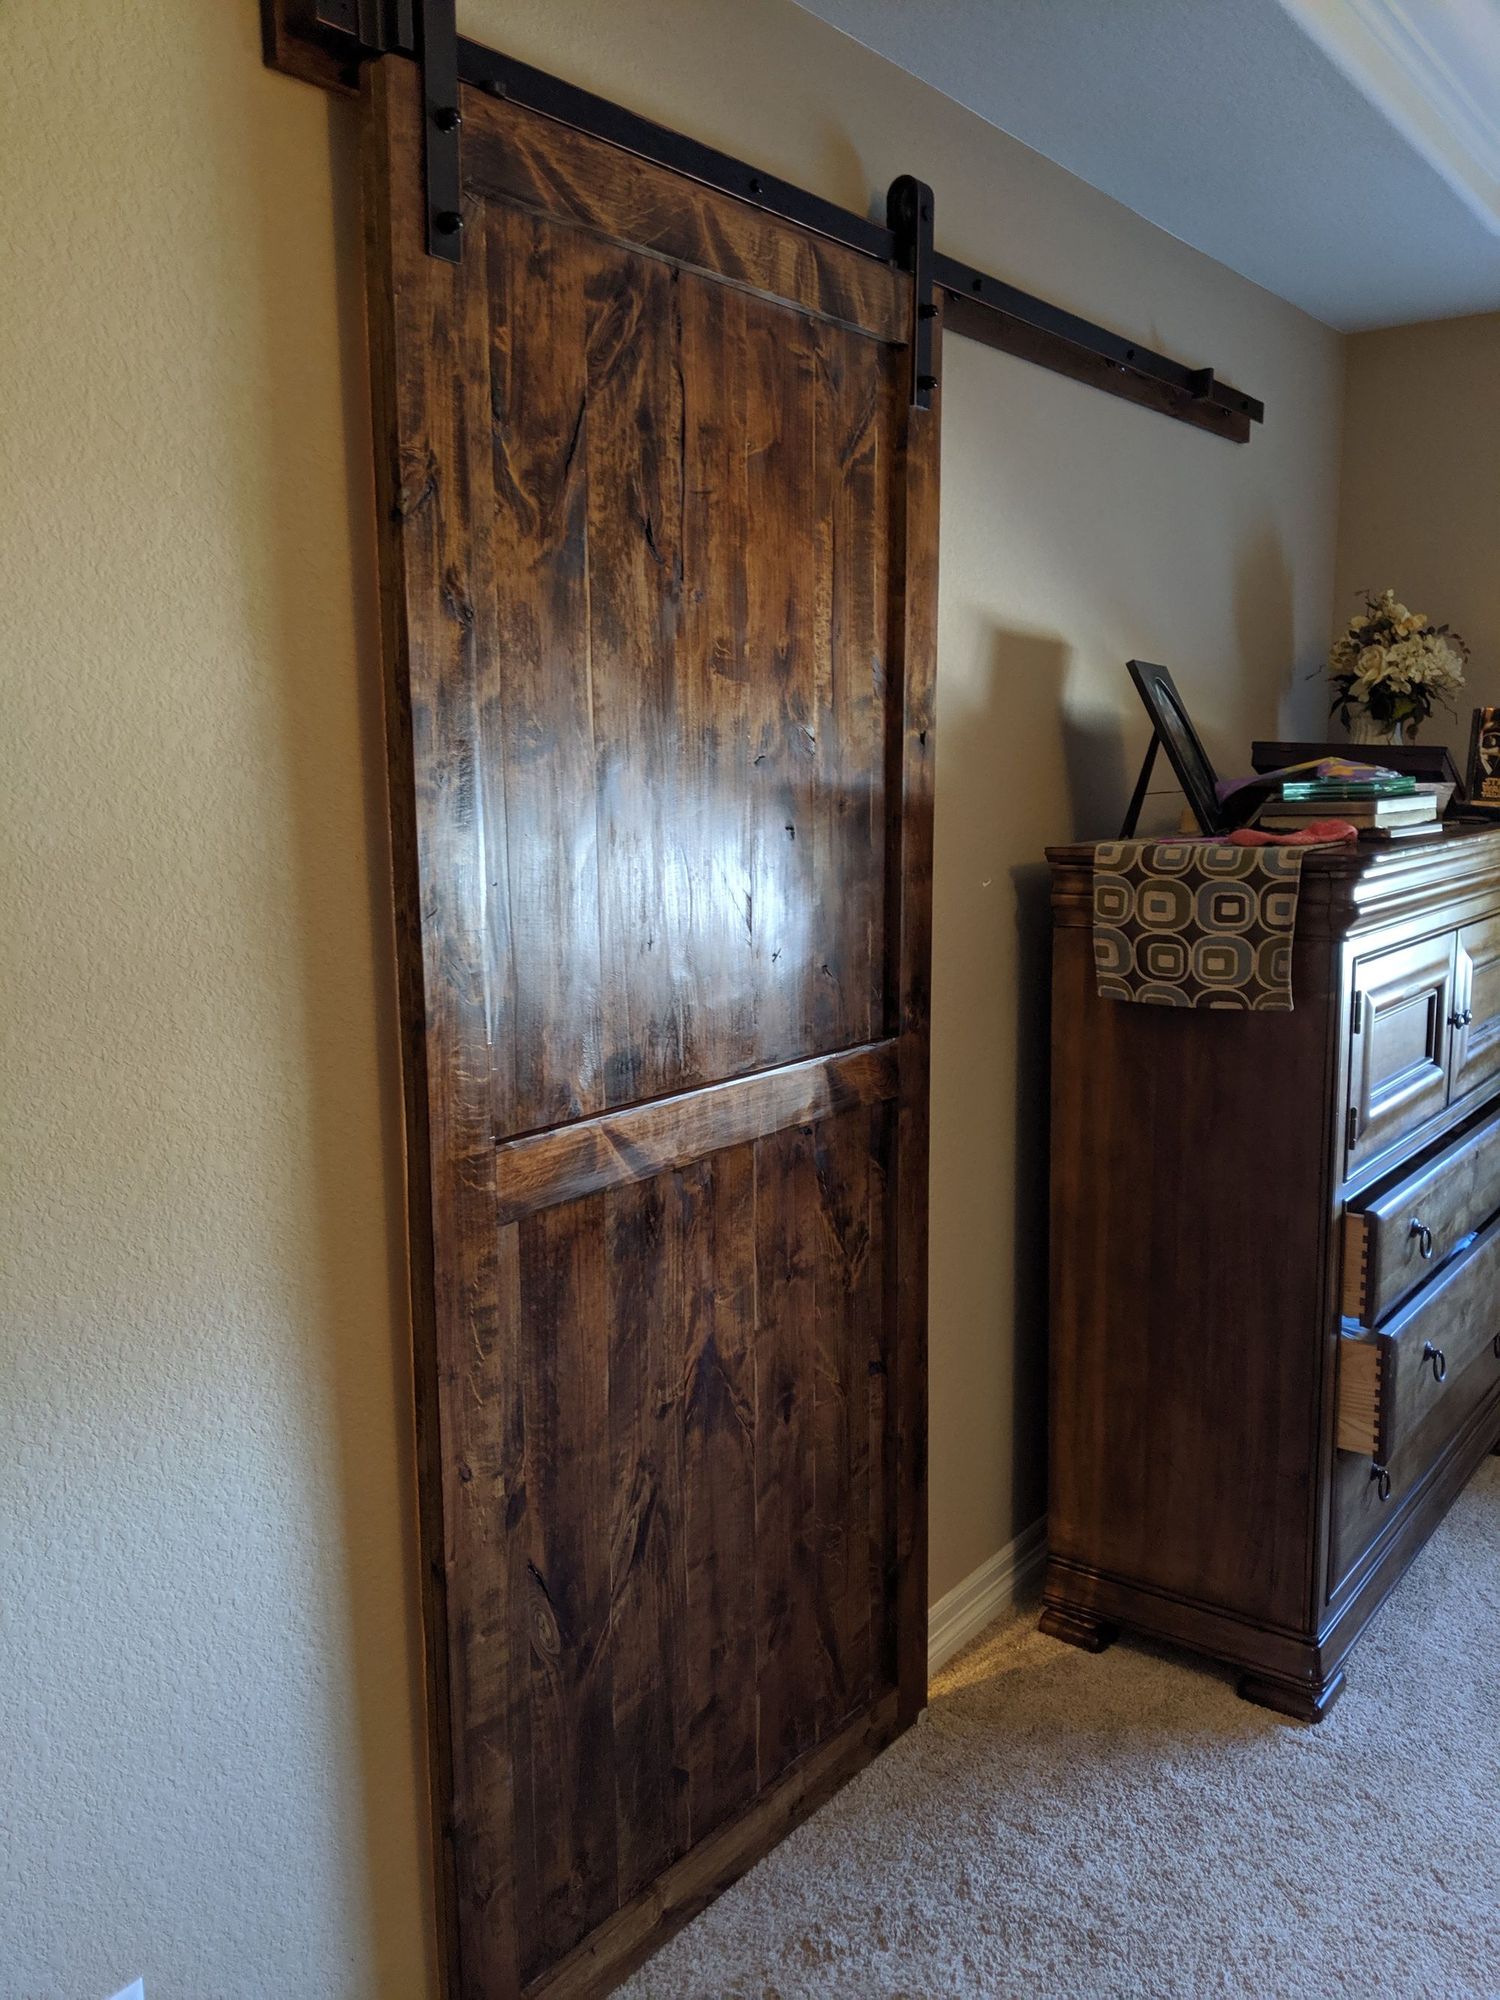
A common architectural feature out here in Colorado is to not actually put a door between the master bedroom and the master bathroom. So we decided a barn door was the best option but given the non-standard (wider than normal) size of our doorway, the only pre-made options were going to cost us north of $1,200 without even factoring in installation. For a little "fun" and to save some money, we decided to build our own!
The process started, as many do, with some YouTube and internet research. These are the links that made it to my favorites:
- https://www.youtube.com/watch?v=QDM_8BKdcIE - Really good video showing the process, how to use the tools, and overall a very similar door design to what we wanted to do. This was my primary inspiration.
- https://imgur.com/a/7u6ixq7 - A decent pictorial walkthrough of the process, also the catchy title that made me think I could actually do this.
- https://imgur.com/a/0Sffvlj - A really cool idea to add some wood burning to your design for added flair – did not do this.
- https://www.wwgoa.com/article/6-tips-for-cleaning-up-glue-squeeze-out/# - Good article on how to properly cleanup glue so as to not mess up your stain. I wish I had seen this earlier in my process.
Most people always want to know the cost and time requirements for something like this so I will start with that.
Costs
Materials
- Alder Wood ( 9 pieces 1"x6"x8', 2 pieces 1"x4",8'): $183.43
- Wood Glue and Biscuits: $21.03
- Additional Alder Wood - Wife wanted different width for the trim (2 pieces 1"x3"x8'): $24.22
- Door hardware for hanging: $207.39
- Pre-stain, stain, and poly: $45.54
- Wood Blocking and Lag Screws: $14.06
Total Materials: $495.67
Equipment I Had to Buy
This does not list all of the equipment that I already had on hand such as a circular saw, a drill, general tools, etc.
- Saw Horses: $20 (Facebook Marketplace)
- Biscuit Joiner: $59.99 (Amazon)
- 3 - 6ft Pipe Clamps: $50 (Facebook Marketplace)
- 3 More Pipe Clamps: $35 (Facebook Marketplace)
- Belt Sander Rental: $25 + tax (Home Depot)
- Sand paper for belt sander: $10.92
Total Equipment: $200.91
Grand Total: $696.58
Time
I started this project on August 3 and hung the door on September 26th. Family commitments meant that I was only working on this every few days and only for an hour or so at a time. You could probably do this in 2 dedicated weekends using the weekdays in between to do the staining and sealing.
The Process
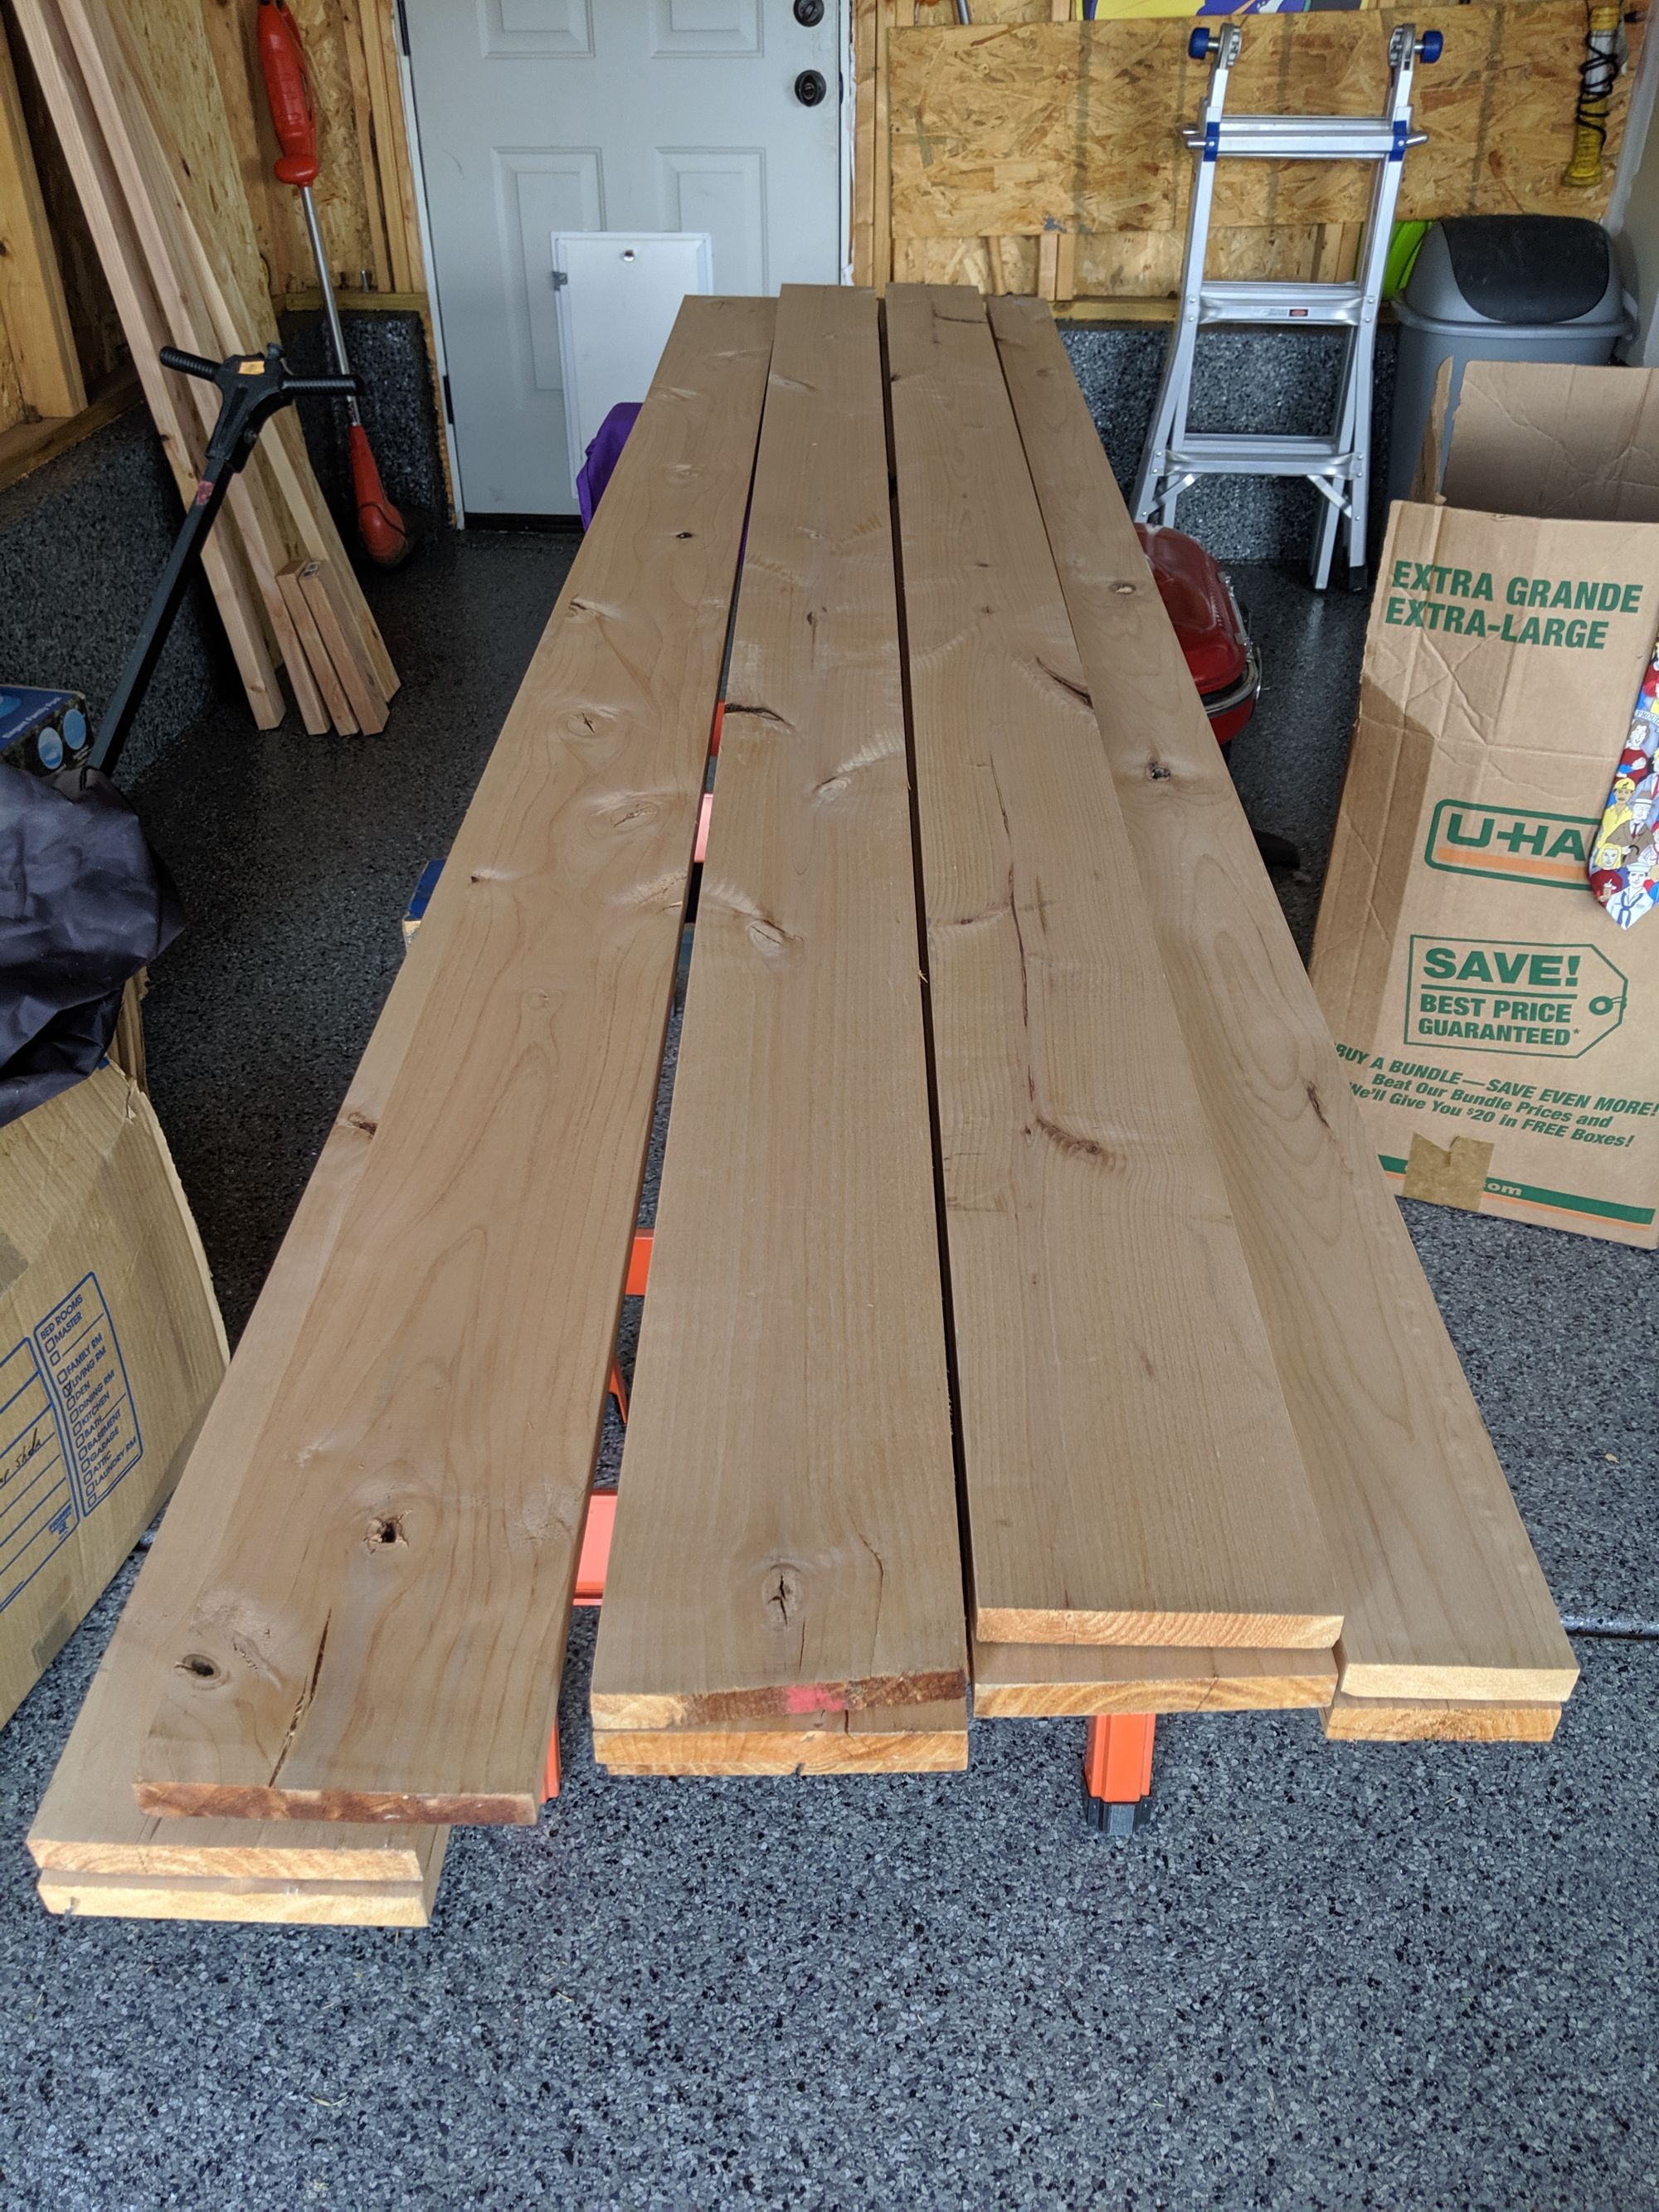
Selecting the wood
After doing my initial research and having a decent idea of what I wanted the door to look like and the size of door we needed, I took my wife to Lowe's to pick out the wood. I learned in the process that Lowe's has a "nice" wood section separate from the regular lumber. Mrs. Steen immediately fell in love with Alder wood (the most expensive option 🤑) and specifically boards that had the most "character" (knots and imperfections). So we went home, I borrowed my brother-in-law's truck and went to pick up the wood. I felt a growing sense of excitement, I was actually going to tackle a somewhat advanced woodworking project!

Defining the layout
While the wood sat on our garage floor that week, I ordered a biscuit joiner on Amazon as I could not find a used one or a place to rent one. I also went through each piece of wood to determine which side I wanted to face out and which end I wanted up; I oriented the wood to have the most character towards the top of the front side of the door. Then I figured out the order to put them in as I built the door to make sure I liked how it looked. I marked each piece front, top, and with a number for the order.
Joining the wood
Being as this was my first time using a biscuit joiner, I did some test cutting into some spare wood to ensure I knew what I was doing and to confirm the height of the cuts. The online reviews said the base height was not correct but I found with my test cuts that it cut perfectly at .375", which is ideal for 1" wood. I started off by marking out the wood for where each cut needed to be made by clamping each piece of wood together and using a square to mark the location of the cut. The biscuit joiner is designed to align the wood, so it was important that the cuts across 2 pieces of wood lined up almost exactly. I did have a little bit of an error margin in that the boards were 96" and the door height I needed was just over 82", so I would be able to clean up the ends later if the boards were not perfectly even when I was marking the cuts (the cuts themselves had to line up still though).
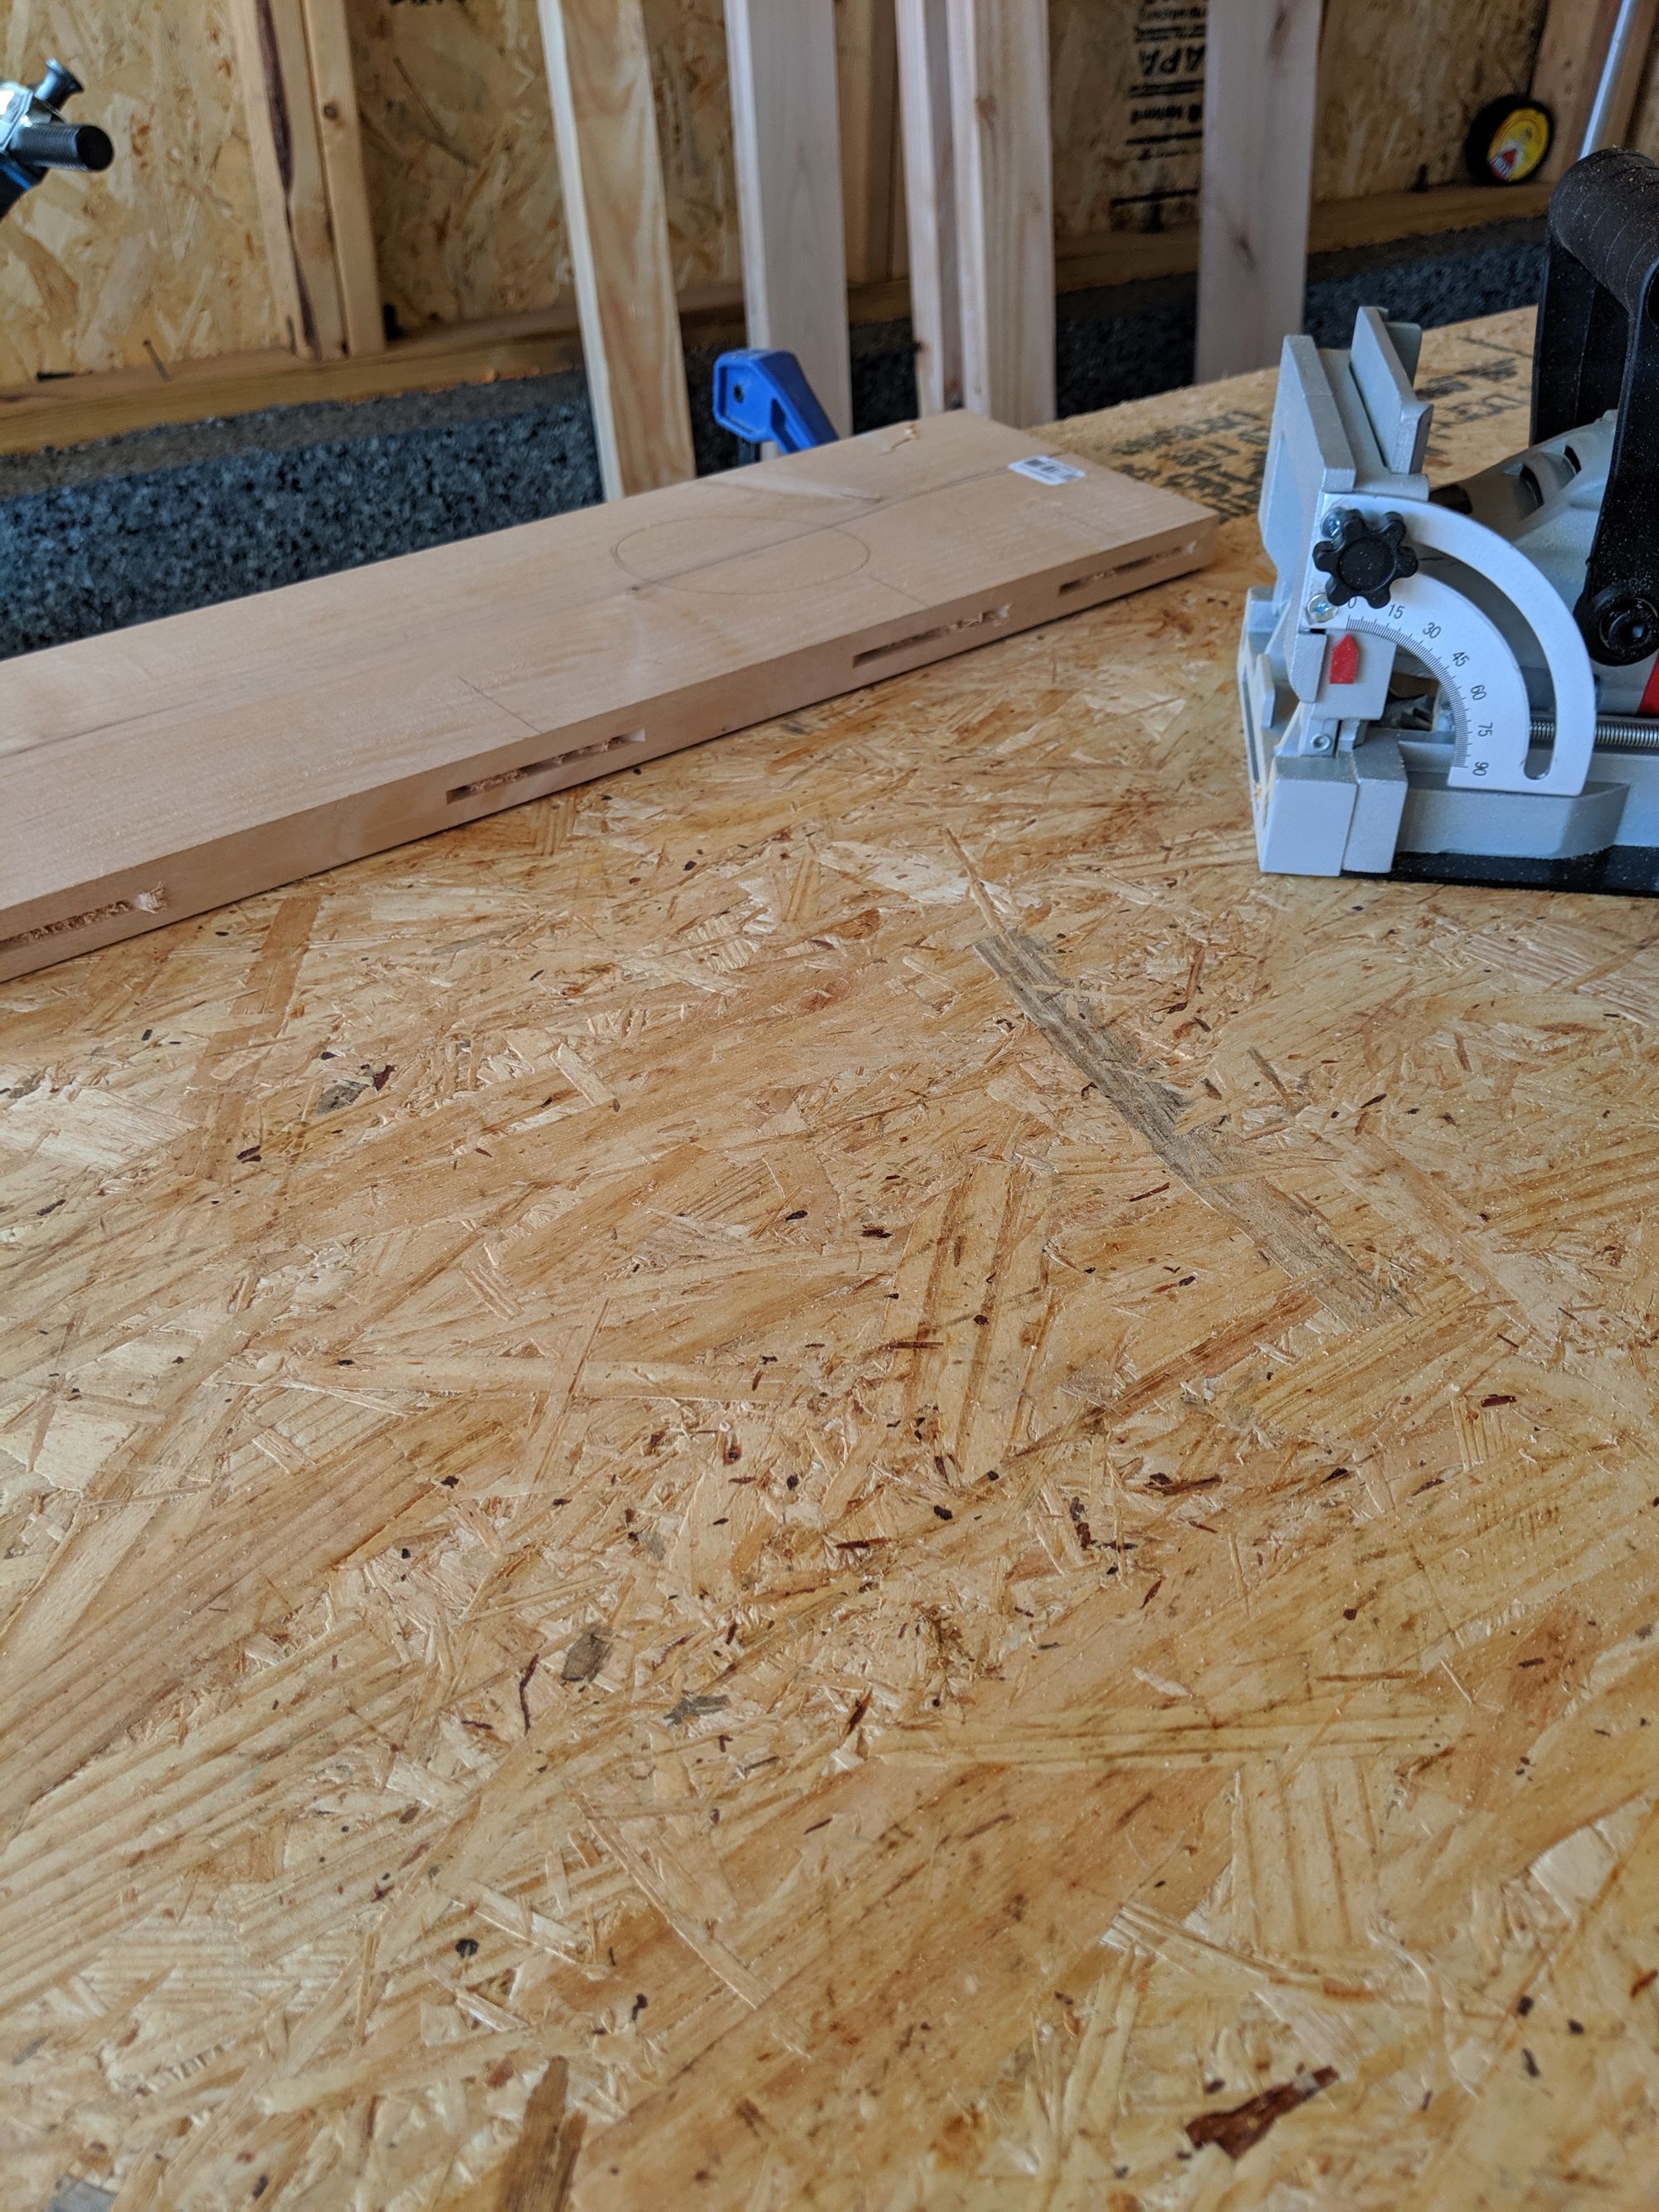
Not really knowing what I was doing, I opted to make the first cut 3" from the end of the wood and then every 6". This may have been overkill but I don't know. Using the biscuit joiner on my makeshift workbench (saw horses and particle board) I made all the necessary cuts. After making the cuts, I used a biscuit to clean out each cut to ensure there was no sawdust leftover.
⚠️Note⚠️ Only make the biscuit cuts on a solid surface. My particle board was a bit flexible and I ended up with some misaligned cuts due to this. I should have made the cuts only over the saw horses to ensure the joiner was perfectly level and flush.
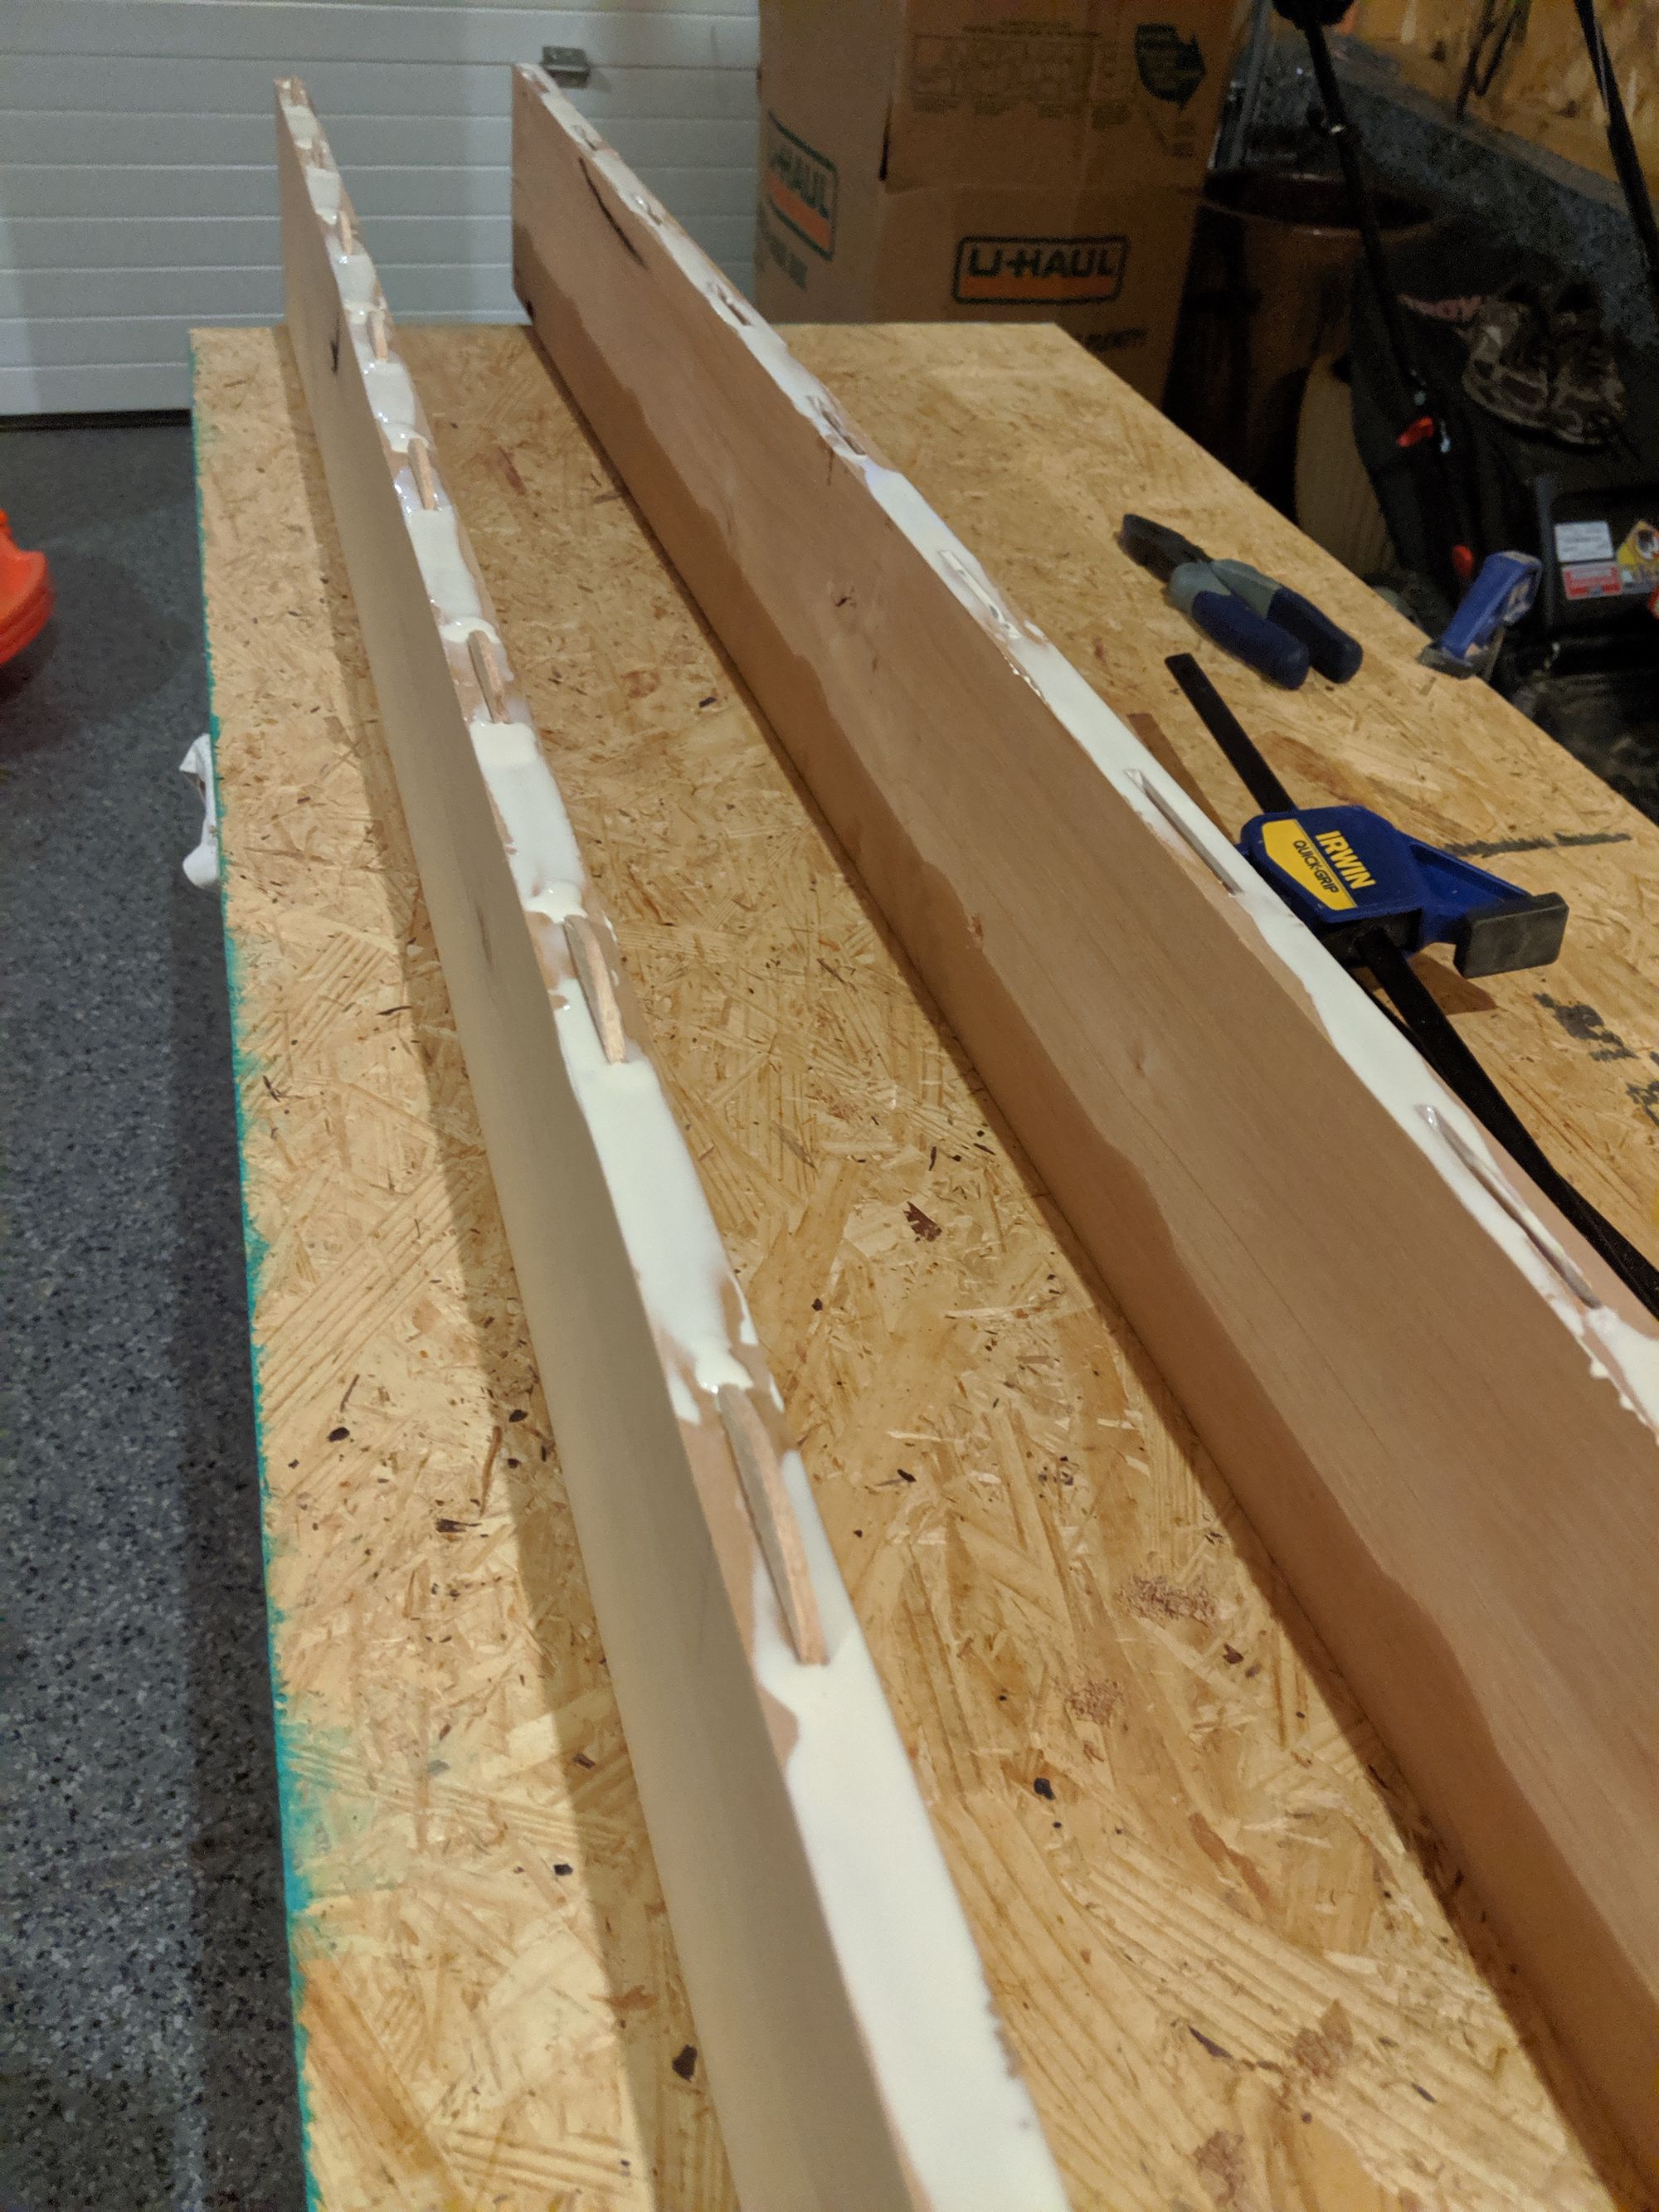
With the cuts made, it was time to join the pieces together. Having watched the YouTube video at the top, I just followed that process. I ran a bead of glue down each side of the joint I was trying to make (constantly checking my marks from early to ensure front, top, and order was correct. I made sure to get some glue in each biscuit hole (they expand when they soak up the glue for a more solid hold) and then dropped the biscuits in. With the biscuits in, I joined the wood and used clamps to make sure the joint was solid and did not have any gaps. I then wiped away any excess glue and let the glue set for at least 2 hours before unclamping and moving onto to the next joint.
⚠️Note⚠️️ Be sure to adequately clean up any glue squeeze-out as glue residue can cause issues with staining. I wish I had read this article before I started glueing.
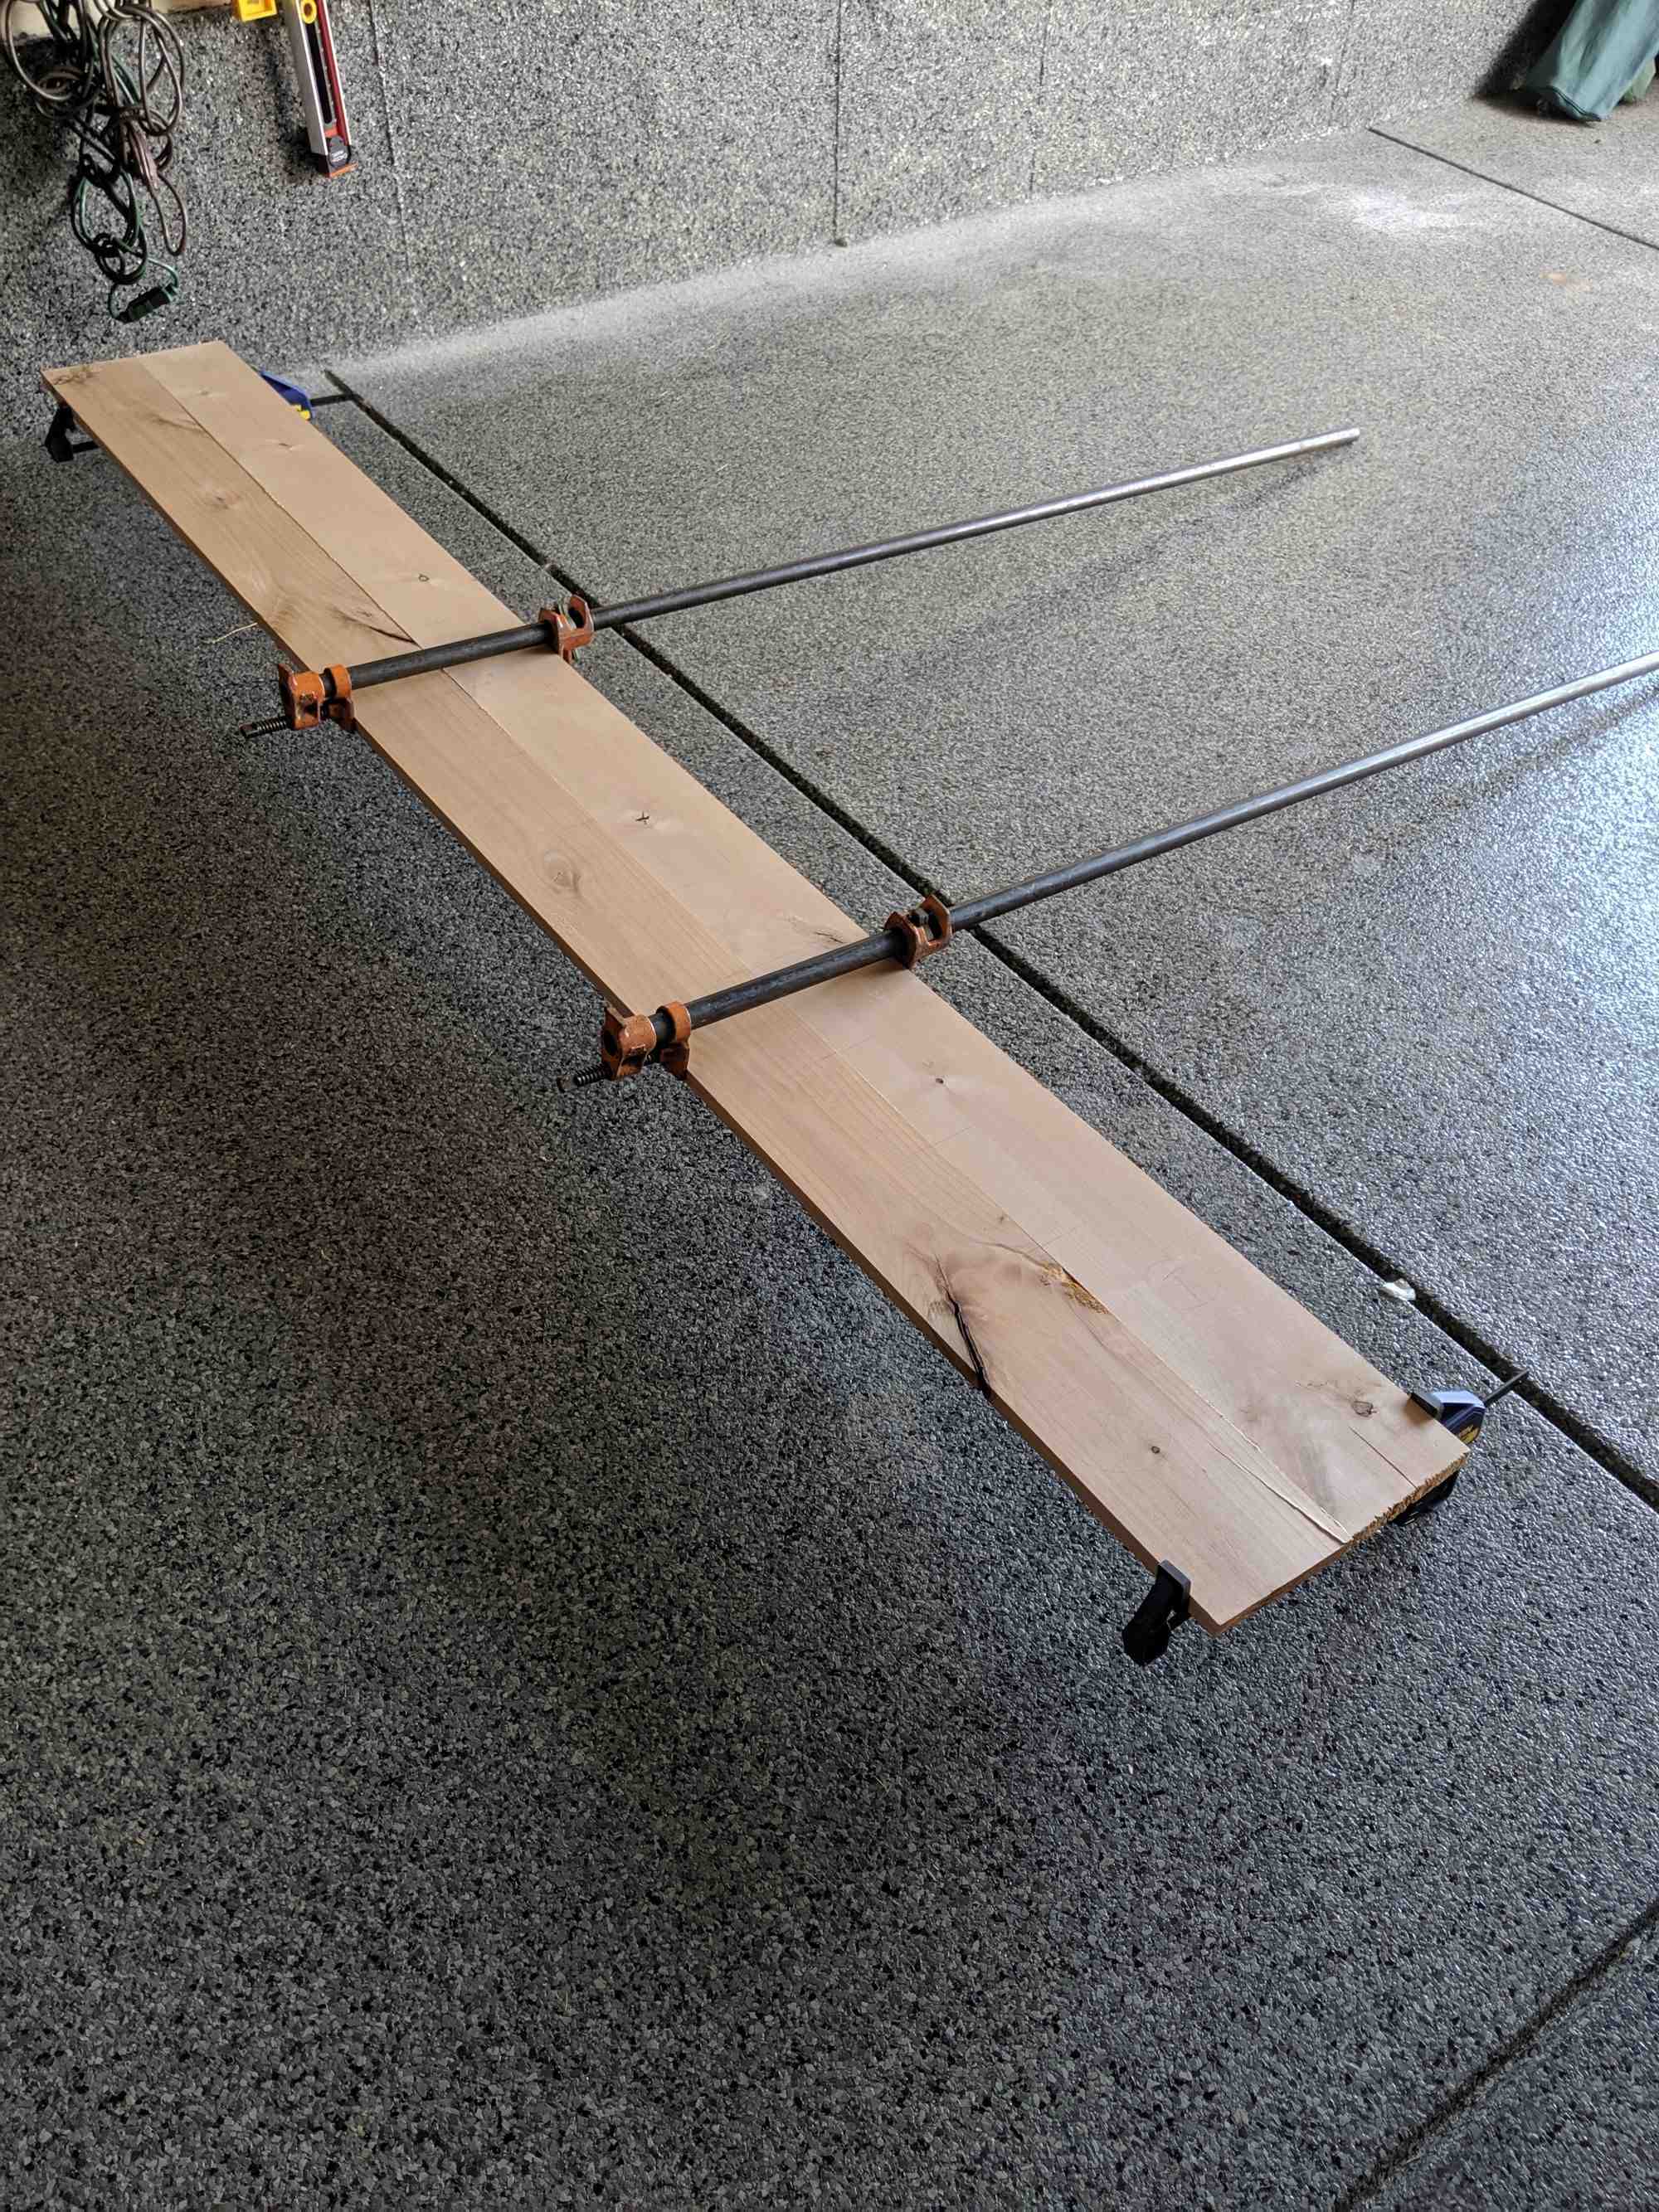
I joined pairs of wood, and then joined the pairs, and finally joined the bigger pieces together. This allowed me to have smaller pieces to work with for more time.
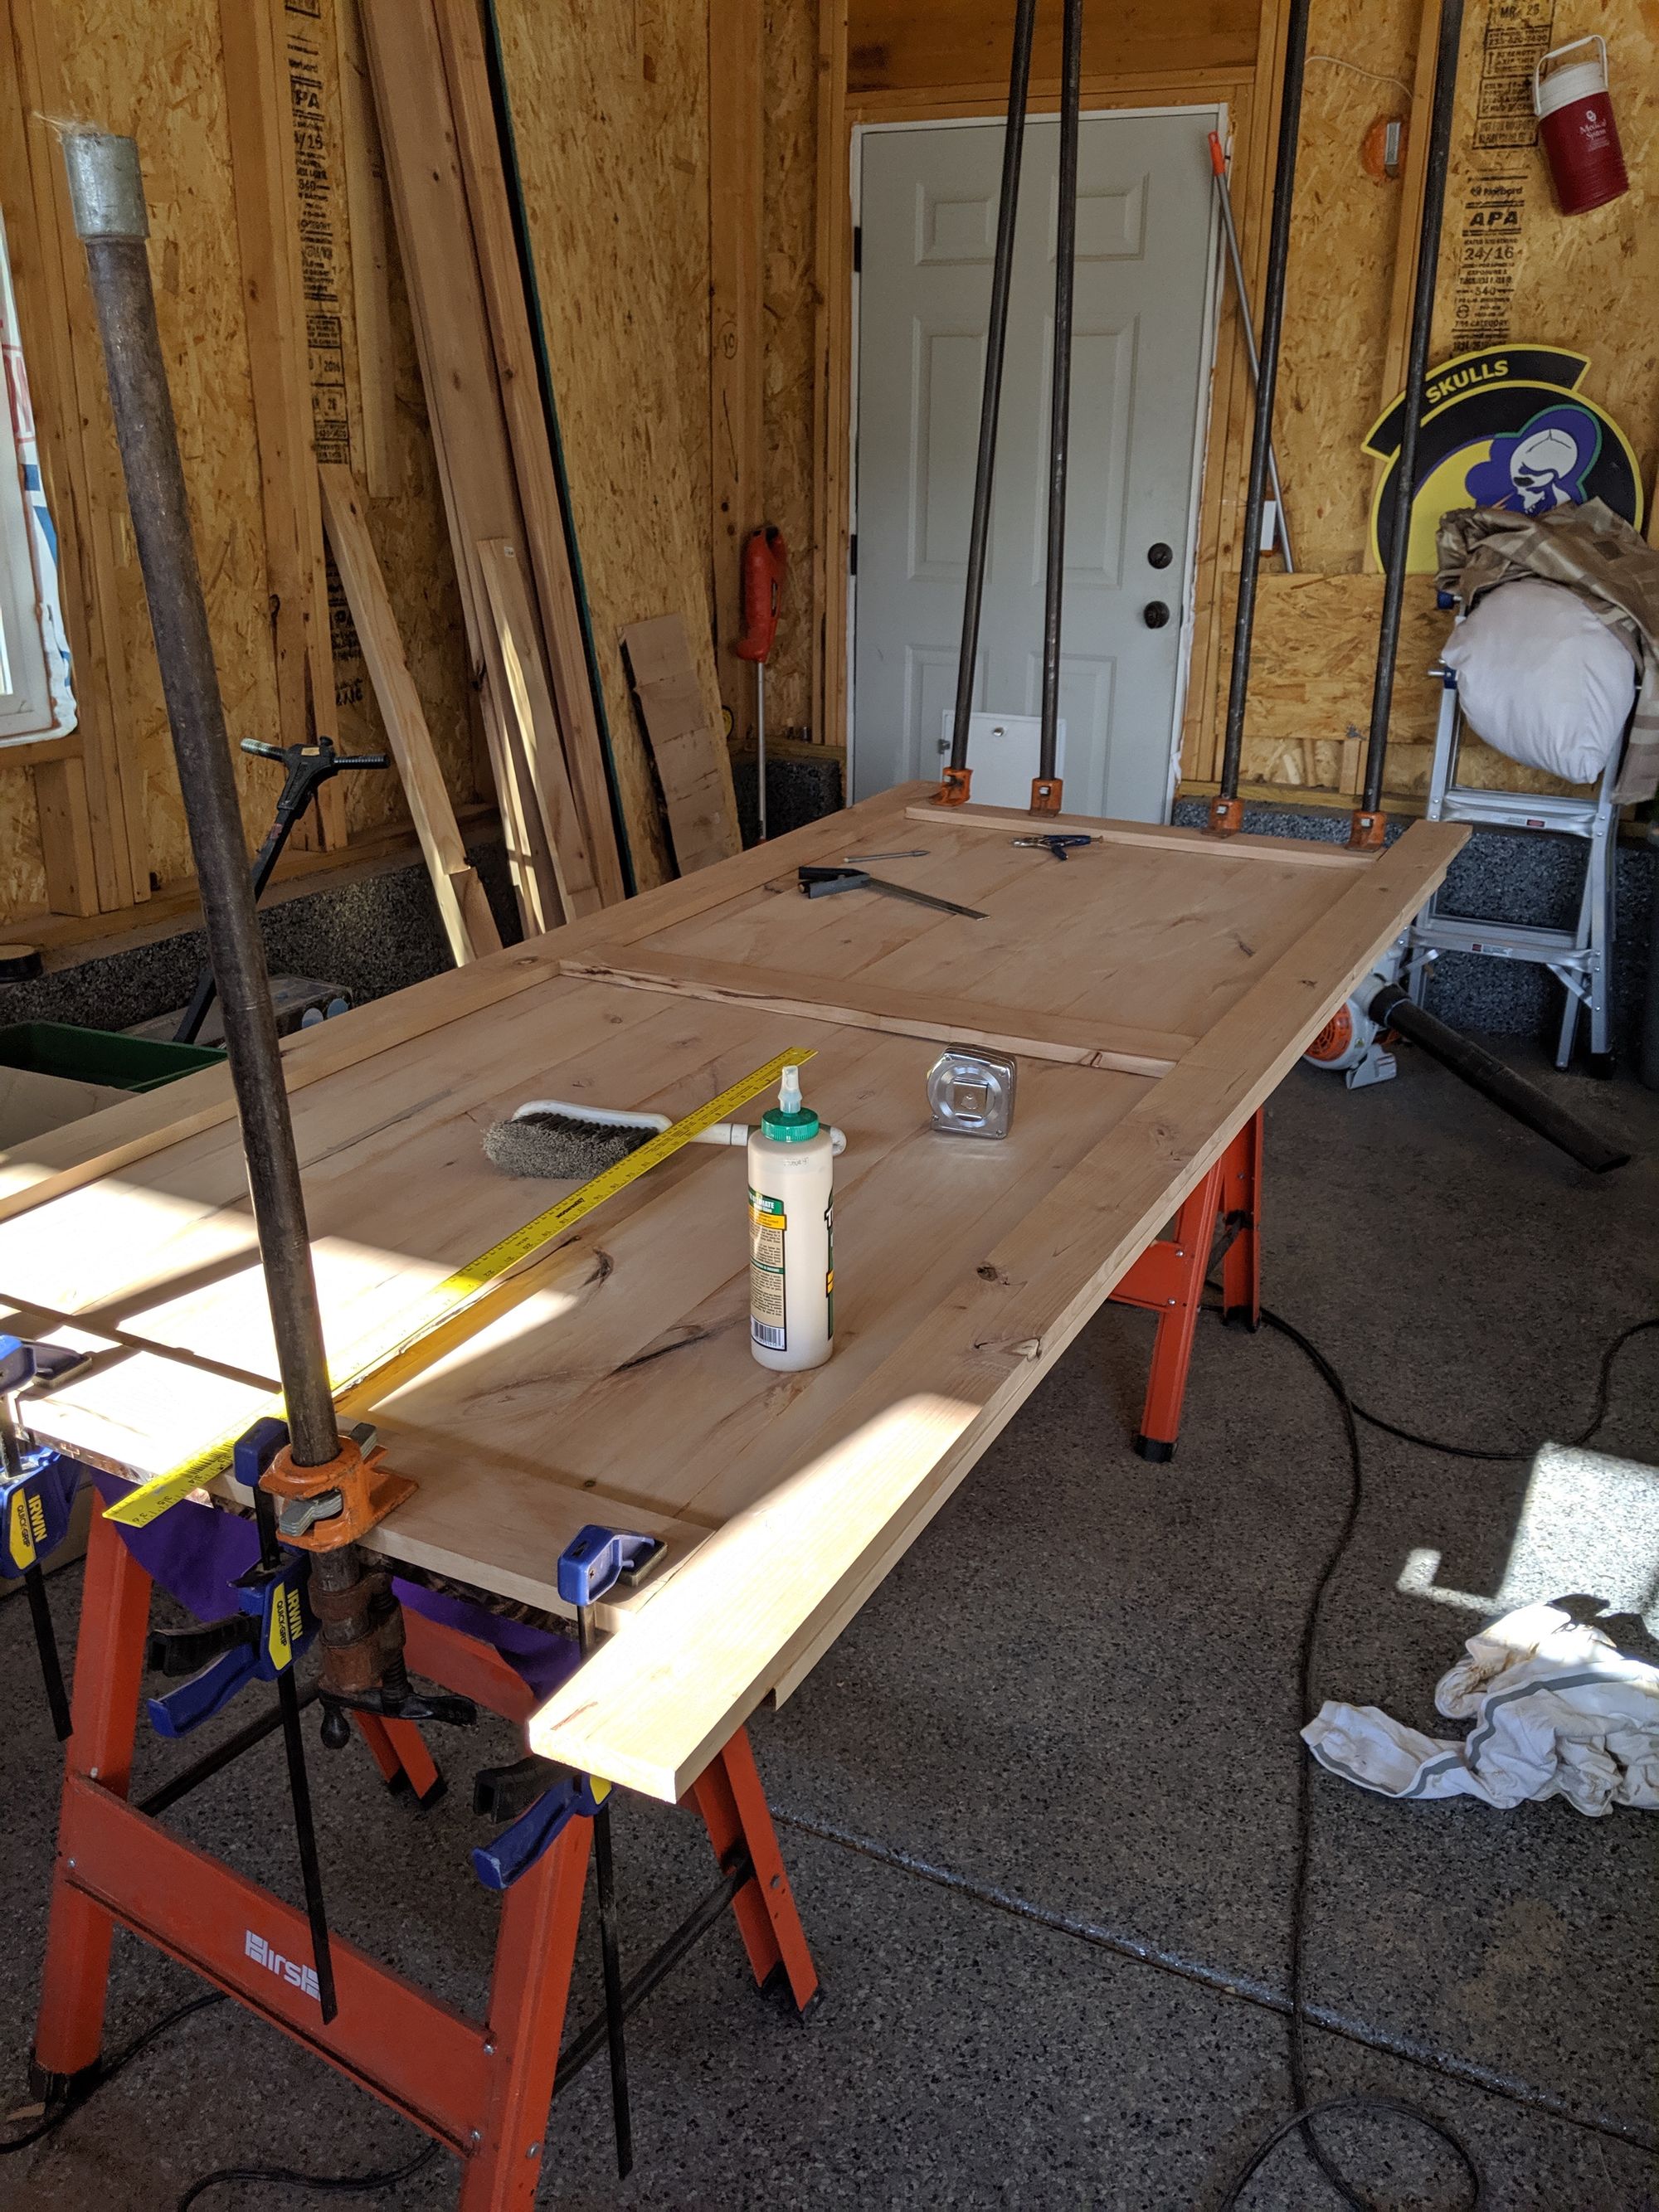
Cutting to size and trim pieces
Now that the door was all joined together, it was time to cut it down to the right height. This was probably the most nerve-racking part of the whole process since a mistake here would have ruined the whole project. I measured the door opening multiple times to be sure. I cut just enough off the top of the door to even out that side since most of the nice knotting and character of the wood was up there. Then I measured and marked the door height and cut off the excess from the bottom of the door. I also figured that any imperfections in my first cut on the top would be less noticeable than on the bottom.
As it turns out, I suck and used the wrong blade for my circular saw, so my cuts suck and burned the wood. Overall this did not turn out to be a major issue since the trim covers the cuts but still I was not happy. In the future, it might be worth seeking out or renting a table saw to get a cleaner cut.
At this point I went and rented a belt sander to take care of some of my alignment issues and to get rid of the excess glue that was leftover (see note above). This went pretty quickly, though I did miss some glue spots as I will mention later.
With the door cut to size and sanded I laid out the trim pieces and began cutting those to size. I started with the taller side trim pieces and then glued those in place. With those in place I then measure and cut pieces for the 3 cross pieces and then glued those in place.
For work like this, an abundance of clamps was indispensable. Given that wood is rarely straight, clamping each piece in a few places really helped.
I considered using brad nails to add extra support for the trim pieces but the wood glue seemed to be more than enough for my purposes.
Finally, I hit the whole door again with the belt sander just to even everything out.
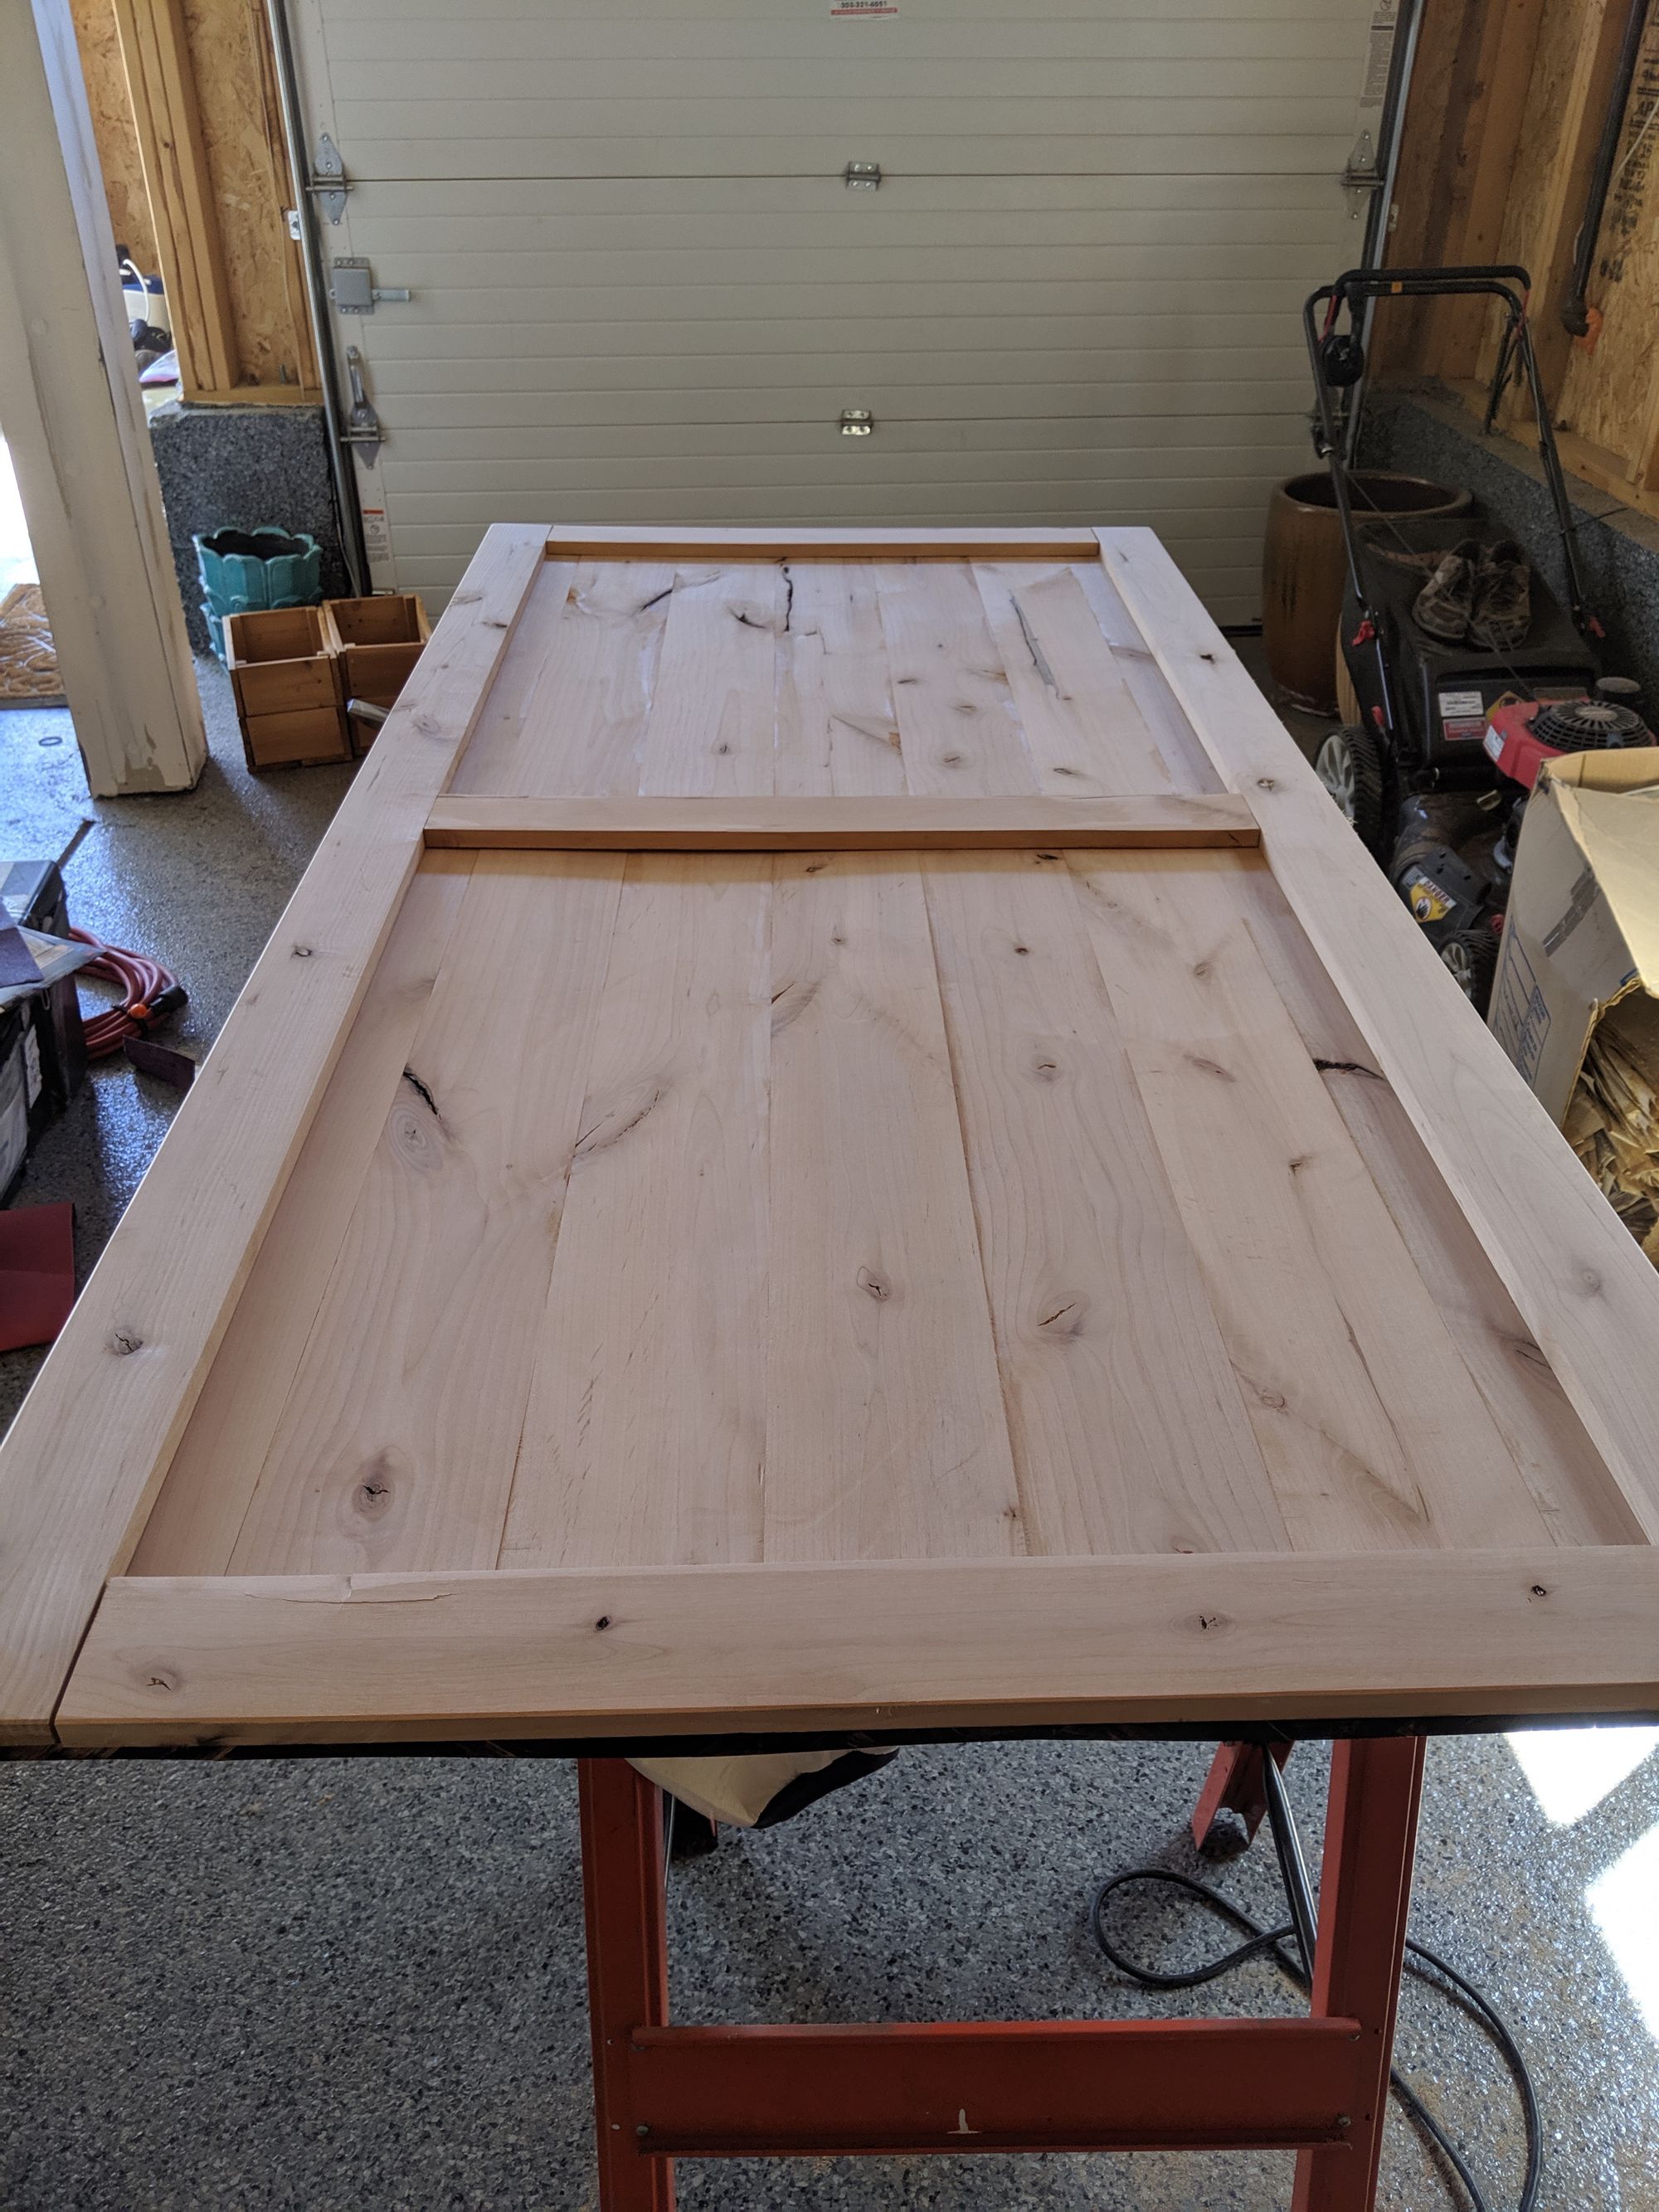
Staining
After a few busy weeks I finally was able to get the wife back to Lowe's to pick out the stain. I expected to come home with one small can but ended up coming home with pre-stain, stain, and a poly final coat. Of course the finished product proves that having taken the time to use all three really made a difference (you were right honey ❤️).
Over the next few days I would pop out to the garage to put on whatever layer was appropriate. The pre-stain needed to be stained on top of between 15 minutes and 2 hours after application but other than that, there were no real time constraints here. One coat of pre-stain, one coat of stain, and 2 coats of the poly (with sanding in between).
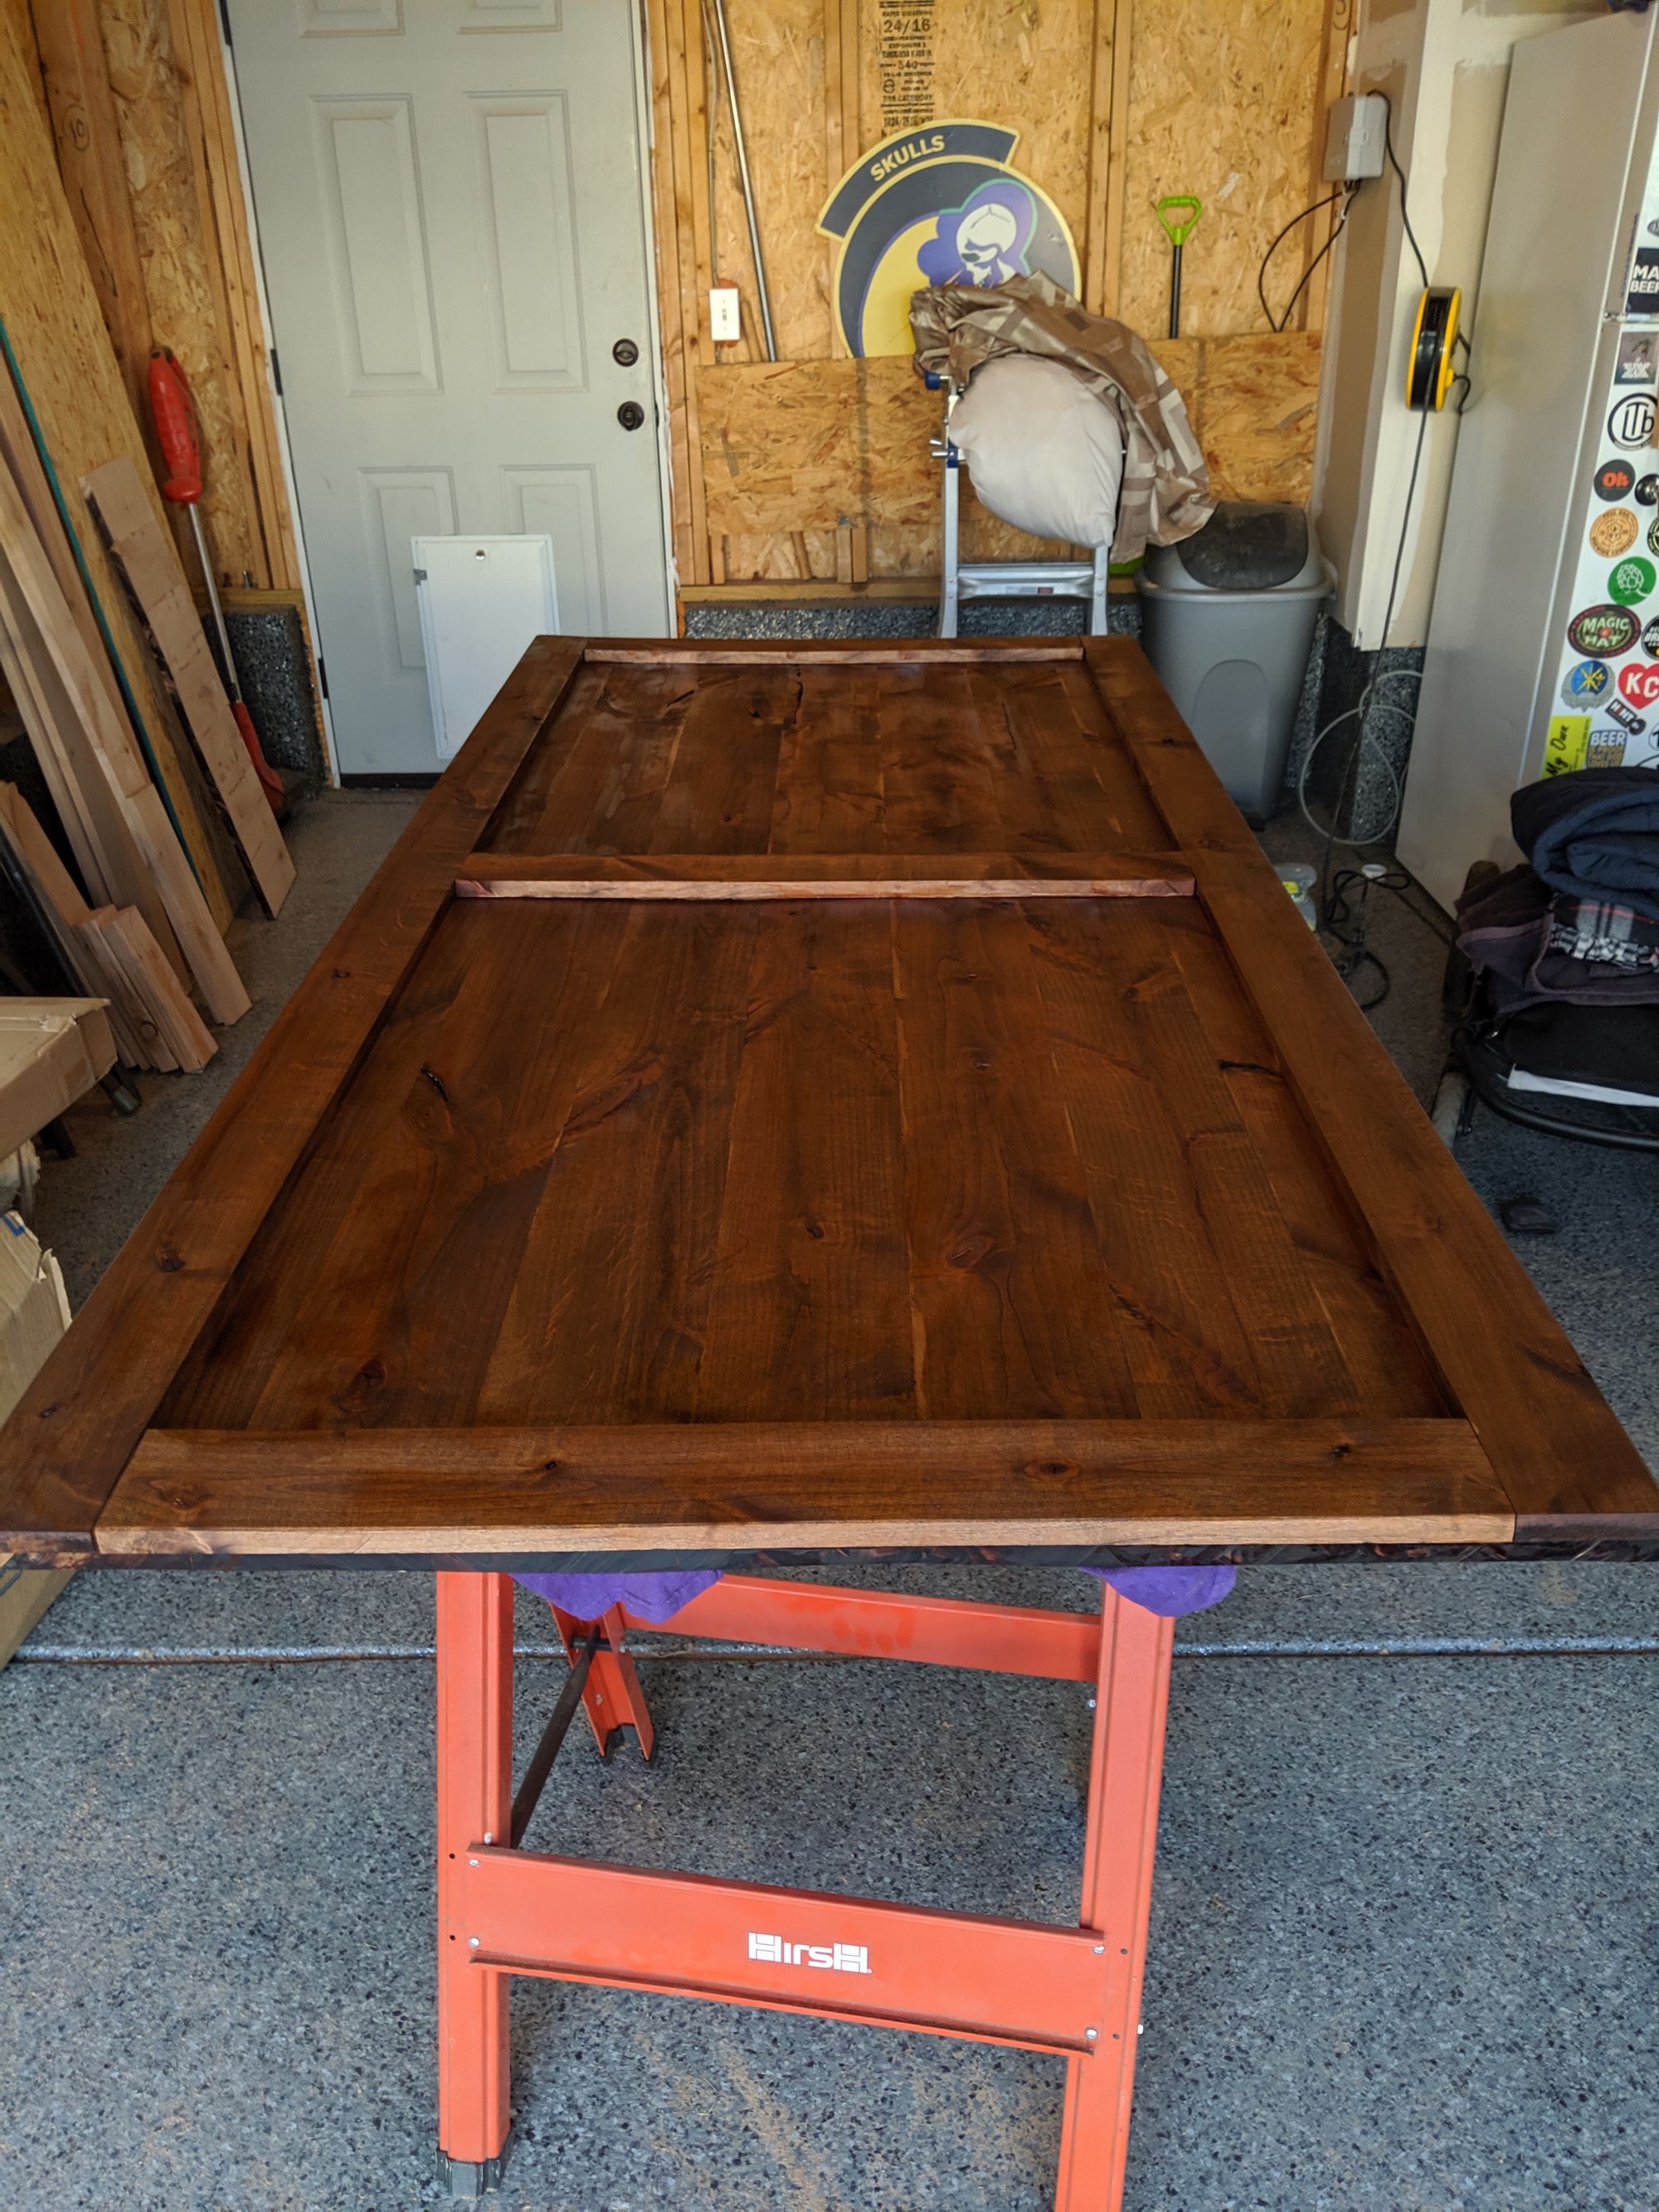
This is where I first noticed the places where I had not removed all of the glue. There were some lighter spots where the stain did not fully penetrate. Honestly, these imperfections are not glaring but I will always notice them. You live and you learn I guess.
As I did the staining, I was extremely impressed with the color the Mrs. had chosen and the way the wood grain really popped under the stain.
Hanging
I have to be honest, I delayed on hanging the door for at least a week just because I was super nervous about getting it right and whether this whole process would end up being worth it or not.
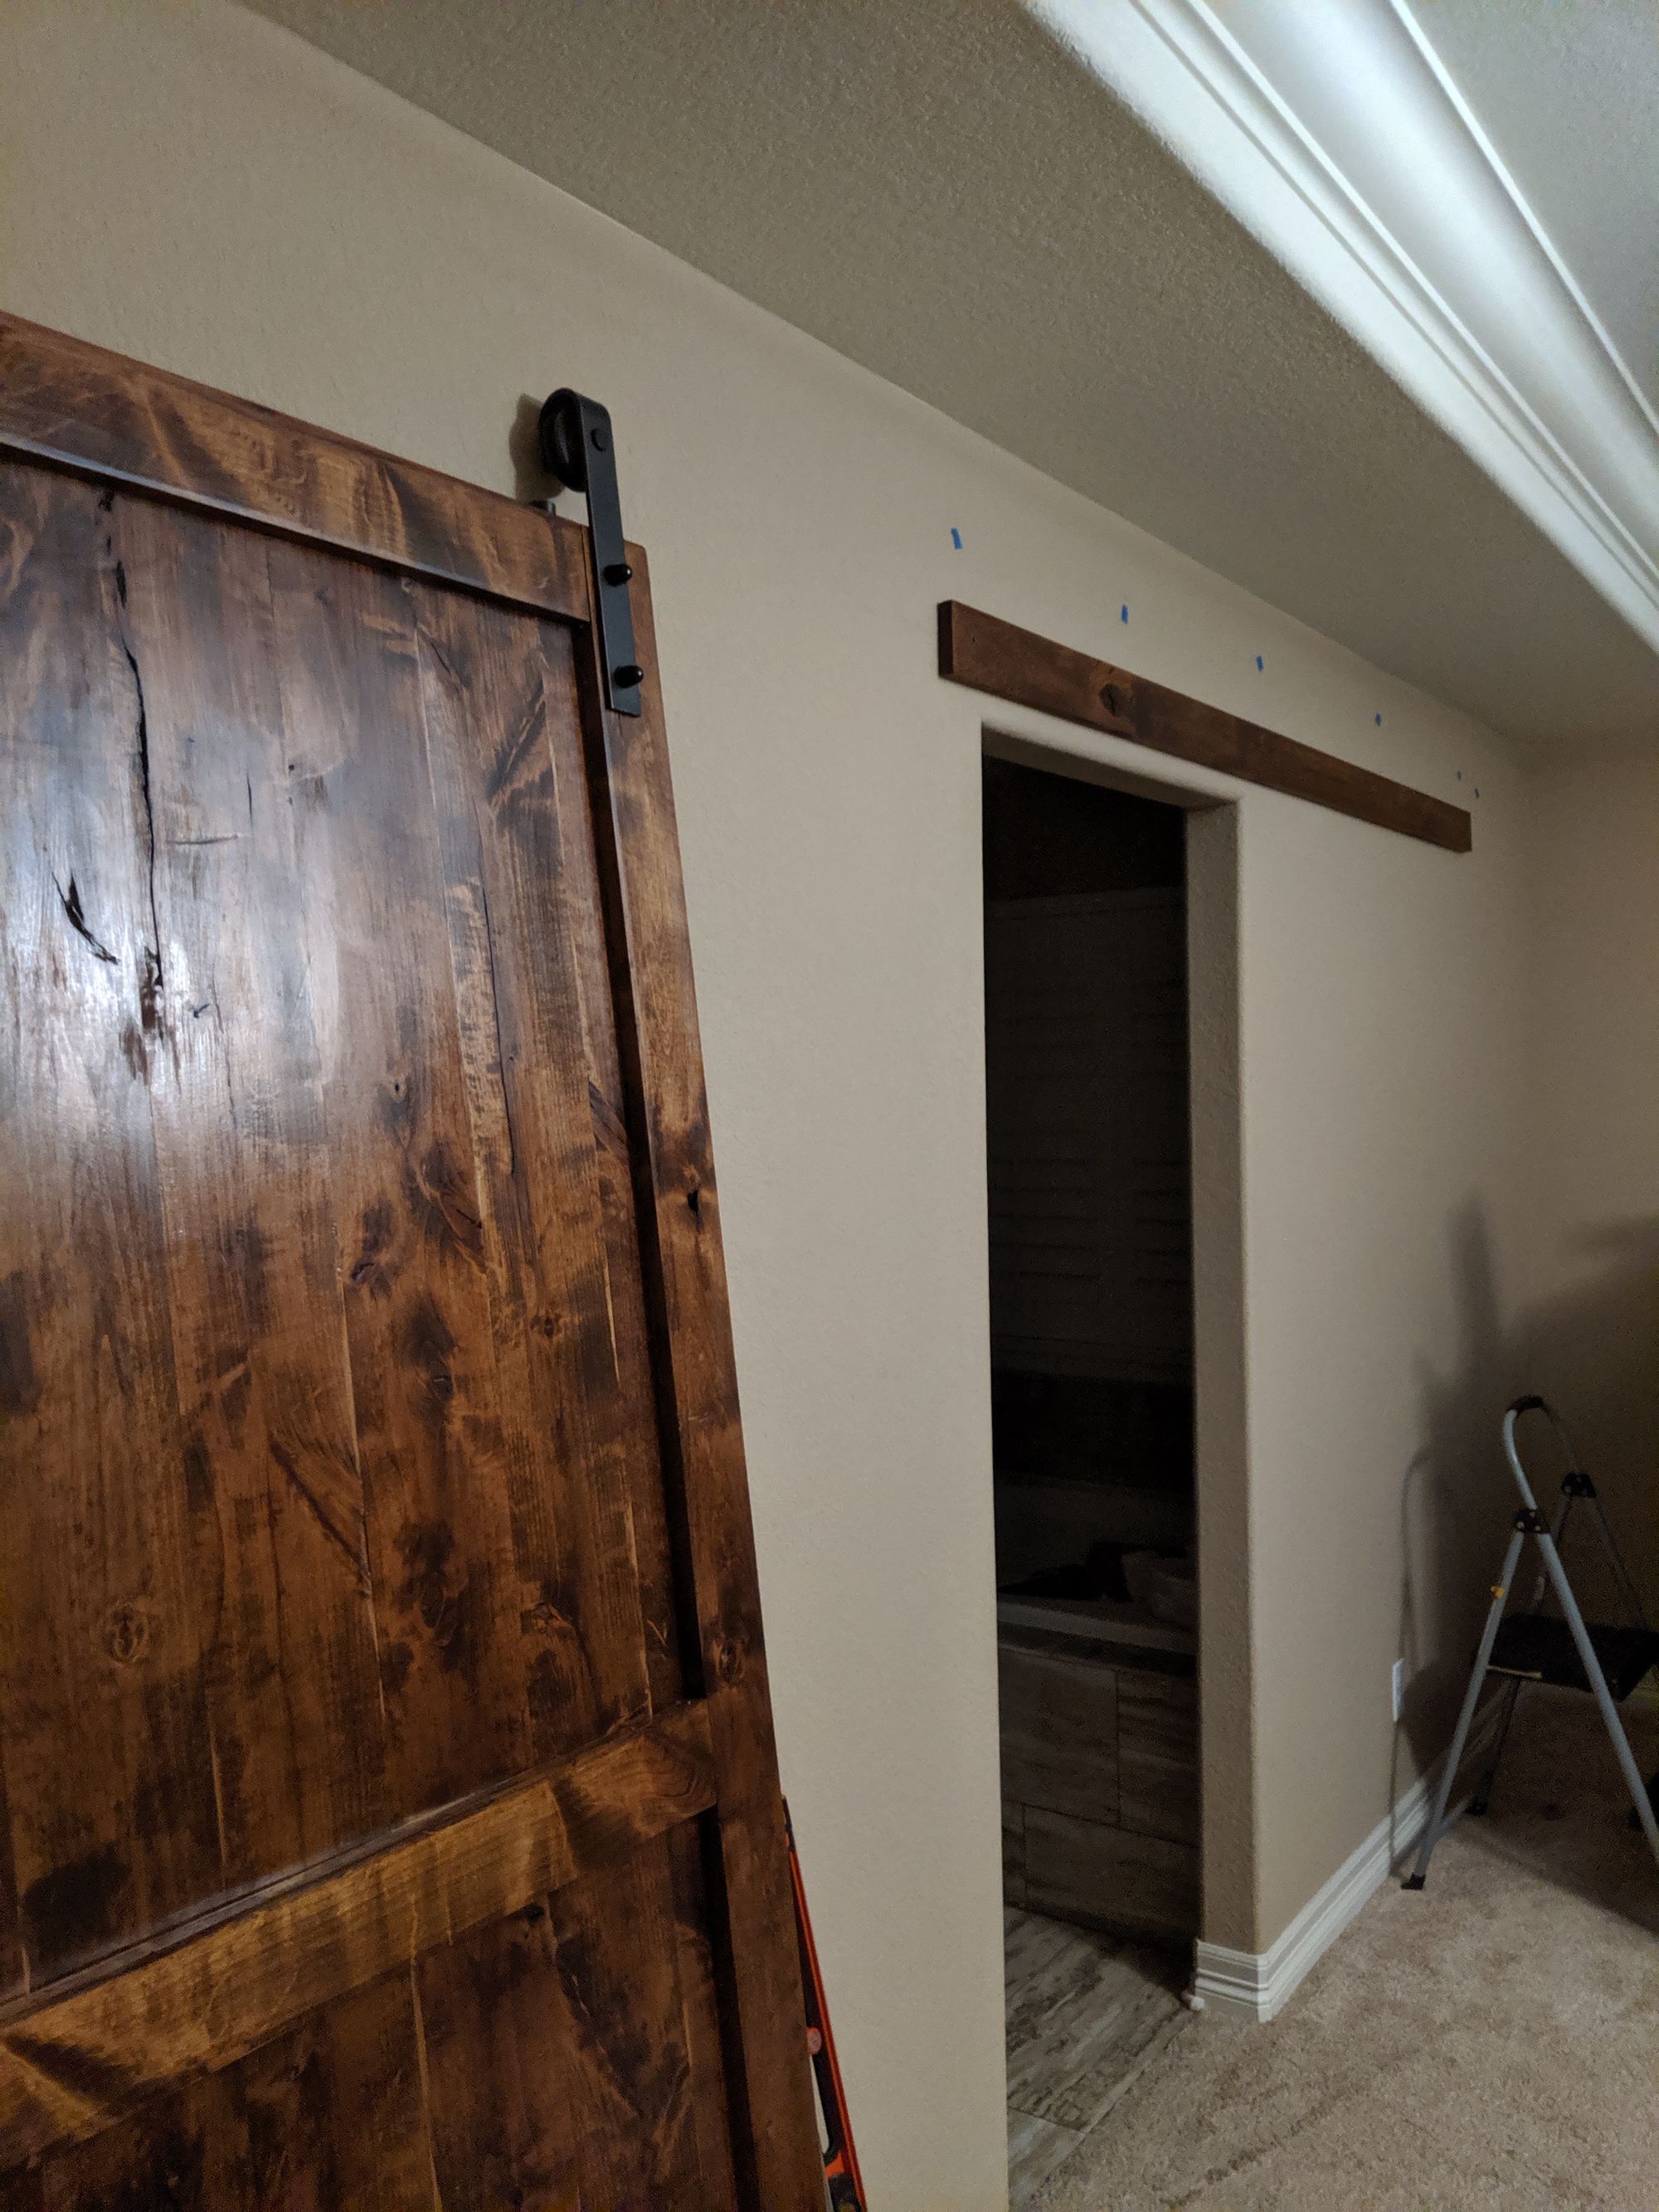
Given that we were installing this into drywall, I had to run back to Lowe's for a final piece of wood that the door rail would get anchored too and then had to stain and seal that piece. The door rail's mounting holes were not aligned to standard stud widths and our studs in the bedroom were also not spaced in a standard manner. I first marked out the studs and did some math per the rail's instructions to figure out where to mount everything.
Then that night our toddler actually went to bed on time! I had most of an evening to just get this thing done. So I stayed up late and in a fury of activity somehow got the whole thing mounted on my own, and it was level, and I didn't break anything, AND THE DOOR WAS MOUNTED PERFECTLY! I really have no idea how it all came together at the end so well.
I have no idea how I did this, so I am not even going to detail the process. Basically I ended up with a garage worth of tools in our master bedroom and just worked for about an hour and a half before finally hanging the door.
The Result
I could not be happier with how this turned out. I had never tackled such an involved project before and definitely not such an expensive project. I learned a lot and really feel like I have the woodworking bug now. Having some extra garage space in the new house allowed me to really slow down, take my time, and just focus on each step as I had time, I think this really helped me to focus and do the work right.
The door is perfect (to me) in almost every way. Still need to find a handle though. Also, due to a slight twist in the door, the bottom hits a trim piece when it is fully closed so I will have to see if there is anything I can do about that.
Next projects will likely be a rolling workbench (so that I can tackle more projects) and then redoing our pantry shelves.
