Maytag 5000 SUD and F35 Error
UPDATE: This ended up not solving the problem. I had to replace the Central Control Unit (CCU). This part is normally $200+ but I found the same part on eBay (along with some other control part) for $75. I installed this and now the error is gone, this was most likely the issue the entire time.
To get the old unit out, take note of all the wiring (cell picture would be a good call), then slide the unit towards the back of the washer and remove it from its mounts. Unplug the wires, connect them to the new unit, and put it back in its place. Done!
DIY appliance repair is one of those things that can save you some serious coin and really isn't all that difficult. With the internet and YouTube, you can do just about anything. That was the case with an error on our washer lately.
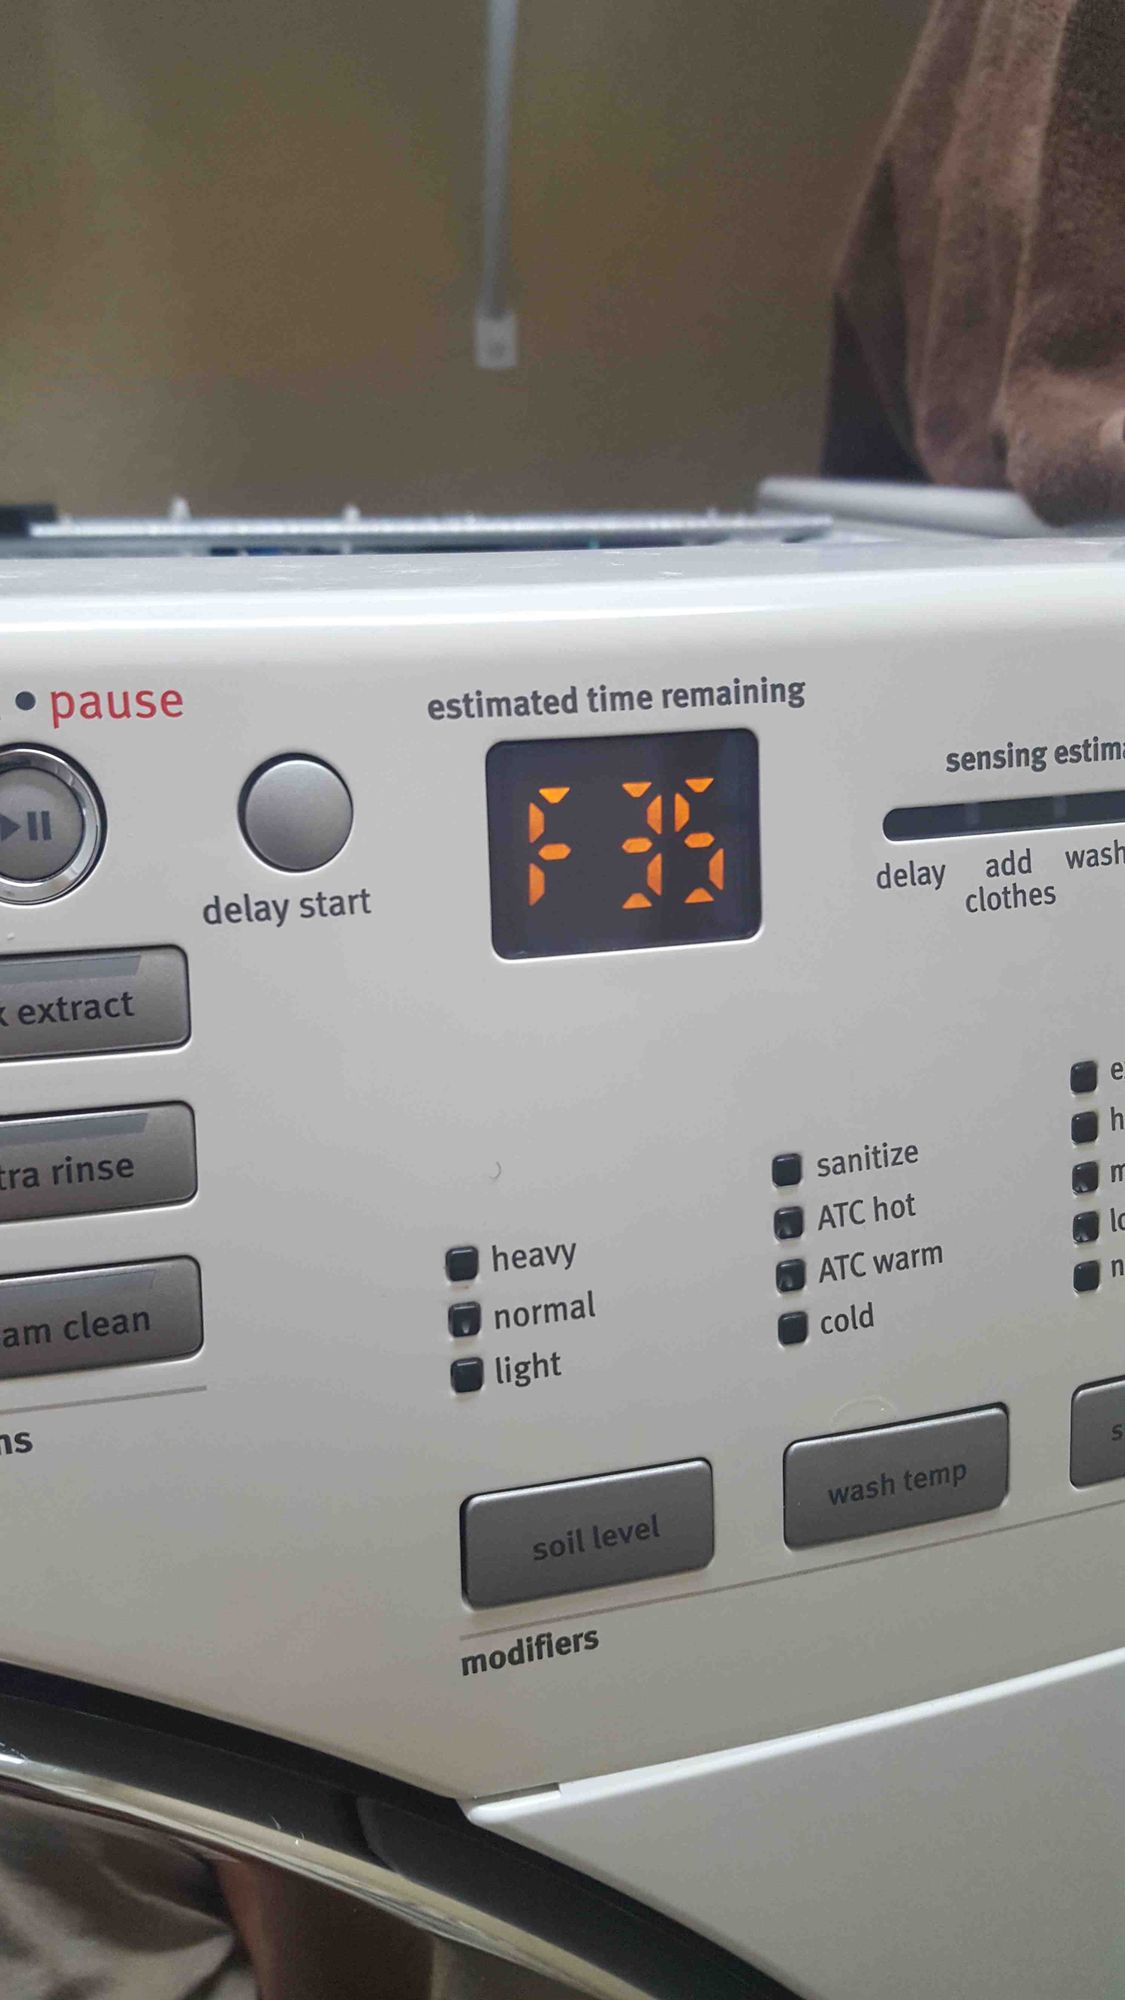
The washer would run for a couple minutes, show the SUD error, then run a few more minutes before throwing the F35 error. From there, the only way to reset the washer was to kill power and restart it. Obviously this was not good for business.
Reading the troubleshooting manual revealed that the SUD error is triggered by too much soap and when detected immediately goes into a drain cycle to see if it can clear the error itself. The F35 error has to do with the Analog Pressure Switch, so as far as I can gather, after the washer tries to clear the SUB error, it eventually realizes that the Pressure Switch is the root of the problem.
So, turning to the internet there were 3 things that needed to be done.
-
Check the drain filter assembly to ensure that the washer is draining correctly. This is donw by taking off the front lower panel of the washer (3 screws along the lower edge) and then removing the filter. This filter contains a LOT of water. There should be a drain plug you can use to drain the line if you want. The filter is in there pretty tight and will require pliers to get it out. I found 2 quarters, a ring, and a bunch of other nasty gunk in there and thought I had found the issue. This did NOT fix it, so moving on.
-
The pressure switch has a rubber hose that runs into the wash drum. If it is damaged in any way it may be causing the issues. This requires a few more parts of the washer to come off. First the top panel, which is removed by taking out 3 screws along the back edge.
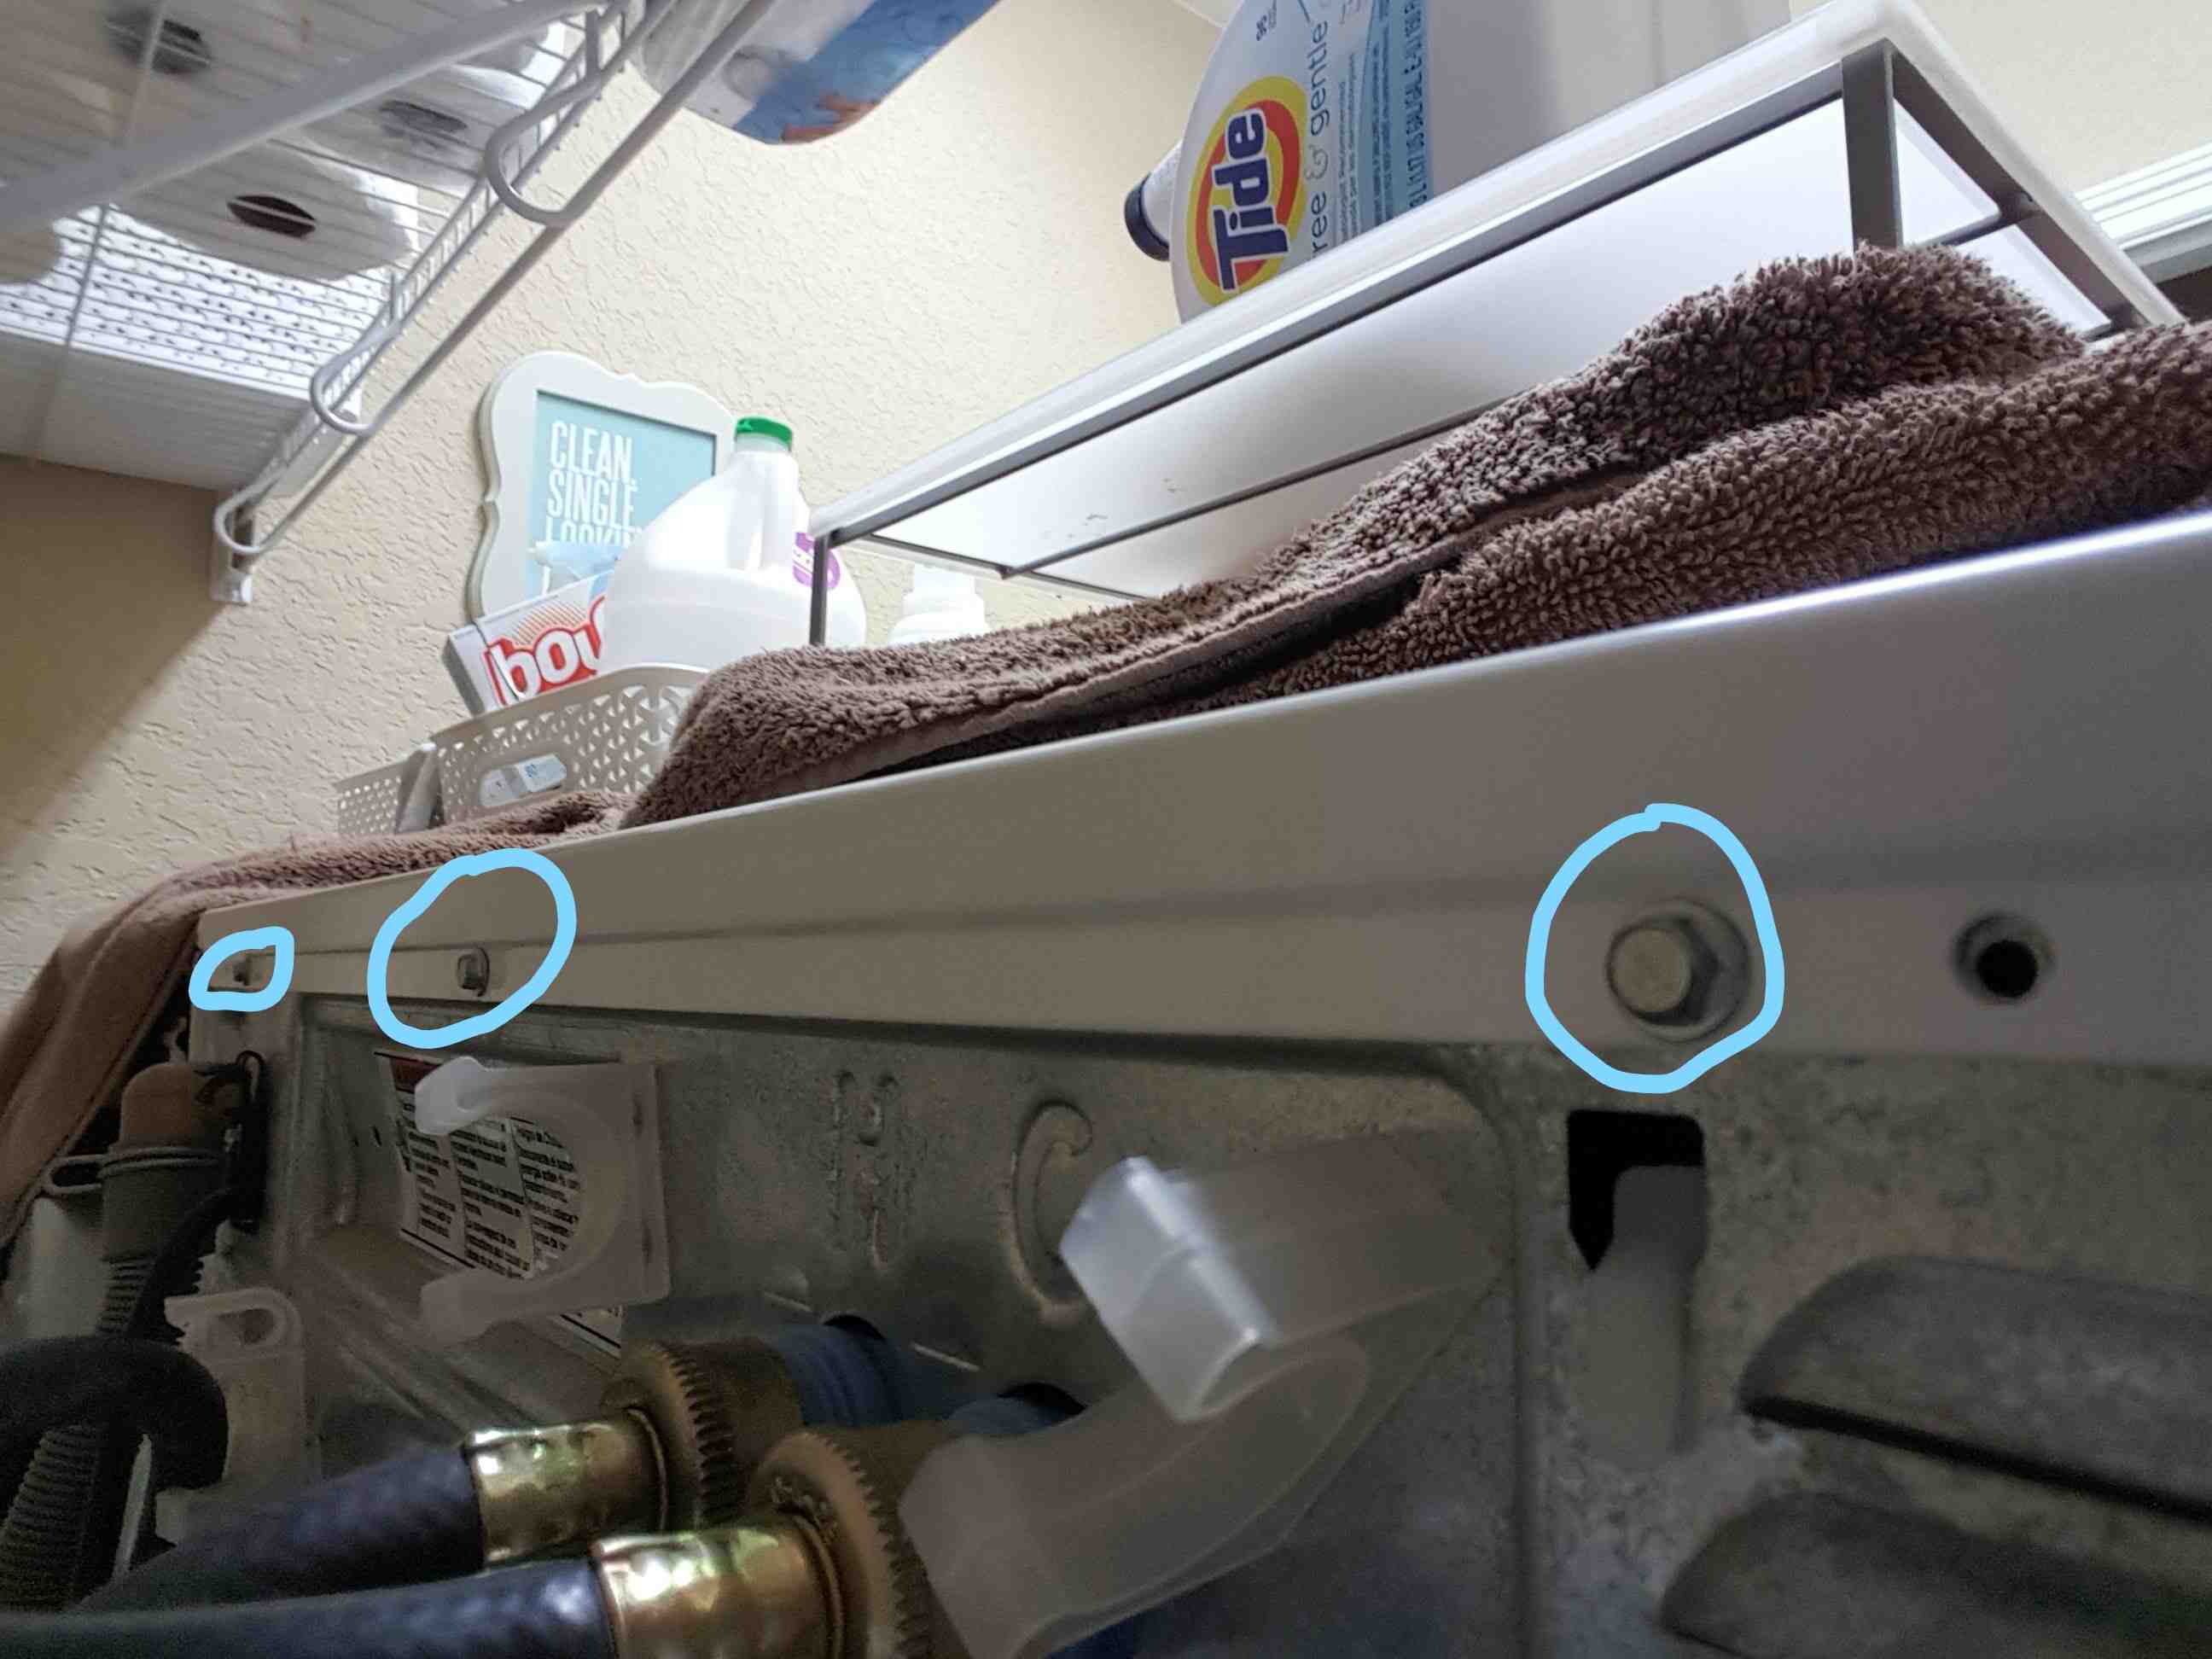
Inside the top panel you will see the pressure switch in the back right side along with the black tube running from it. If you have a light and the right angel you might be able to see the whole tube from there, if not, you will need to also remove some screws on the back panel. I removed all the ones along the edges, bottom side, and middle so that I could just peel the panel back enough to check the hose.
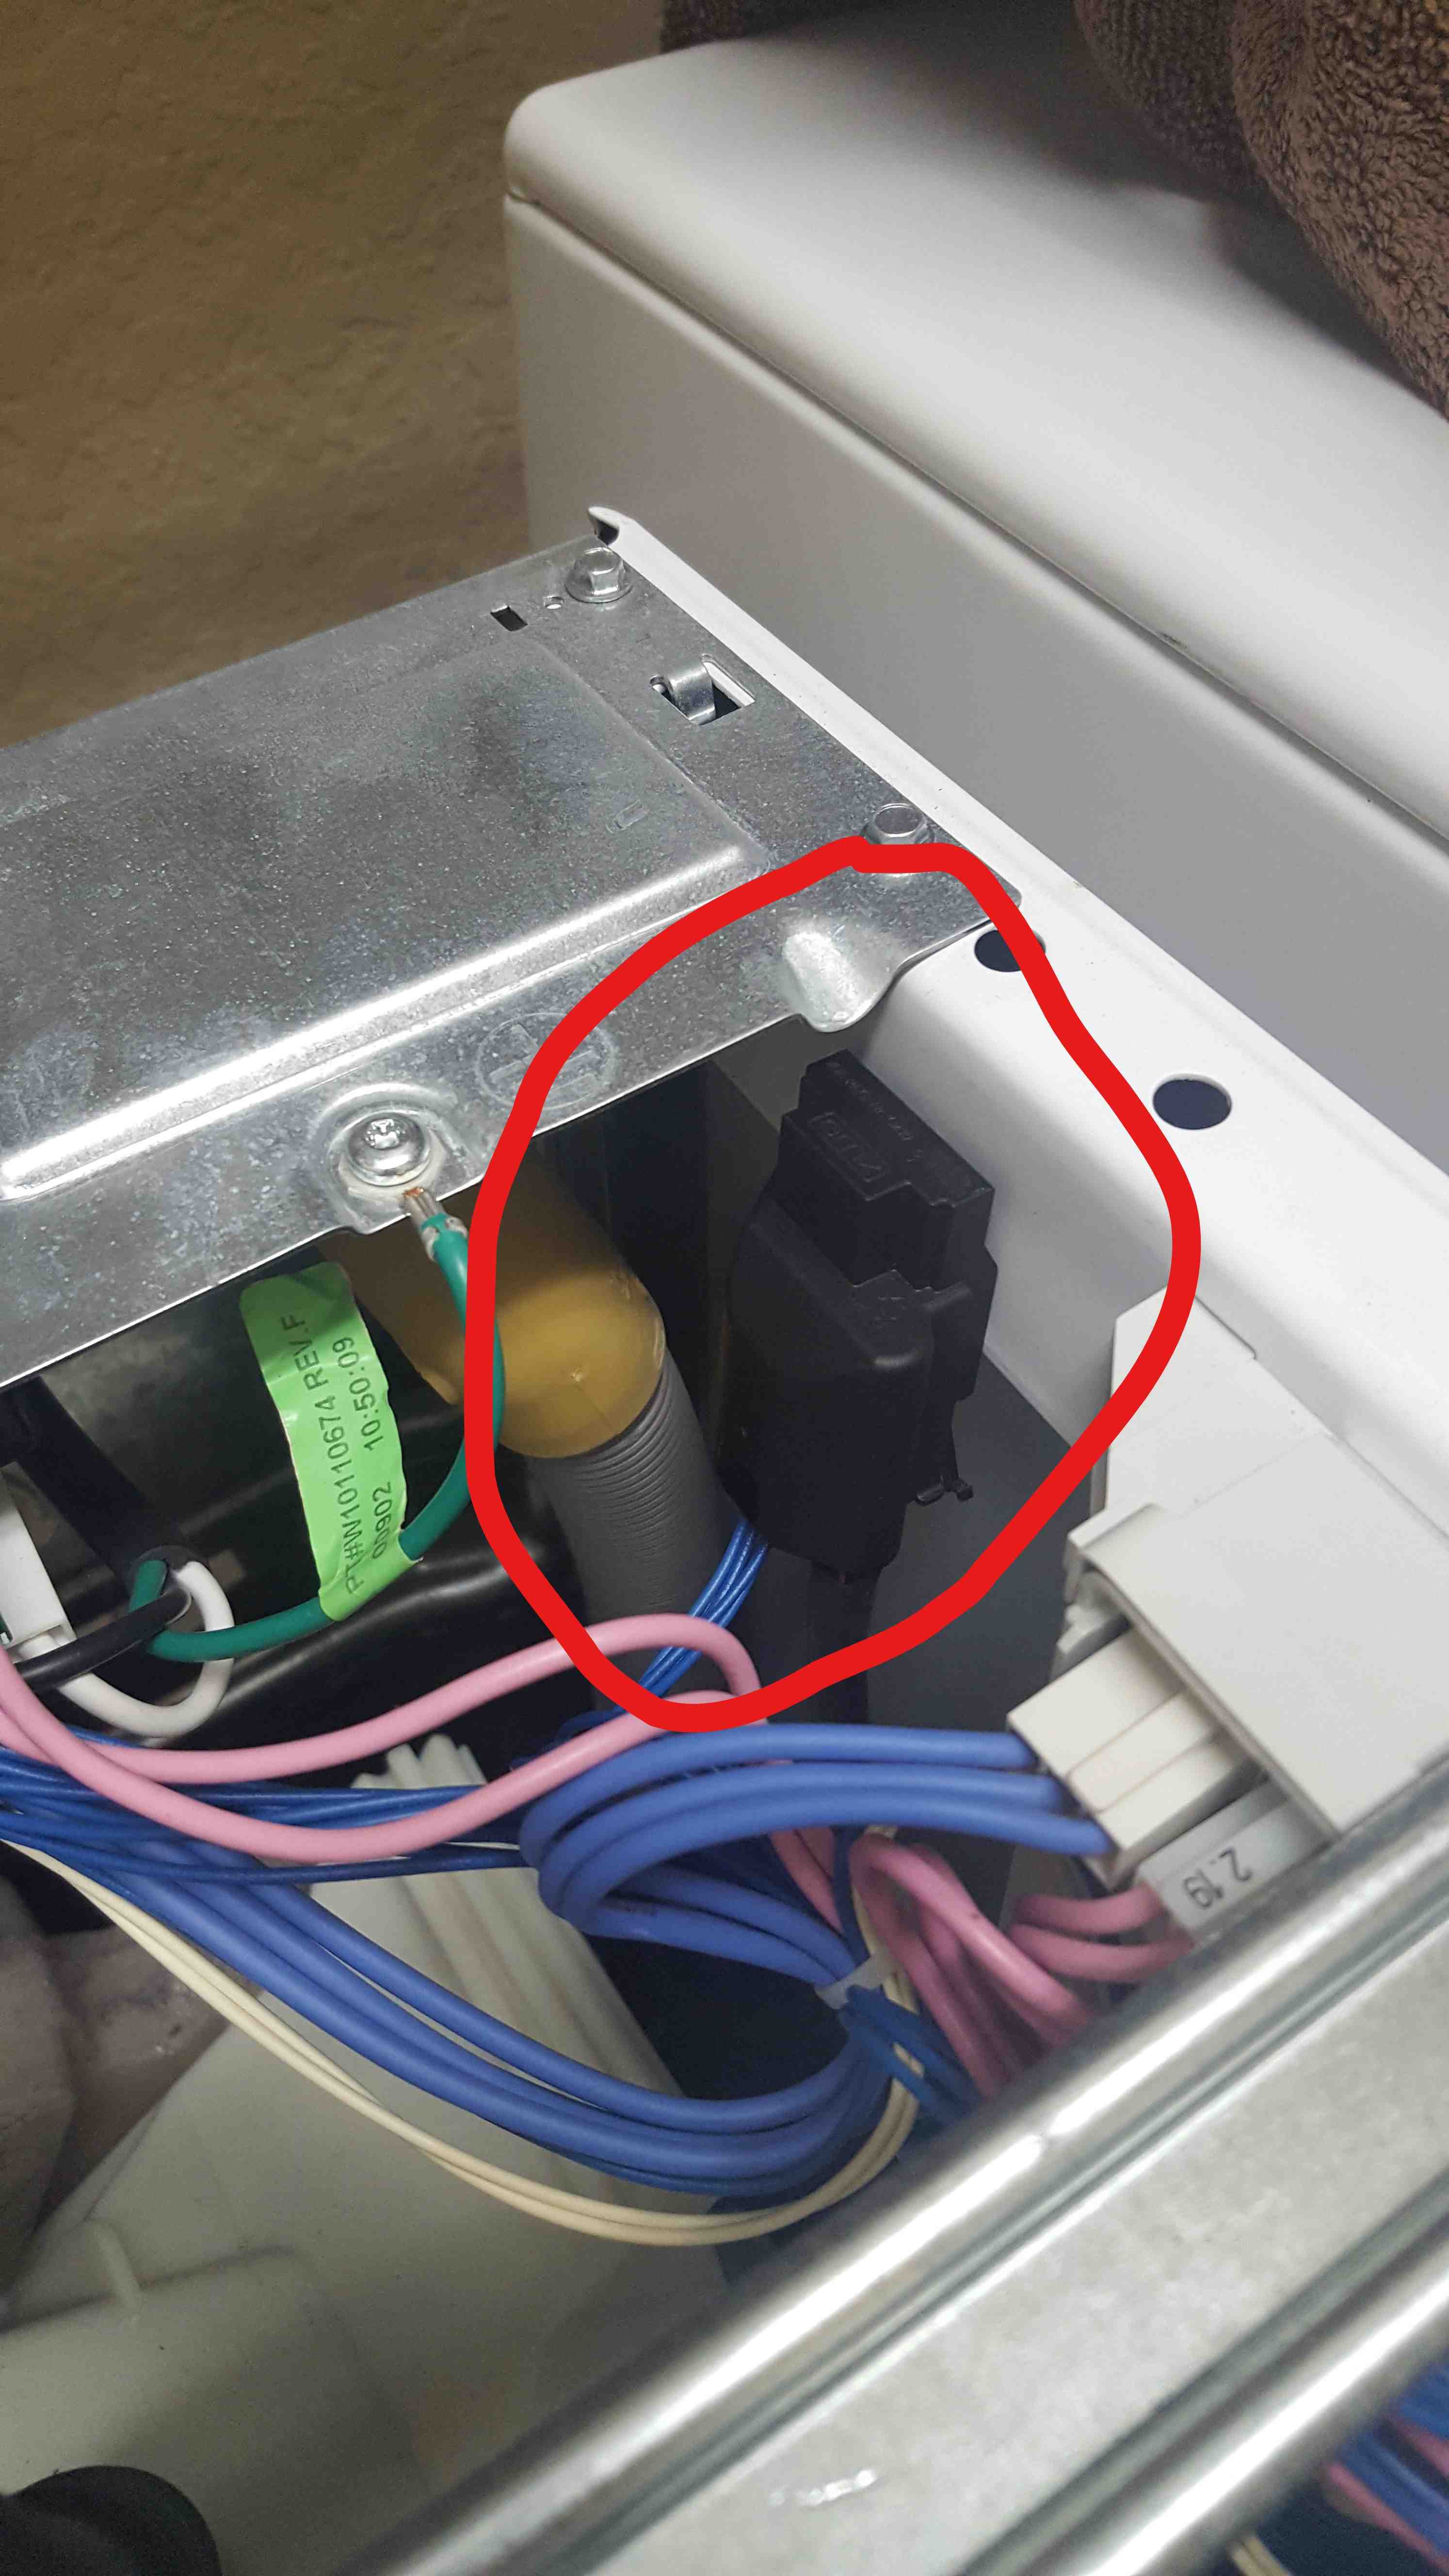
- The hose was all in tact so the last step was to replace the pressure switch itself, which really turned out to be the easiest part. The switch is removed by pulling down on the hose, then twisting the switch towards the front of the washer, removing it from the hole in the metal, and then disconnecting the electrical connection. I found the replacement on Amazon for $70. This one if for a Whirlpool but they are literally the same part. I got it overnight (thanks Prime) and had it installed within a few minutes.
And with that my DIY job was done. Saved myself a service call and probably at least $50 in labor.