Pikler Triangle
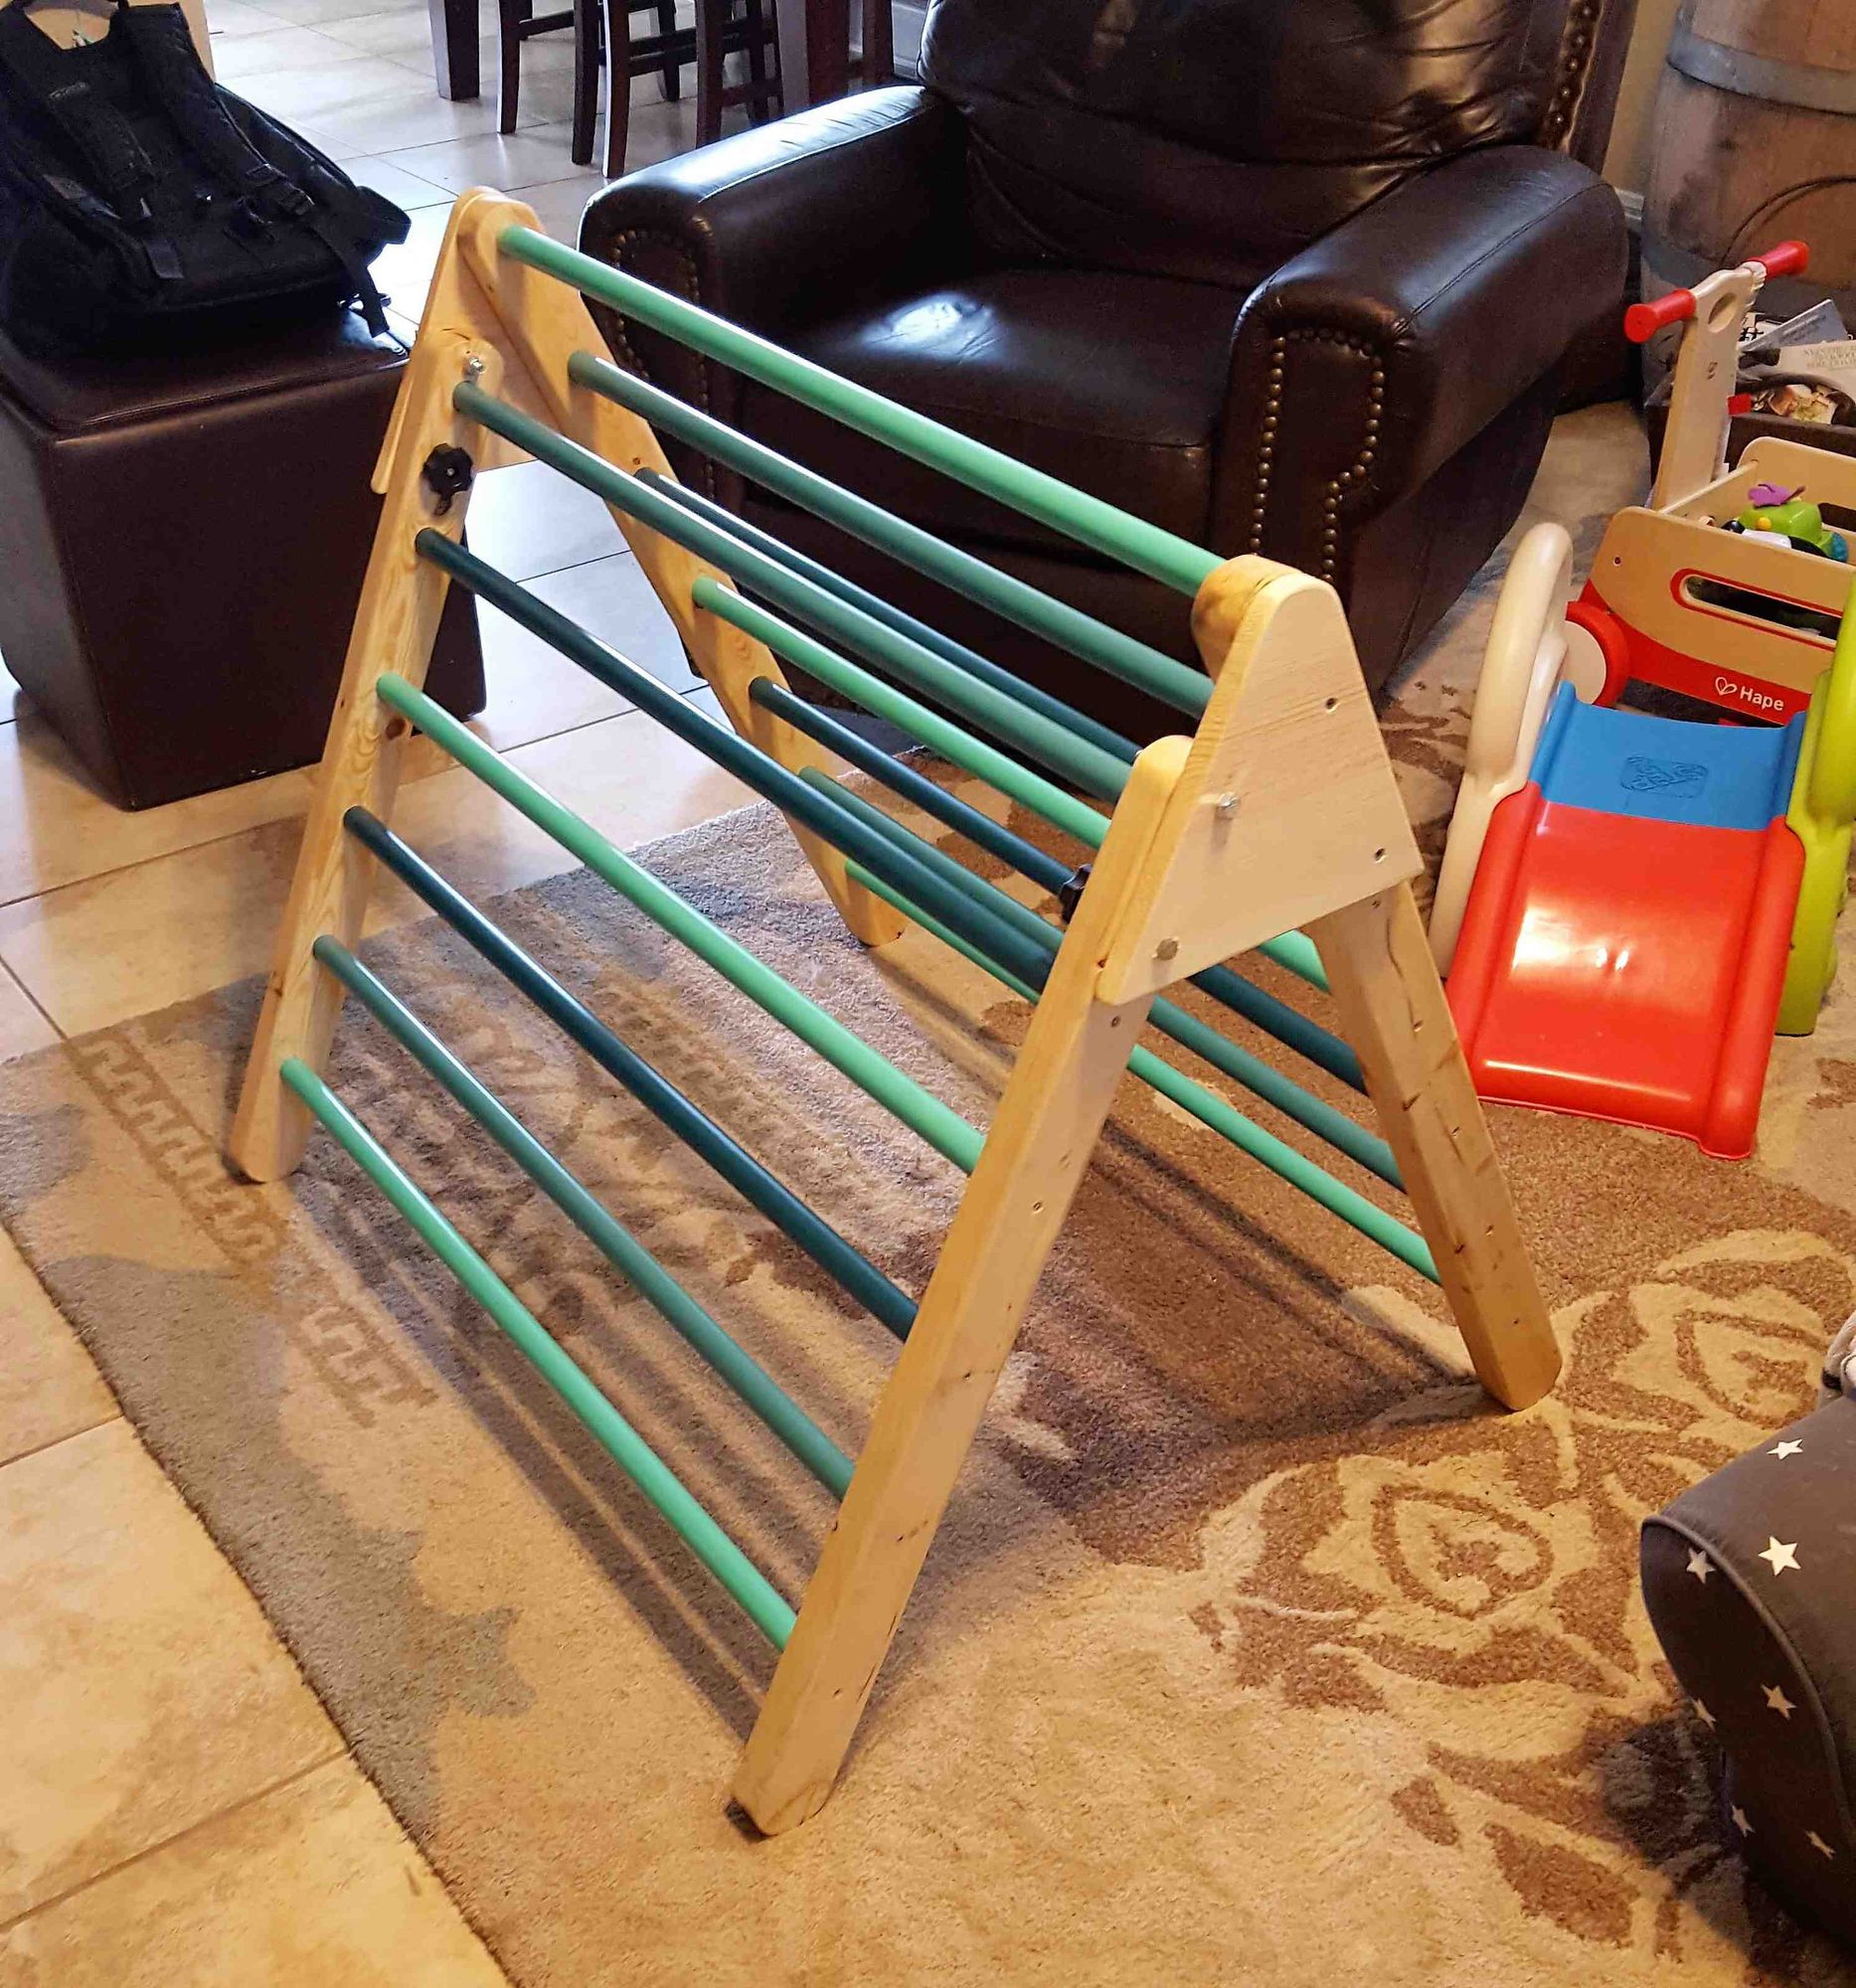
First off, I am no wood worker, I just found this Instructable and followed it pretty closely. In the areas where I did the same thing, I will just gloss over it, but if I did something different or needed additional information, I will add that in. Follow this guide and you will be fine, just use this post as some additional context.
https://www.instructables.com/id/How-to-make-a-collapsible-Pikler-Triangle-climbing/
As a novice wood worker, I did find that the most helpful thing I did was to TAKE MY TIME. I basically just picked small tasks to do each night and then planned what I would do the next time that I had a moment to work.
NOTE: I opted to screw in every dowel so there are extra screws and a couple extra steps later.
Parts List
This is probably the place that was most different from the Instructable as I felt better going to the store to get this stuff rather than trying to order from the links in the Instructable. You could potentially order this all online and just go pick it up. I got all parts from Lowe's.
Raw Materials
- 2 - 2x3 8' Board --> $2.57 ea.
- 13 - 1"x48" Dowels --> $3.98 ea.
- 1 - 1x10 6' Board --> $9.98
- 25 Pack #8 x 3" Zinc Plated Screws --> $5.78 ea.
- 4 Pack #8 x 3" Zinc Plated Screws --> $1.28 ea.
- 2 -Screw on Knobs (5/16-18) --> 3.02 ea.
- 2 - 5/16-18 3-in Stainless Bolt --> 1.28 ea.
- 2 - 3/8" x 3" Zinc Plated Hex Bolt --> $0.41 ea.
- 2 - 3/8" Zinc Plated Nylon Lock Nut --> $.0.18 ea.
- Wipe-On Polyurethane --> $12.48 ea.
- Stain Pad --> $4.98 ea.
- Spray paint in various colors as desired --> $4.98 ea.
Tools I Had to Buy
- 3/8" Countersink Drill Bit
- 4-pack Wood Clamps
- 1" Woodboring Drill Bit
- Sand Paper (I used 120 and it worked well)
Tools I Needed and Already Had
- Gloves
- Face mask
- Jigsaw
- Palm Sander
- Drill w/ drill bit set
- Hammer
- Mallet
Tools I Had To Borrow
- Miter Saw
- Belt Sander
- Pivot Piece Template from the Instructable
Building the Triangle
Getting the Parts
We spent probably 2.5 hours in Lowe's getting all this stuff because we were looking for a hitch pin to complete the locking mechanism for the folding feature. Turns out, the one I saw online was the wrong picture so we were NEVER going to find this thing.
I would probably order all the hardware online to be ready for pickup but you will want to select your lumber in person to make sure it does not have any blemishes that you do not like. For the dowels, make sure they are as straight as possible and check the length of each one to make sure you don't get a derpy one.
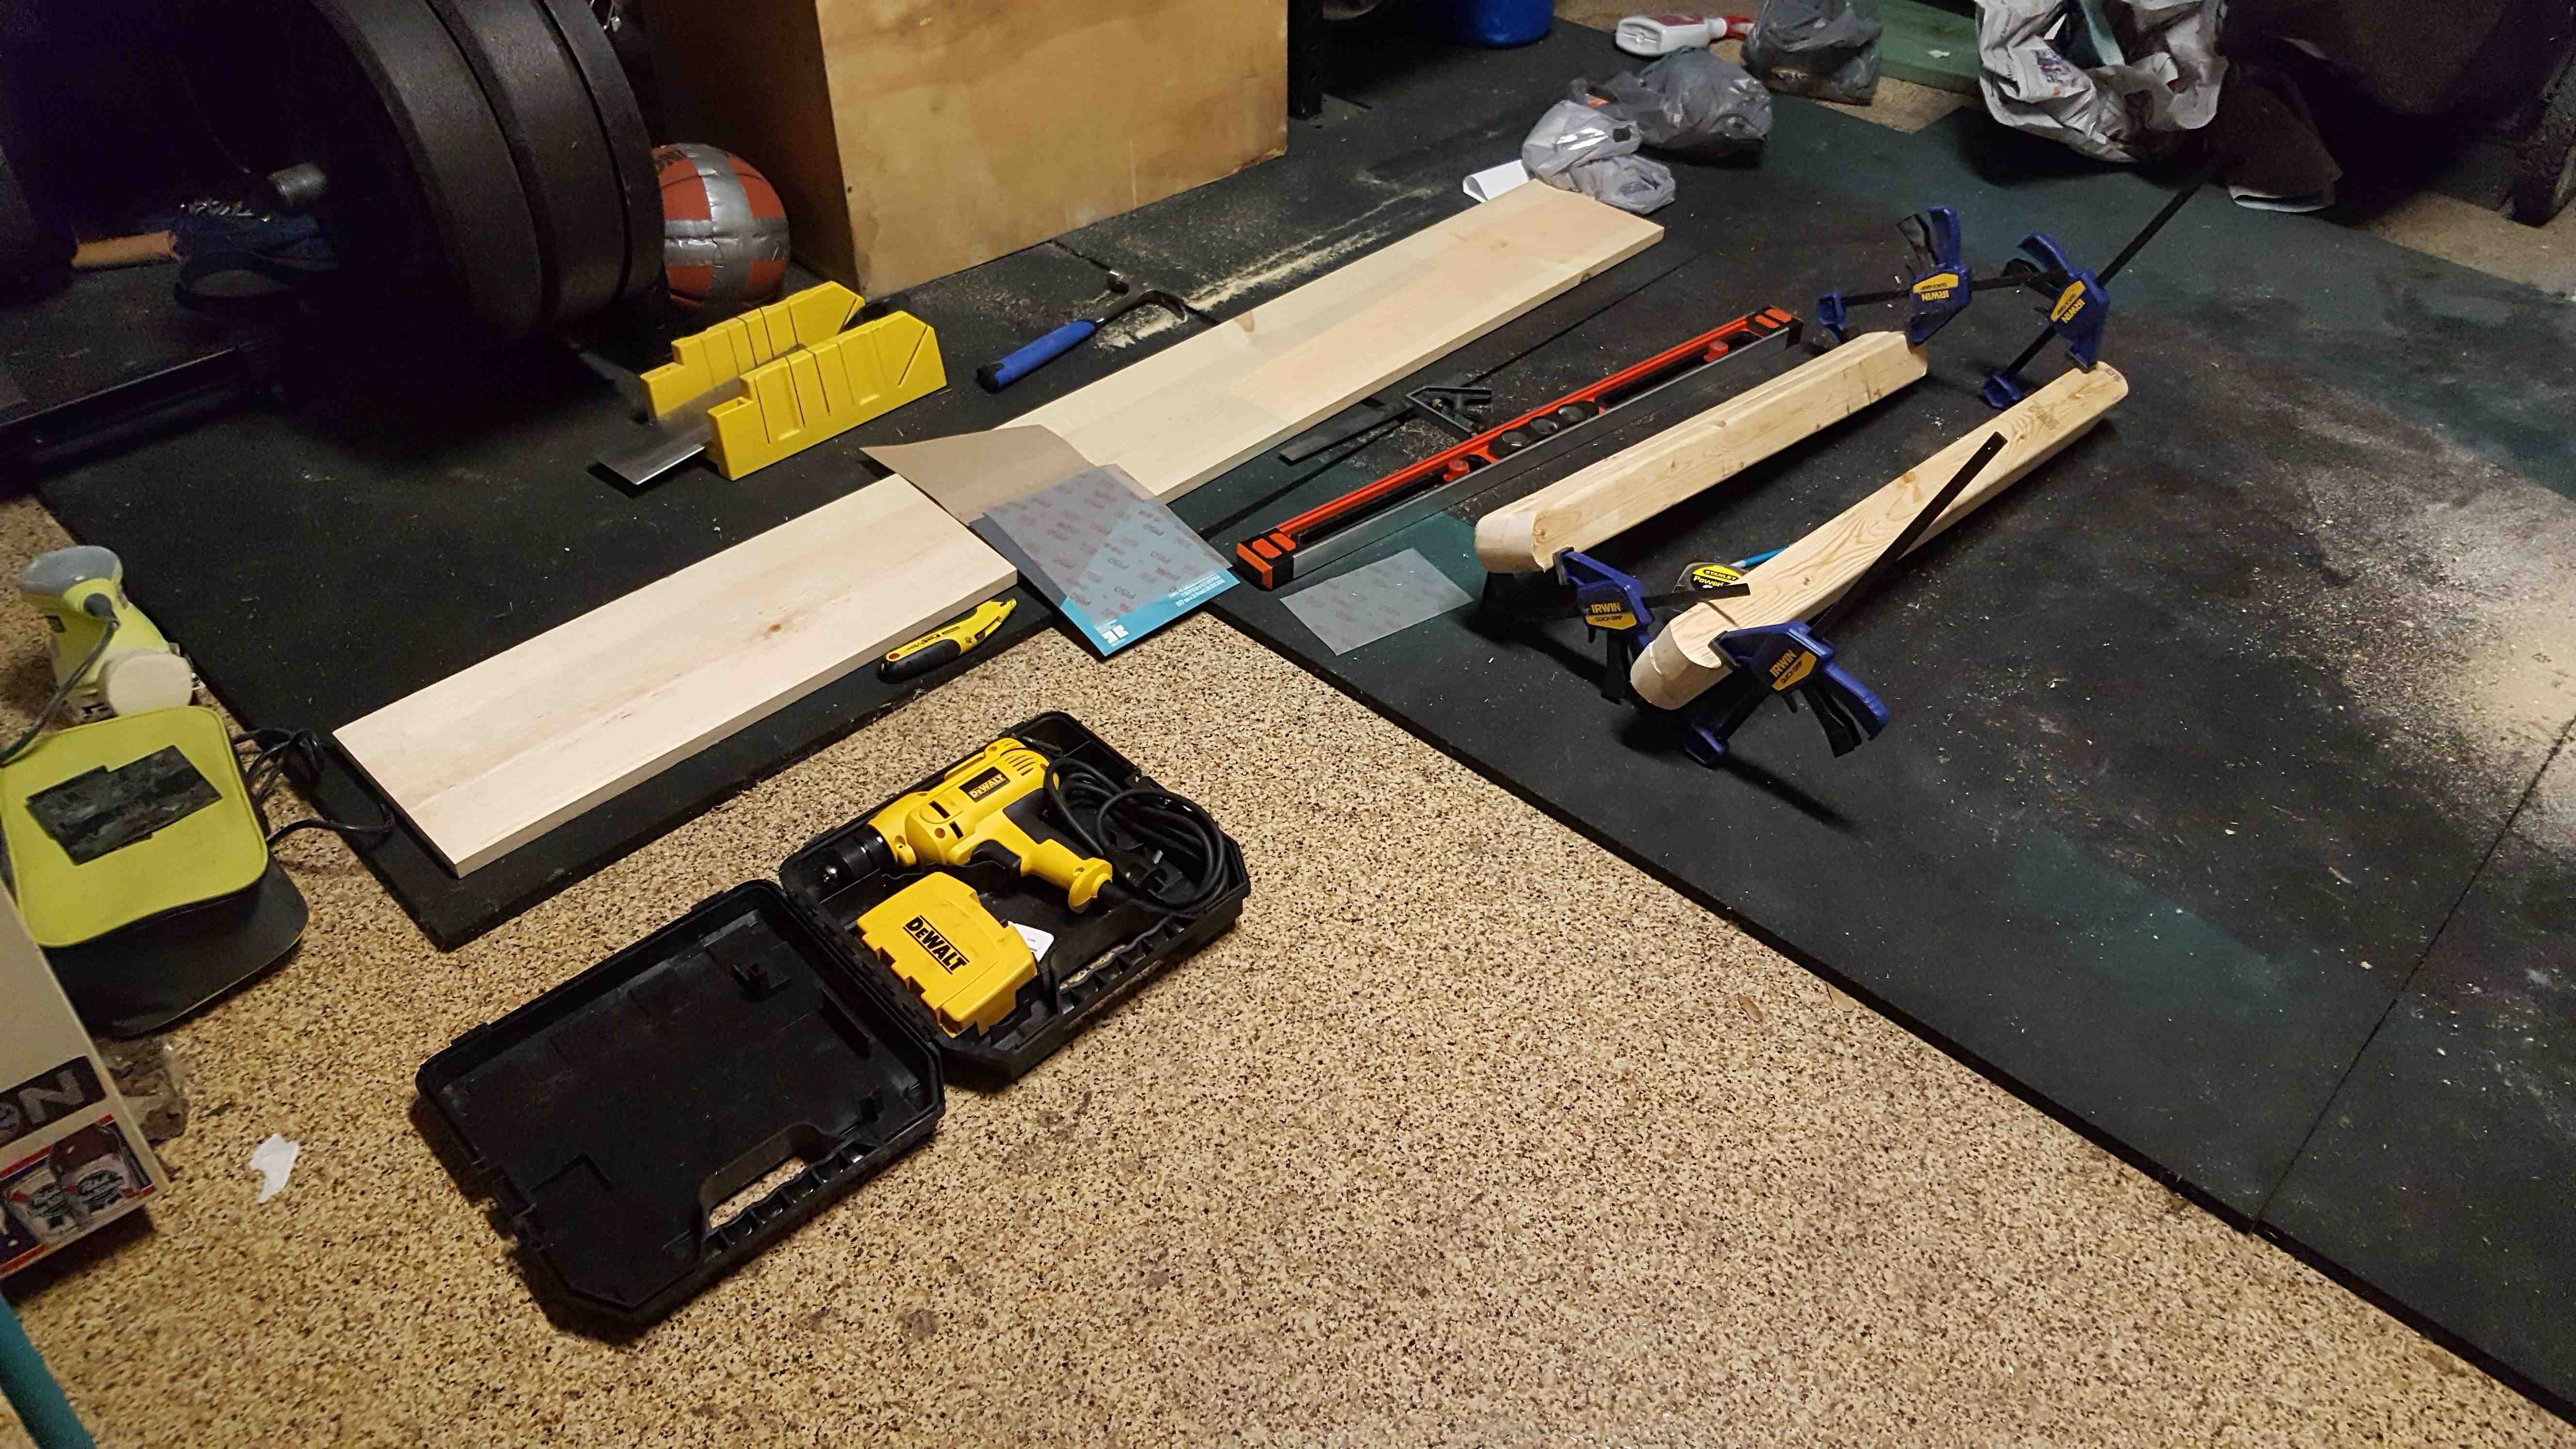
Cutting the Lumber
Cutting the lumber was easy thanks to a friend who let me borrow his Miter saw.
For the 2x3 pieces, they do not even have to be that exact since they are going to get rounded off and sanded anyways. Getting close is ideal though. Cutting a 36" and a 32" piece from each piece of lumber left 2 28" scrap pieces that were perfect for using later to hold the dowels while I painted (I don't have a bench or saw horses).
With the dowels, we cut one guide piece at 36", and then clamped that to the saw/table to make cutting the other 12 pieces relatively fast. I left the scrap 12" pieces for my buddy's scrap bin.
Rounding the Edges
I am not a perfectionist and realistically, with a jigsaw, I was not going to get perfection so I abandoned the idea of rounding the edges using a compass. I was going to have to buy one anyways. Instead, I took a tip from (again) my wood-working friend and just used a kitchen cup to approximate the rounding and marked it in pencil.
I cut each end and then paired the equal length pieces together in the orientation that they matched the best and clamped them together.
Enter the belt sander. We took my friend's belt sander, clamped it to a table and used it to evenly round the ends of the clamped pieces to ensure that they matched exactly and would not wobble once in place. This only took about 5-10 minutes and the results, although not perfect, were great and absolutely within my tolerance.
Leave the boards clamped.
Painting
Now that all the lumber was cut, I moved onto painting the dowels. Our plan was to paint just the dowels and leave the supports unpainted. The most important step here is to LET YOUR WIFE PICK THE PAINT. You can be a perfect craftsman, but wrong colors are always wrong.
Hand sand the dowels with a piece of sand paper in your hand until they are smooth enough for you. Then you can use the scrap pieces from the lumber to lay your dowels on for painting.
We chose 3 colors and painted all dowels, you could do any other arrangement. Just be sure to rotate your dowels after each coat dries. This will probably be time consuming.
I also found that the paint did not significantly affect the dowels fitting into their holes later int he build. So I never had to worry about sanding down the ends at all.
Drilling the Holes
Step 5 in the Instructable is pretty well laid out. Here are a couple tips though:
- Ensure your clamps for the boards are arranged in such a way that the middle of the boards is clear.
- Mark the middle and hole locations exactly as in the Instructable on one side of each clamped set of wood.
- Using a regular drill bit (I used a 5/32 bit), drill pilot holes for each of the places you marked. The bit will most likely NOT go all the way through, so do all of the holes. After all holes are drilled with the regular bit, remove the clamps and finish drilling the holes all the way through for the pieces that were on the bottom.
- Now continue will drilling the larger holes for the dowels with the Forstner bit using the pilot holes as your guide. I did not have a drill press, so I just eye-balled the depth. Luckily the bit head depth seemed appropriate so I was able to determine a consistent depth when the bit head went below the surface of the wood.
After all the holes were done being drilled, I took the palm sander to the pieces so get rid of the marks, splintered wood from drilling, and to smooth out any rough spots that the wood came with.
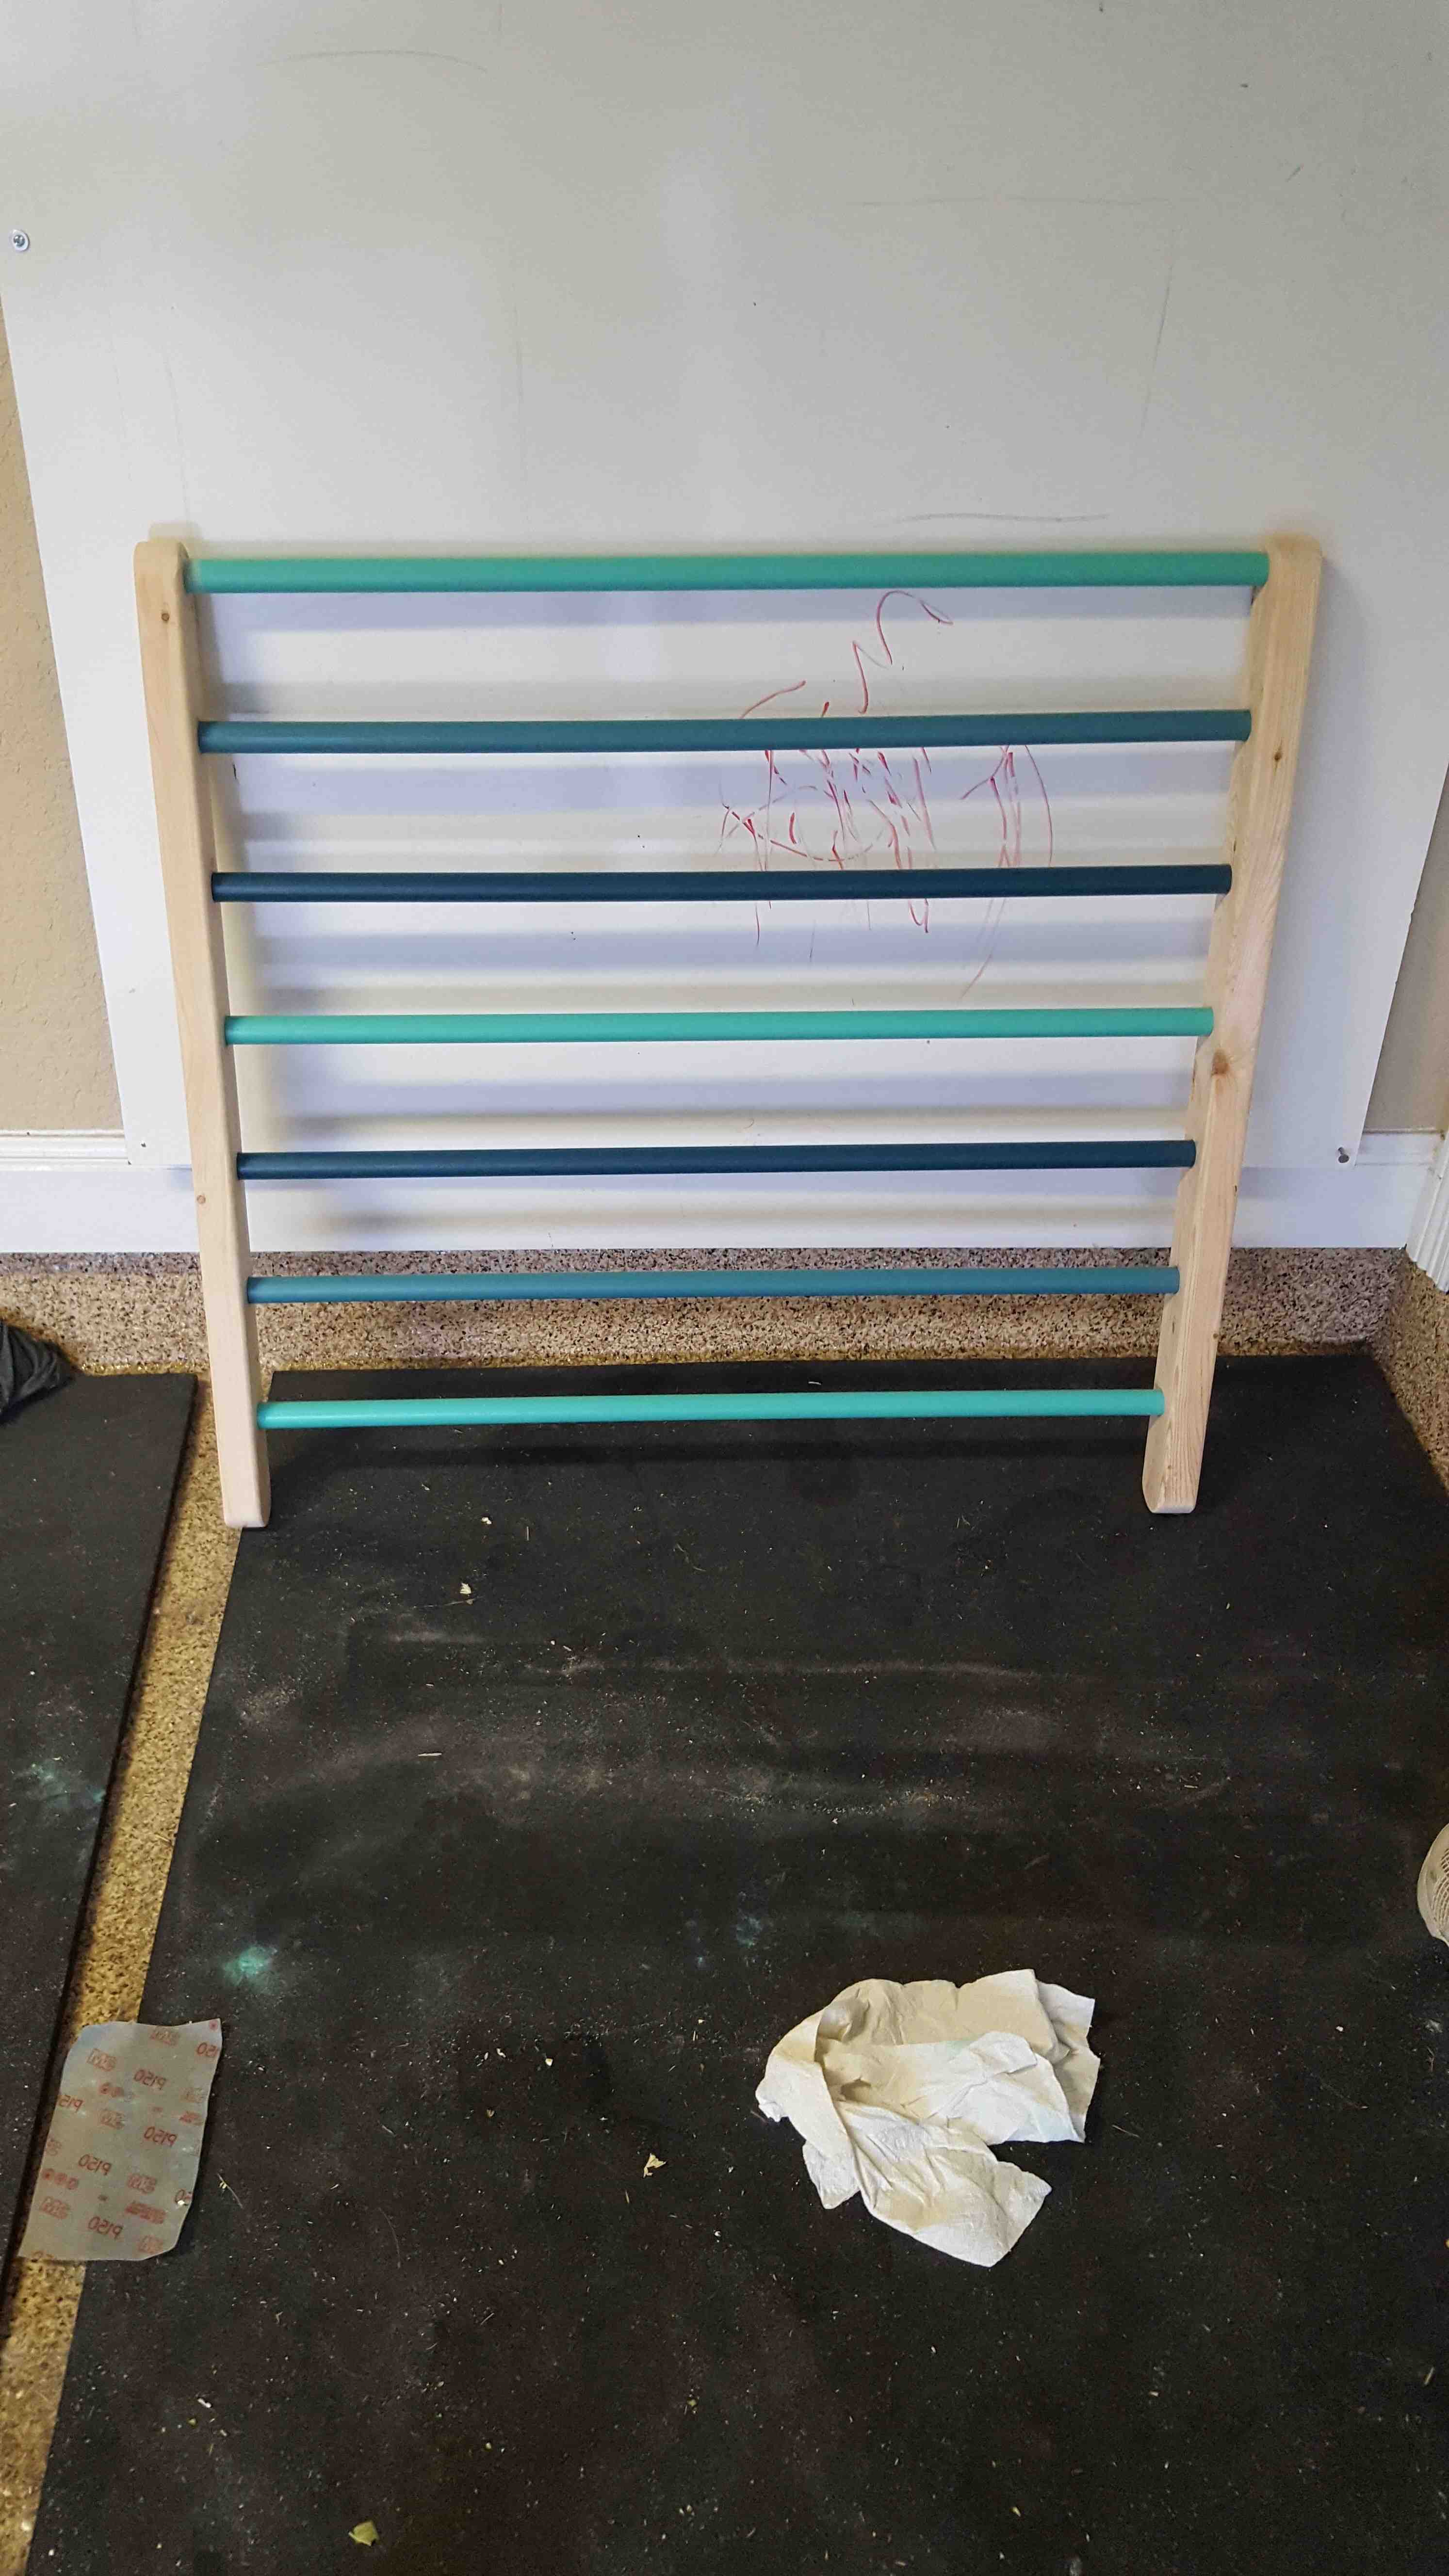
Assembling the Ladders
This part what far more frustrating than difficult.
Lay out your dowels in the order you want (if painted and wanting a specific color order). Then using a mallet and with the rail on the ground, pound the dowels into one side of each ladder.
Now the frustrating part...due to not having a drill press and the dowels probably not all being exactly 36", fitting the second rail onto the ladders took some finesse. What ended up seeming to work for me was to simply start at one end and use the mallet to lightly tap each hole onto the corresponding dowel being careful not to pound hard enough to dislodge the ones I had already done. I set up the ladder with the already attached rail on the ground and pounded the second rail DOWN onto the dowels.
This took probably 30 minutes of trial and error, but in the end worked just fine.
From here, I used the pilot holes in the rails to drill additional pilot holes into each dowel. Then I put screws into each dowel. Perhaps this is overkill but screws are cheap. This is Option A from the Instructable.
NOTE: Leave the top two screws out on the tall ladder, as we will be adding the pivot piece here.
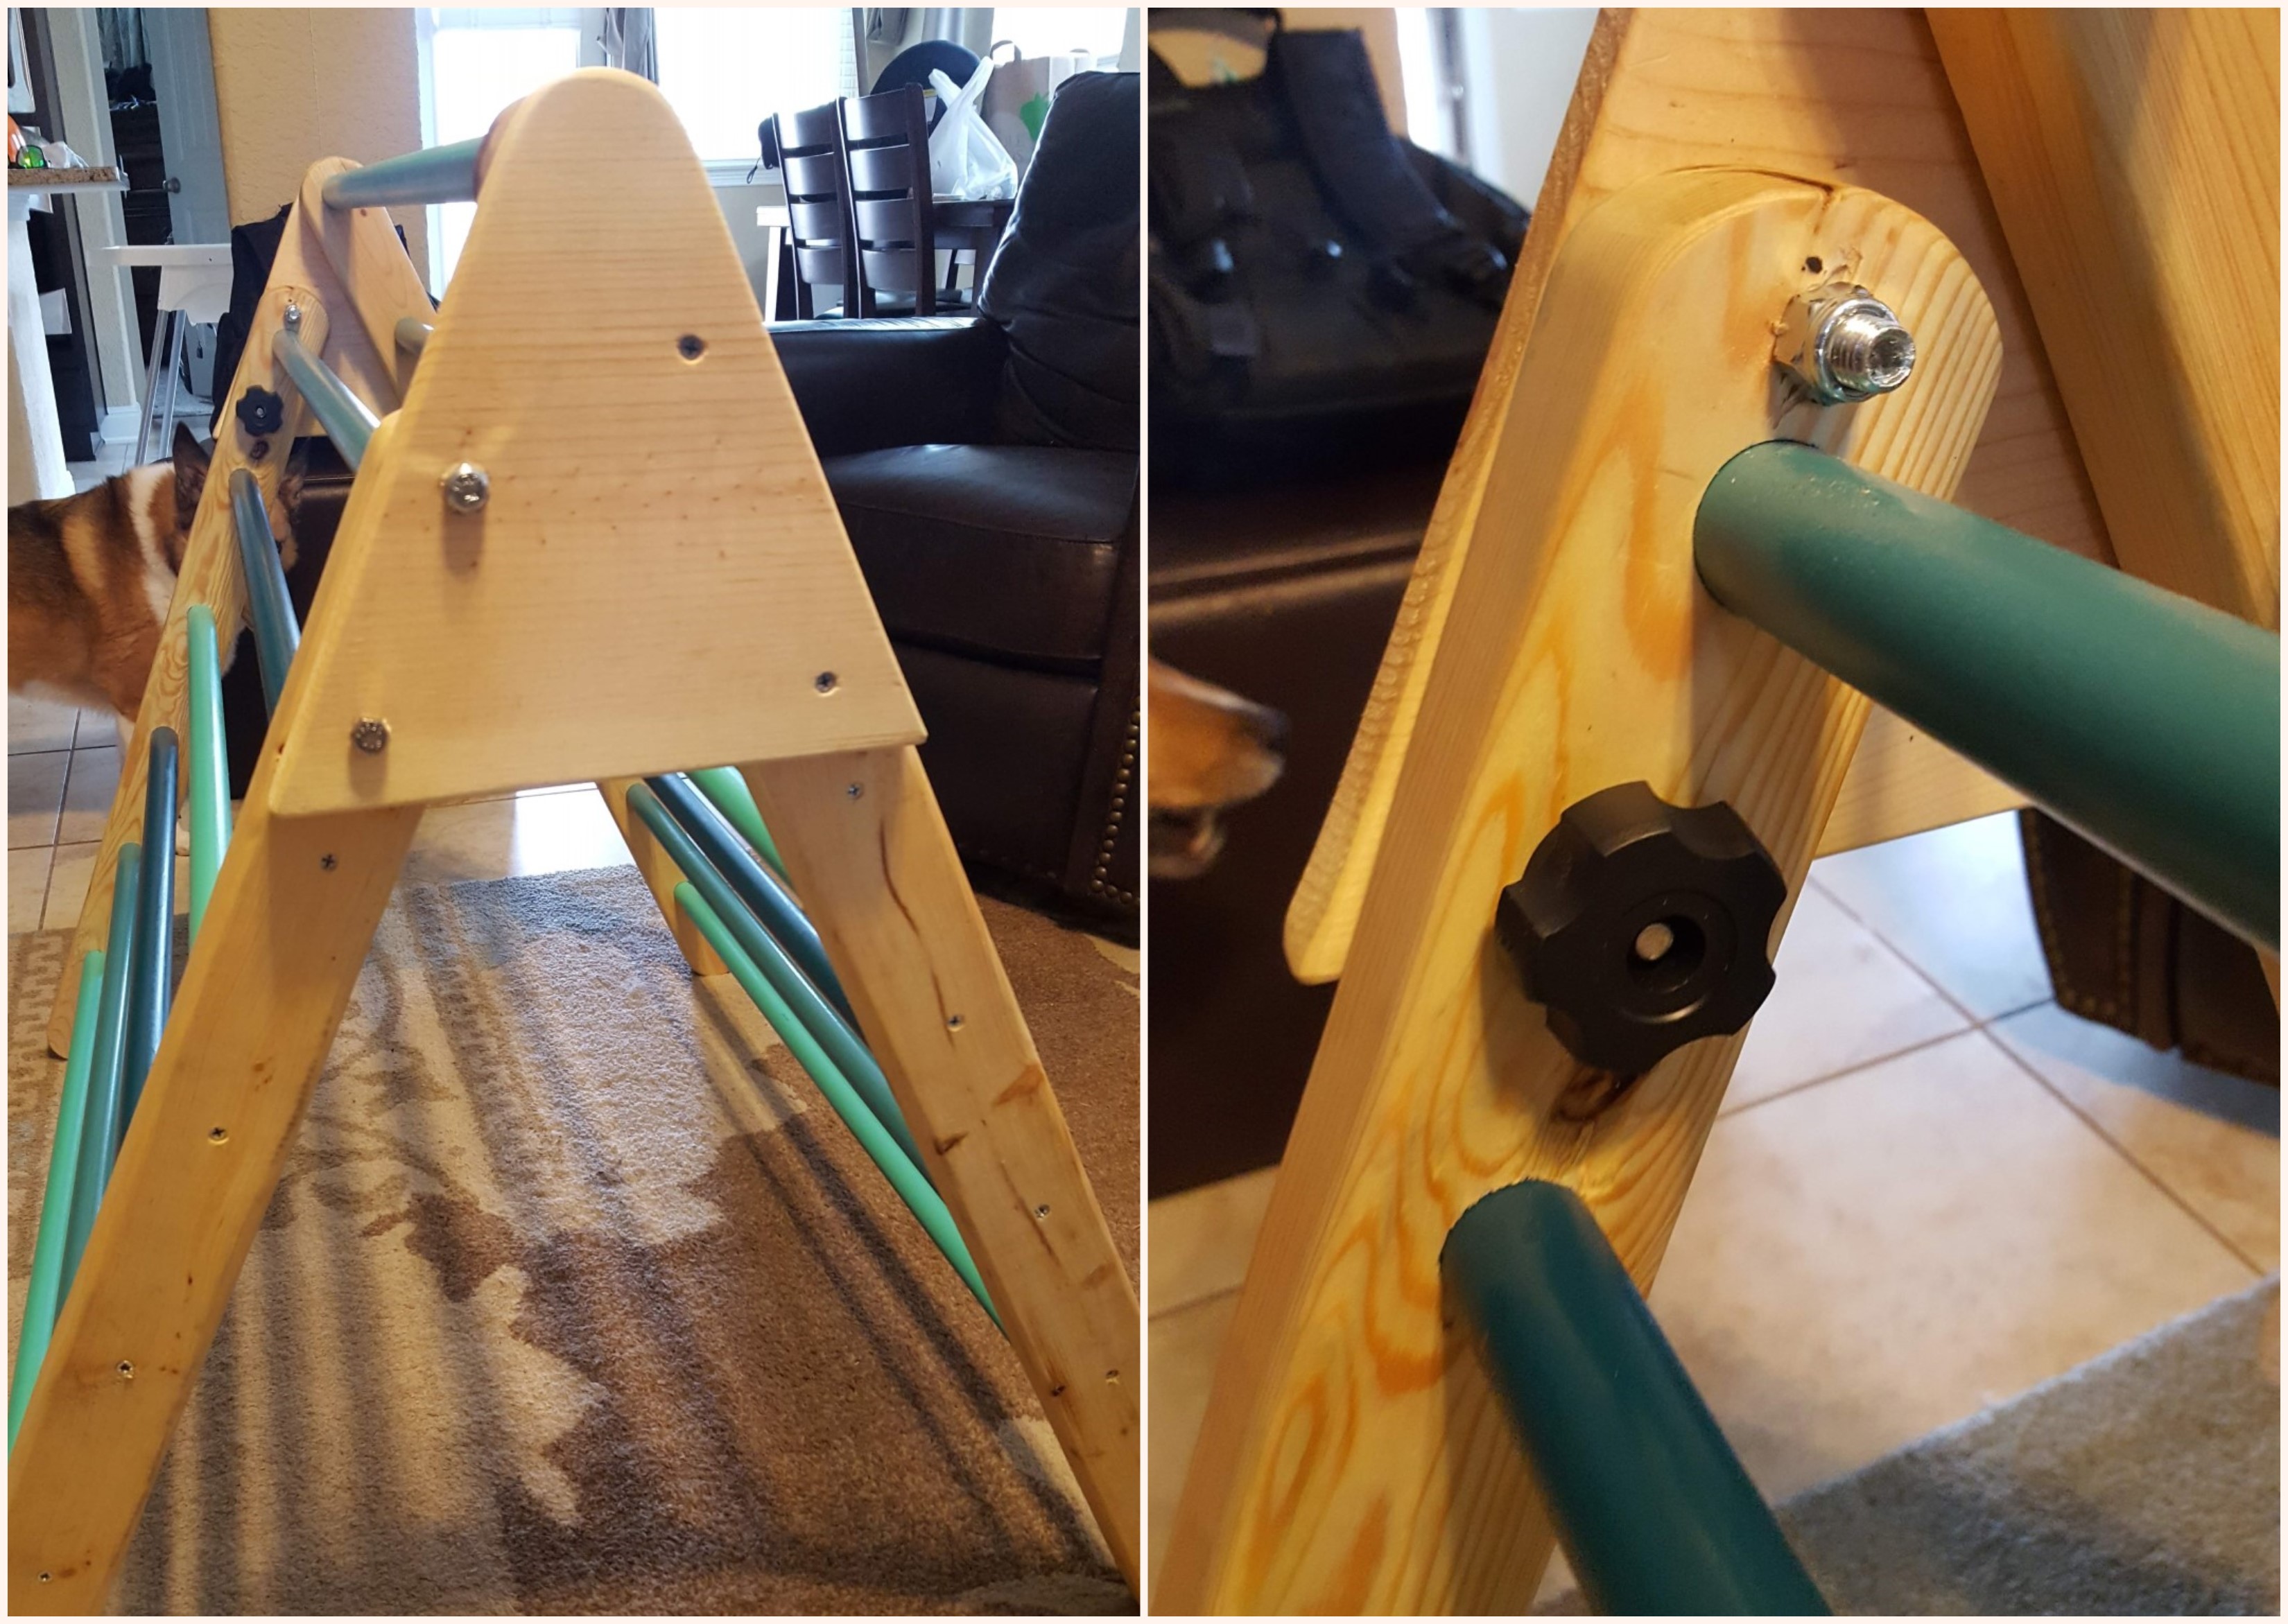
The Pivot Piece
The Instructable is spot on here. I used the attached guide to cut out the pivot piece. I found that drilling the holes at this point was unnecessary. I cut the pieces and then sanded them until I was happy with their shape.
With the ladders completed in the previous step, I simply used clamps to put the pivot pieces in place so that I could check the overall placement and make sure that the Triangle would not be wobbly.
When I was happy with the placement, I again drilled pilot holes on the tall side of the ladder in line with the top two rungs. I then put 2 screws in here.
For the short side (the pivoting side) I used appropriate bits to drill holes for the 3/8" bolt (top pivot bolt) and the 5/16" bolt (bottom lock bolt). I drilled these as recommended in the guide at the very top and then between the top two rungs.
NOTE: I should have used the same size bolt for these.
Dropping the bolts in place and tightening everything up I was done with the build!
Finishing
We finished the triangle with a wipe-on polyurethane. There are probably other options but this is what the guide recommended. The pad really helped. I tried initially with some shop rags and the results were poor.
If you plan to do coats over a few days, be sure to rinse the pad out.
What I Would Do Different
This is the first wood working project I have tackled in quite some time. The project turned out better than I expected but certainly not without lessons learned.
- The pivot side bolts should have been the same size either 3/8" or 5/16". I bought them at different times and was therefore not consistent. These bolts could also have been a bit shorter as the top one sticks out past the lock nut longer than I would have liked.
- Spray paint sprays WAY further than you think it does even with newspaper down. Be sure to do that NOT in the middle of your garage. Maybe somewhere in the lawn.
- Commodity wood at Lowe's may not be the greatest for toys. If I did this again, I might look for some higher quality lumber, at least for the rails.
- With the colors we chose for the dowels, a stain for the rails might have been a nice aesthetic feature.
- Take lots of pictures. I suck at this as you may have noticed.
Total Cost
After a few returns and multiple trips to Lowe's the total cost for parts (not including the tools I had to buy) was $114.21.
Over the course of building this I probably spent a total of about 6 hours building across 3 or 4 days.
Similar structures on Amazon and Etsy cost between $200 and $400.